
This simple, stylish crochet beanie is worked from the brim up with stretchy ribbing, a textured double crochet body, gentle crown shaping, and a decorative pom pom finish.

This crochet beanie hat is the perfect mix of style, comfort, and functionality. Designed to keep you warm in cooler months, it’s a must-have accessory that works for everyday wear or as a thoughtful handmade gift. Its cozy texture and simple design make it a standout, if you’re making it for a child or adapting it for an adult.
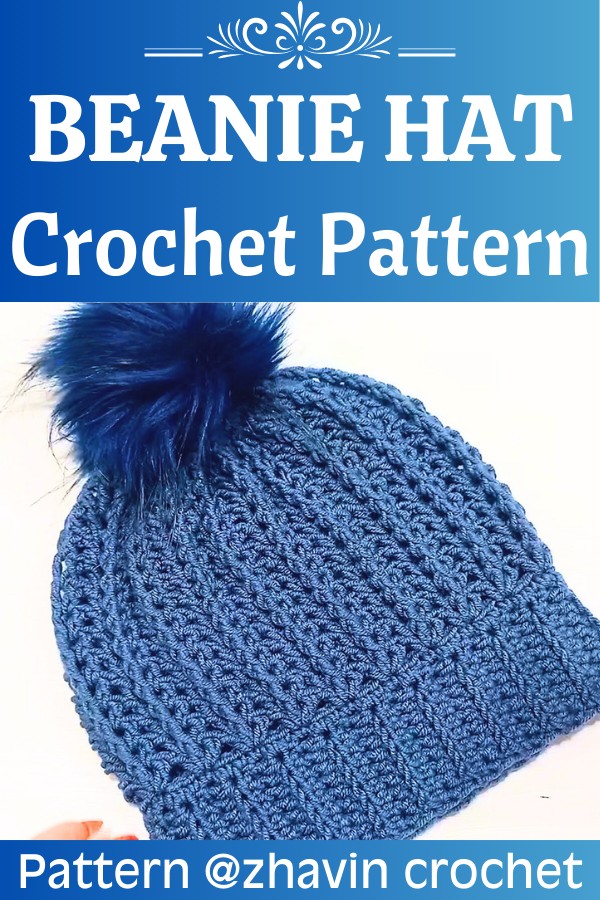
Crochet Beanie Hat Pattern
This particular crochet hat is made from the bottom up, beginning with a stretchy brim and followed by a textured body that gives it a neat and modern look. Using simple crochet techniques, this hat pattern is beginner-friendly yet crochet a professional and polished design. It’s customizable, you can adjust the size for children or adults, and even top it off with an adorable pom-pom for that finishing touch.
Credit zhavin crochet
- Worked bottom-up, starting with a stretchy half double crochet brim in rows
- Brim is made with back loop only half double crochet for a ribbed, elastic band
- Band is joined into a circle with an almost invisible seam using slip stitches
- Body of the hat is worked in the round in textured double crochet groups
- Uses a mix of regular double crochet and front post double crochet for a subtle, squishy texture
- Crown is shaped with invisible single crochet decreases worked in the front loops
- Finished by closing a small top opening and adding a pom pom for a classic look
- Uses worsted weight yarn with a smaller hook for the brim and a larger hook for the body
This beanie begins at the brim, using a smaller hook to create a neat, snug band that fits comfortably around the head. The brim is worked flat in rows of half double crochet, with the first and last stitches worked under both loops while the middle stitches are worked in the back loop only. This simple back loop only technique builds a stretchy ribbing that looks like knit and hugs the head nicely. The length of the band is adjusted by working more rows until it reaches the desired head circumference, and the total row count is kept as a multiple of two.

Once the brim is long enough, its short edges are folded together and joined with slip stitches through the stitches of the first row. The join is designed to be “invisible” from the outside by placing the seam on the inside of the hat, so the ribbing looks continuous all the way around. This creates a neat banded circle that becomes the foundation for the rest of the hat. At this point, the hook is switched to a larger size to give the body of the beanie a bit more drape and room.

The body of the hat is worked in the round, beginning with a setup round of single crochet stitches made evenly around the edge of the brim. The designer spaces these by working three single crochets for every two brim rows—two into the tops of rows and one into the “gap” between rows—ending up with a stitch count of 60. This gives a smooth transition from ribbed brim to the main fabric. The next round introduces double crochet clusters: groups of three double crochets worked into the same stitch, separated by skipping two stitches between each group. This simple repeat creates the base for the textured pattern.

From there, the texture is built using a combination of standard double crochets and front post double crochets. Each new round begins with chain-3 as a double crochet, then continues by working double crochets into the spaces between clusters rather than into the tops of stitches. A front post double crochet is added around the middle stitch of each cluster, which pulls that stitch forward and gives the fabric a gently raised, ridged texture. The pattern settles into a comfortable rhythm: one double crochet into the space before the front post, a front post double crochet around the raised stitch, and one double crochet into the space after it. This sequence is repeated round after round until the hat reaches the desired height.

To shape the crown, the stitch pattern switches from textured double crochet to tidy single crochet decreases. First, a round alternates one regular single crochet with one invisible decrease worked through the front loops of the next two stitches. This begins to gently taper the top. The following round (and optionally one or two more for larger sizes) works decrease single crochets over every pair of stitches, continuing to use only the front loops. This method creates a smooth, almost puckered finish without bulky lumps. Once only a small opening remains, the yarn is fastened off and the top is cinched closed with the same yarn tail, then finished off with a pom pom for a classic beanie look.

Materials
- Worsted weight yarn
- 4.5 mm crochet hook (for the brim)
- 5.0 mm crochet hook (for the body)
- Scissors
- Yarn needle
- Pom-pom (optional)
Key Crochet Techniques
- Slip Stitch (sl st)
- Chain Stitch (ch)
- Half Double Crochet (hdc)
- Back Loop Only (BLO) technique
- Double Crochet (dc)
- Front Post Double Crochet (fpdc)
- Decrease Single Crochet (invisible decrease)

Detailed Pattern
- Begin with the Brim:
- With the 4.5 mm hook, create a slip knot and chain 10.
- Starting in the second chain from the hook, hdc in each chain across. You will have 9 hdc in total.
- Chain 1, turn your work.
- Hdc in both loops of the first stitch, then BLO hdc in the next 7 stitches, and hdc in both loops of the last stitch.
- Repeat until you have a brim length that fits around the head (multiple of 2 rows).
- Join the Brim:
- Fold the brim in half and slip stitch the last row to the first row to form a loop.
- Start the Body:
- Switch to the 5.0 mm hook.
- Chain 1, then work single crochet evenly around the edge of the brim. For each 2 rows of the brim, make 3 sc for a total of 60 sc.
- Join with a slip stitch to the first sc.
- Body:
- Round 1: Ch 3 (counts as dc), 2 dc in the same stitch. *Skip 2 stitches, 3 dc into the next stitch. Repeat from * around. Join with a slip stitch to the top of the beginning ch 3.
- Round 2: Slip stitch to the space between the ch 3 and the next dc. Ch 3, fpdc the next dc, dc in the space between the second and third dc of the previous group. Continue around, alternating front post dc and regular dc in the spaces.
- Repeat until the desired height (approximately 11 more rounds for an adult hat).
- Decreasing the Top:
- Round 1: Ch 1, *1 sc, 1 decrease sc (using the front loops only) in the next 2 stitches. Repeat from * around.
- Round 2: Ch 1, decrease sc around.
- Round 3: Decrease sc around if needed to close the hole.
- Fasten off and sew the top tightly
- Finishing Touch:
- Optionally attach a pom-pom to the top of the beanie.
Troubleshooting and Suggestions
- Uneven brim length or tightness: If the brim feels too tight, add more rows before joining, or loosen your tension on the half double crochet rows. Remember the total number of rows should stay a multiple of two for the stitch count to work out later.
- Visible seam at the brim join: Make sure you’re joining the last row to the front loop of the first row only, and then turning the join to the inside of the hat. If your seam looks bulky, double-check that you’re not accidentally working under both loops on the first row.
- Wavy or ruffled body: If your hat body flares out, you may have added too many stitches in the setup round of single crochet. Aim for three single crochets over every two brim rows and keep your tension even.
- Front post stitches too tight: If your front post double crochets feel stiff or pull the fabric too much, try lifting your hook a bit higher as you draw up the loop, or relax your tension slightly on those stitches.
- Gaps at the crown: For a smaller top opening, work an extra round or two of decrease single crochets as suggested for adult sizes, then cinch tightly when closing.
Creative ideas:
- Color play: Try a contrasting color for the brim and body, or work the double crochet rounds in stripes. Self-striping or variegated worsted yarns look especially pretty with the textured front post pattern.
- Different brim looks: Make the brim longer and fold it up for a thick cuff, or keep it shorter for a close-fitting, no-fold style.
- Embellishments: Swap the yarn pom pom for a faux fur one, add a button at the top to secure a removable pom pom, or sew on a small leather or faux leather tag at the brim.
- Fit variations: Make more rounds of the textured body before decreasing for a slouchy beanie, or fewer for a snug, fitted cap.
- Matching set: Use the same stitch pattern (double crochet with front post accents) to create a matching cowl or headband for a coordinated winter set.


