Stylish & Simple Striped Crochet Sweater Pattern
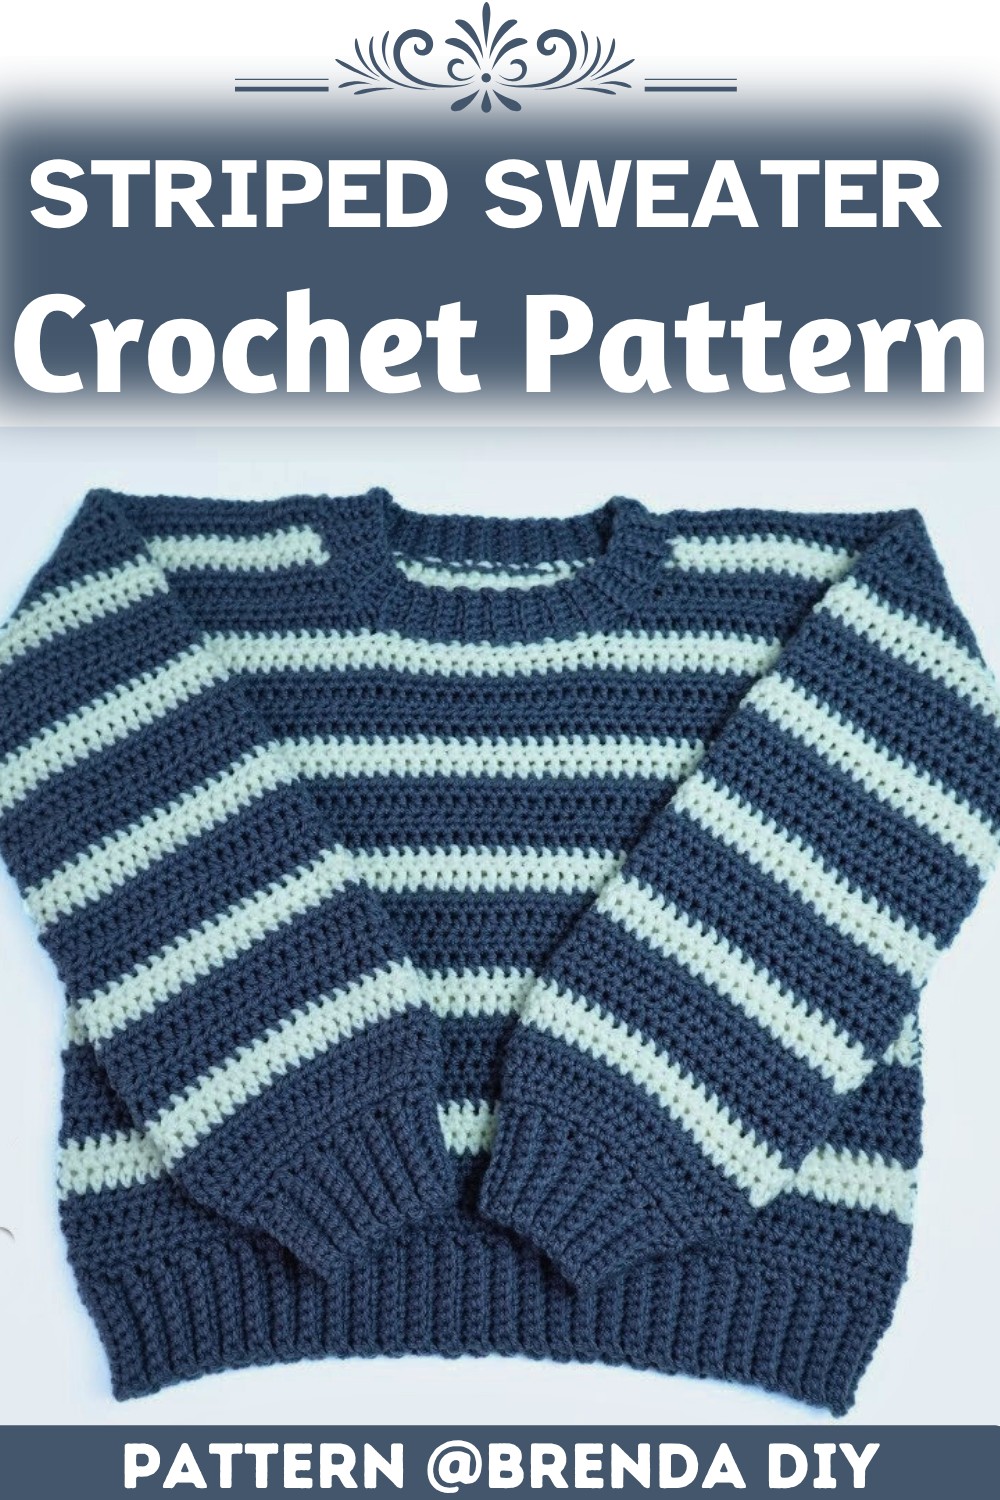
A striped sweater never goes out of style, especially when the design stays clean and easy to wear. This crochet version pairs classic stripes with a relaxed shape that looks great for everyday outfits.
If you’re ready to make one yourself, this crochet pattern walks you through each stage without making the piece feel overwhelming.

The crochet stripes come together one section at a time, giving the sweater its polished look while keeping the process enjoyable. You can switch the colors to create a bold contrast or a softer everyday style. As the pieces take shape, you’ll see how a simple pattern turns into a crochet sweater you’ll be excited to wear again and again.
Credit Brenda DIY
Materials & Tools Needed
- Yarn: Worsted weight yarn (Weight 4) in two contrasting colors
- C1 (Main color): Charcoal/Slate Grey (Main Body & Ribbing)
- C2 (Contrast color): White (Stripes)
- Crochet Hooks:
- 5.5mm for ribbing (waistband, cuffs, neckline)
- 7.0mm for the main body panels and sleeves
- Notions: Scissors, tapestry needle, and 4 stitch markers (PM)
Finished Size & Customization
- Width: Ribbing length = half of your chest circumference
- Body Length: Customize by adjusting rows before neckline shaping
- Sleeves: Adjust length with pattern repeats (approx. 17 inches minimum)
Pattern Abbreviations (US Terms)
- Ch: Chain
- SC: Single Crochet
- HDC: Half Double Crochet
- BLO: Back Loop Only
- HDC2tog: Half Double Crochet Two Together (Decrease)
- Sl St: Slip Stitch
- PM: Place Marker

Step-by-Step Instructions
1. Bottom Waistband Ribbing (Make 2 – Front & Back)
Using 5.5mm hook and C1:
- Row 1: Ch 9. SC in 2nd Ch from the hook and across (8 sts).
- Row 2: Ch 1, turn—SC BLO across (8 sts).
- Repeat Row 2 for 56 rows or until the length equals half your chest circumference.

2. Back Panel
Switch to 7.0mm hook. Work along the long edge of the waistband ribbing:
- Row 1 (C1): SC evenly across the waistband (56 sts).
- Row 2-4 (C1): Ch 2, turn. HDC across.
- Stripe Sequence:
- Rows 5-6: HDC with C2
- Rows 7-10: HDC with C1
- Repeat the sequence until Row 36 or desired body length.
Back Neckline & Shoulder Shaping
- Mark the 19th stitch from both edges.
- Work the shoulders separately:
- Row 37: HDC across to 2 stitches before marker. HDC2tog. Turn.
- Row 38: HDC across. Fasten off.
Repeat for the second shoulder, starting after the second marker.

3. Front Panel
- Repeat Rows 1-30 from the Back Panel.
- Shape Deeper Neckline: Count the 22nd stitch from both edges and mark them.
Left Shoulder
- Row 31: HDC across to 2 stitches before marker. HDC2tog. Turn.
- Rows 32-38: Follow stripe sequence while shaping the neckline with HDC2tog.
Right Shoulder
- Attach yarn next to the second marker and repeat steps for the Left Shoulder.

4. Sleeves (Make 2)
Ribbed Cuff (C1, 5.5mm hook):
- Row 1: Ch 9. SC in 2nd Ch and across (8 sts).
- Row 2: Ch 1, turn. SC BLO across (8 sts).
- Repeat Row 2 for 26 rows or until cuff fits the wrist.
Sleeve Body (C1, 7.0mm hook):
- Work SC evenly across cuff edge. Increase in Row 2: HDC in first stitch, 2 HDC in next, repeat.
- Continue with stripe pattern (2 rows of C2, 4 rows of C1) until sleeve length is approx. 17 inches.
5. Assembly & Neckline Trim
- Seaming:
- Sew the shoulder seams.
- Attach sleeves to armholes. Sew the body side seams and sleeve seams.
- Neckline Ribbing (C1, 5.5mm hook):
- Attach yarn at neckline edge, Ch 6 for ribbing and work SC BLO across.
- Slip stitch to neckline, turn, and repeat in rows until the neckline is complete.
- Sew the ends of the ribbing together.
Finishing
- Fasten off and weave in all loose ends. Block your sweater if needed.
Video Tutorial