Bright Floral Crochet Buttons – Perfect Blend of Texture & Function
Imagine the charm of a handmade blossom sitting delicately on your favorite sweater or bag strap. These crochet buttons bring a burst of joy to every creation they adorn! With their rounded form, intricate puff texture, and cheerful hues, they are designed to be more than functional; they are statements of creativity crafted stitch by stitch.
These crochet buttons combine a compact, donut-like design with a soft, textural bloom. Perfect for embellishments or closures with a unique flair, their three-dimensional puff detailing creates a standout visual and tactile experience.
Crochet Button for Designs
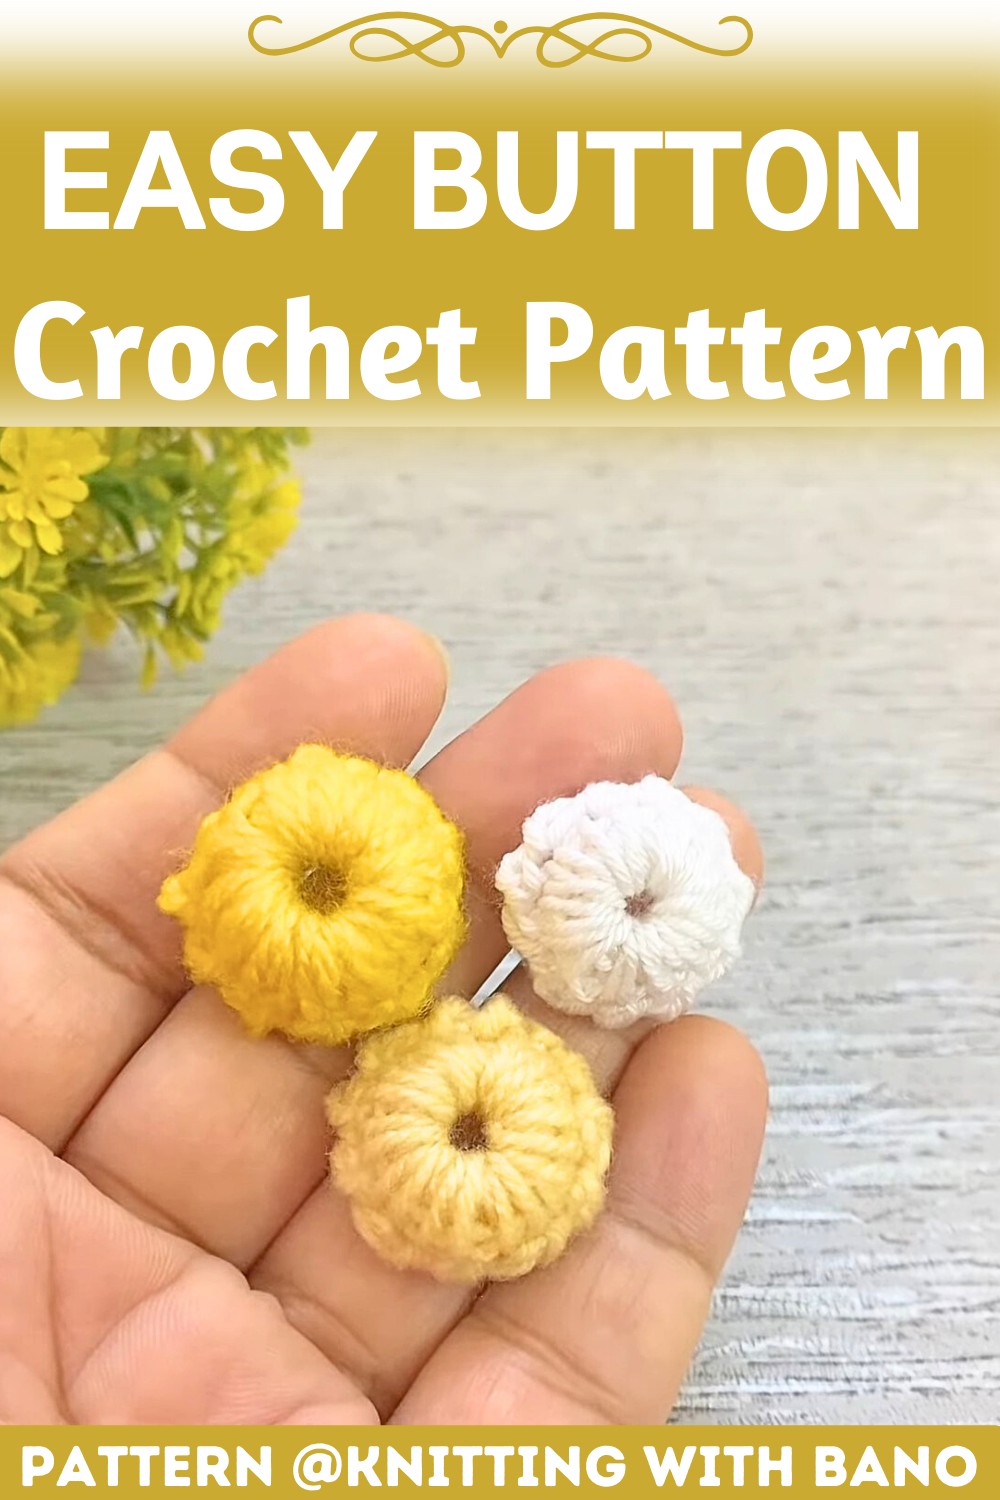
Inspired by sunny mornings and delicate flower petals, these buttons mimic nature’s perfection. Their vibrant bright yellow, pale yellow, and white tones evoke positivity, making them ideal for spring-themed projects, cheerful gifts, or everyday wearables.
Pattern Highlights
- Rounded Form with Central Hole: Easy to attach and functional as closures.
- Fluffy, Petal-Like Texture: Raised and plush stitch detailing provides elegance and charm.
- Compact Size: Small and practical for delicate enhancements.
- Vivid Color Palette: Bright shades add vibrancy without overpowering subtle designs.
Credit Knitting with bano
Step By Step Pattern
Materials
To make your crochet button, you’ll need the following:
- Yarn: A small amount of worsted weight yarn or cotton yarn (choose yarn that matches your project’s style).
- Hook: Crochet hook in a size appropriate for your yarn (e.g., size G/4.0mm or H/5.0mm).
- Tapestry Needle: For weaving in ends and attaching the button to your project.
- Scissors: For trimming excess yarn.
- Optional: A small plastic or wooden round base if you want a sturdier button.
Stitch Guide
Here are the basic stitches and techniques you’ll need to know:
- Slip Knot: The starting loop used to secure yarn onto your hook.
- Chain (ch): Wrap the yarn over your hook and pull through the loop to make a chain.
- Slip Stitch (sl st): Insert the hook into the stitch, yarn over, and pull through the stitch and the loop on your hook.
- Single Crochet (sc): Insert the hook into a stitch, yarn over, pull up a loop, yarn over again, and pull through both loops on your hook.
- Magic Ring (optional): A circular foundation for crochet, helpful when creating tight circles (e.g., for the button center).
Notes
- Gauge: Exact gauge isn’t critical for this project, as buttons are small and forgiving. However, aim for tight stitches to ensure the button holds its shape.
- Customization Ideas:
- Experiment with different yarn weights or colors for eye-catching effects.
- If you’d like larger buttons, use a thicker yarn and larger hook.
- Add a bead or small embellishment to the center for a decorative touch.

Pattern Instructions
Follow these detailed steps to create your crochet button:
Step 1: Create the Foundation
- Begin with a magic ring, or chain 4 and join with a slip stitch to form a small ring (if you prefer not to use the magic ring).
- Tighten the ring to leave a small opening at the center where you’ll work your stitches.
Step 2: Round 1
- Chain 1 (does not count as a stitch).
- Work 6 single crochet (sc) stitches into the ring.
- Pull the magic ring tight (if you used it) to close the center hole.
- Join to the first single crochet with a slip stitch (sl st).
Step 3: Round 2
- Chain 1.
- Work 2 single crochets (sc) into each stitch around (12 stitches total).
- Join to the first sc with a slip stitch.
Step 4: Round 3 (Optional)
- If you want a larger button, chain 1 and work [1 sc, 2 sc in next stitch] around (18 stitches total).
- Finish the round with a slip stitch into the first sc.
Step 5: Shape the Button
- Fasten off, leaving a long tail for sewing.
- Use the tapestry needle to weave the tail through the last round of stitches, pulling gently to shape the button into a slightly dome-like structure.
- If desired, insert a small plastic or wooden base inside the button for added stability.
Step 6: Finishing Touches
- Secure the yarn tail by weaving it in and out.
- If the button is going to be attached to a project, leave the tail long enough to sew it directly onto the fabric. Otherwise, trim the tail.
Tips for Success
- Tension Matters: Keep your stitches tight to ensure your button maintains its shape and durability.
- Practice: It might take a couple of tries to perfect shaping and gauge size—don’t worry, buttons work up quickly!