Crochet Slouchy Beanie Pattern With Four-Row Repeat
Crochet a relaxed, slouchy beanie with a four-row repeat, textured stitches, and a simple side-to-side design that makes it easy to adjust for a comfortable fit.

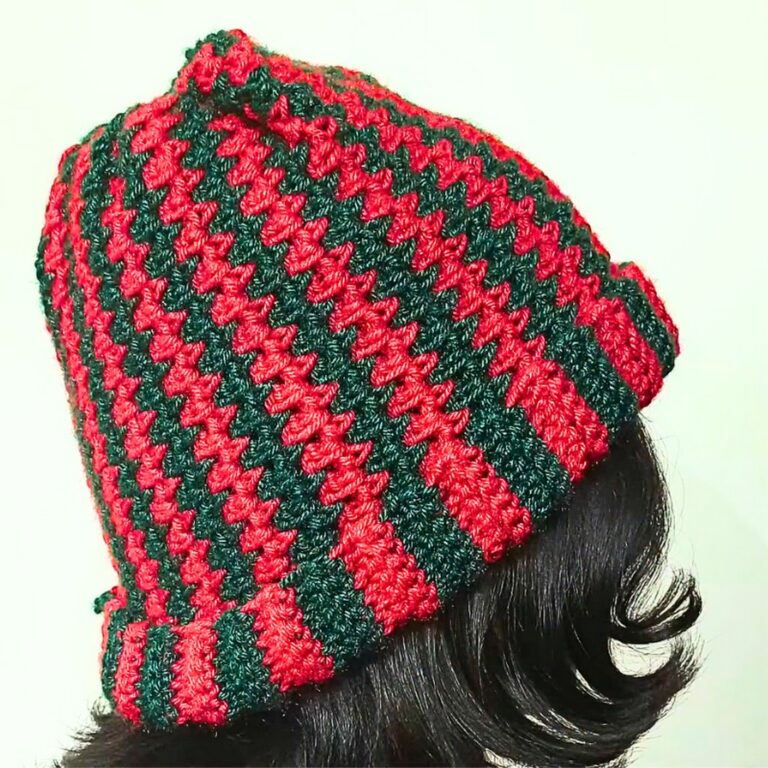
A slouchy beanie is one of those crochet pieces that feels simple once you understand how the fabric is built. Instead of starting at the crown and working outward, this crochet design is made side to side as a long rectangle. The finished strip is then seamed and gathered at the top to create the relaxed shape of the hat.
The stitch texture comes from moving between both loops, the back loop, and the third loop, so stitch placement is the main detail to watch as you work. Once those changes become familiar, the crochet pattern settles into an easy four-row repeat. You can also change the starting-chain length to make the hat more fitted or give it additional slouch.
Credit zhavin crochet
Materials & Tools Needed
- Yarn: Number 4 worsted-weight yarn
- Crochet Hook: 5 mm crochet hook
- Tapestry Needle: For seaming, closing the crown, and weaving in ends
- Scissors
- Optional: Faux fur pom-pom
Finished Size & Customization Ideas
The pattern is designed for an adult woman’s size, but the construction can be adjusted for different fits.
The starting-chain length determines the height of the hat, while the number of repeated rows determines how much length you have to wrap around the head.
For different amounts of slouch:
- Fitted hat: 30–40 chains
- Standard slouchy beanie: 45 chains
- Extra-slouchy beanie: 50–55 chains
For the standard version, begin with 45 chains.
When changing the size, check the actual fabric around the intended head rather than relying only on the chain count. Yarn thickness and personal tension can change the finished measurements.
Pattern Abbreviations & Terminology
This pattern uses US crochet terminology.
- ch: Chain
- st(s): Stitch(es)
- sl st: Slip stitch
- sc: Single crochet
- dc: Double crochet
- BLO: Back loop only
- Yo sl st: Yarn-over slip stitch

How to Work a Yo Sl St
Yarn over, insert the hook into the indicated stitch, and pull up a loop. Pull that loop directly through the first two loops on the hook.
This stitch is used throughout the main body, so getting comfortable with it before beginning the repeat will make the rest of the pattern easier to follow.
How the Beanie Is Constructed
This beanie is worked side to side in rows rather than from the center of the crown outward. The starting chain creates the height of the hat, while the repeated rows build the length needed to fit around the head.
The final six stitches of each row form the crown-shaping area. They use shorter stitches than the main body, which gradually creates the shaping needed when the top is gathered.
Personal Observation: With this type of construction, I find it much easier to check the first and last few stitches of every row than to wait until the rectangle is finished. Because the body changes between different stitch loops, a small placement mistake can quietly affect the edge over several rows.
Foundation Chain
For a standard slouchy fit:
- Make a slip knot.
- Chain 45.
If you are making a fitted version, use 30–40 chains. For additional slouch, use 50–55 chains.

Row 1: Foundation & Crown Shaping
- Skip the first 3 chains; these count as the first dc.
- Insert the hook into the 4th chain from the hook and work 1 dc.
- Continue with 1 dc in each chain through the main body, leaving the final 6 chains for the crown.
- Work 1 sc in each of the next 3 stitches.
- Work 1 sl st in each of the final 3 chains.
- Turn your work.
The final six stitches are intentionally shorter than the main dc section. This creates the first part of the crown shaping.
Row 2: Body & Crown Slips
- Chain 1.
- Working loosely through both loops, make 1 sl st in each of the first 6 stitches.
- Work 1 yo sl st through both loops of each body stitch across.
- For the final stitch, work 1 yo sl st into the top of the turning chain-3 space from Row 1.
- Chain 1 and turn.
Stitch Check: The first six stitches belong to the crown section. Do not accidentally continue the body stitch into this area, because the shorter crown stitches are what create the gradual shaping.
Row 3: Back Loop Body & Crown
- Chain 1.
- Work 1 yo sl st through both loops of the first stitch.
- Work 1 yo sl st into the BLO of each remaining body stitch across.
- For the final 6 crown stitches, work 1 sl st into the BLO of each stitch.
- Chain 1 and turn.
Working the first stitch through both loops helps keep the outer edge straighter. The rest of the body moves into the back loop only to build the ribbed texture.
Row 4: Third-Loop Texture
- Chain 1.
- Working through both loops, make 1 sl st in each of the first 6 stitches.
- Across the body section, work 1 yo sl st into the third loop of each stitch from the previous row.
- Work the final edge stitch through both loops.
- Turn your work.
Finding the Third Loop
The third loop can be easier to recognize from the wrong side of the work. It sits horizontally in front of the stitch.
If you are unsure, stop before making the next stitch and identify the horizontal loop first. Consistent placement here is what gives the fabric its distinctive raised texture.
Row 5: Double Crochet Body & Crown
- Chain 1.
- Work 1 sc through both loops of the first stitch to help maintain a straight edge.
- Establish the first dc equivalent using the small anchor stitches as indicated.
- Work 1 dc into the BLO of each body stitch across.
- Work 1 sc into the BLO of the next 3 crown stitches.
- Work 1 sl st into the BLO of each of the final 3 stitches.
- Chain 1 and turn.
The change from dc to sc and then slip stitches once again lowers the height at the crown section. Repeating this shaping is what helps the finished hat gather naturally at the top.

Repeat the Four-Row Pattern
Once Row 5 is complete:
- Repeat Rows 2, 3, 4, and 5 in order.
- Continue the four-row sequence until the rectangle reaches the required length for the head circumference.
- The tutorial version uses 16 total repeats, ending with a Row 4 repeat.
Check the Circumference
Before seaming, wrap the finished rectangle around the intended head.
It should meet comfortably without needing to stretch the fabric excessively. If you want a looser slouch, make sure the rectangle provides enough circumference while still allowing the hat to sit securely.
Seam the Rectangle
Once the desired length is reached, fold the rectangle in half to form the hat.
- Place the right side facing you.
- Align the starting-chain edge with the final working edge.
- Insert your hook into the 3rd chain of the original Row 1 edge.
- Join with a slip stitch.
- Continue joining the two edges using slip stitches.
- Work through the remaining loops of the original Row 1 edge and the BLO of the final row stitches.
- Continue across the entire vertical edge.
- Chain 1 and fasten off, leaving a long yarn tail for closing the crown.
Seam Check
Keep the two edges aligned as you join them instead of trying to correct the alignment after several stitches. A consistent stitch-by-stitch join will help the seam remain straight and prevent the hat from twisting.
Close the Crown
The long yarn tail is used to gather the remaining opening.
- Thread the yarn tail onto a tapestry needle.
- Weave the needle in and out through the top-edge loops around the entire opening.
- Pull the yarn gradually to gather the opening.
- Continue pulling until the center is completely closed.
- Secure the gathered center with several anchor stitches.
- Weave the remaining yarn securely inside the hat.

Finishing Check: Pull the crown closed gradually rather than tightening everything at once. This gives you more control over the gathers and helps distribute them around the top instead of creating one bulky section.
Add an Optional Pom-Pom
For a playful finishing touch, attach a faux fur pom-pom to the center of the gathered crown.
Secure it firmly and weave the attachment yarn into the inside of the hat.
Final Fit & Finish Check
Before wearing or gifting your beanie, check that:
- The side seam is secure and straight.
- The crown is completely closed.
- The gathers are distributed evenly.
- The hat has the amount of slouch you wanted.
- The textured rows are consistent.
- All loose ends are securely woven in.
- Any pom-pom is firmly attached.
Customize Your Slouchy Beanie
Once you understand the four-row repeat, the design is easy to personalize. Use fewer starting chains for a shorter, closer-fitting hat or more chains when you want additional height and slouch. You can also change the yarn color or add a pom-pom for a different finished look.
The key to getting the cleanest result is not rushing the stitch changes. The body alternates between different loop placements, while the final stitches create the crown shaping. Keeping those sections distinct makes the pattern easier to follow and gives the finished beanie its characteristic textured, relaxed shape.