Crochet V-Stitch Summer Bucket Hat Tutorial with Milk Cotton Yarn
Stay cool and stylish this summer with the Crochet V-Stitch Bucket Hat—a lightweight, textured accessory perfect for beach days, picnics, or casual sunny outings.
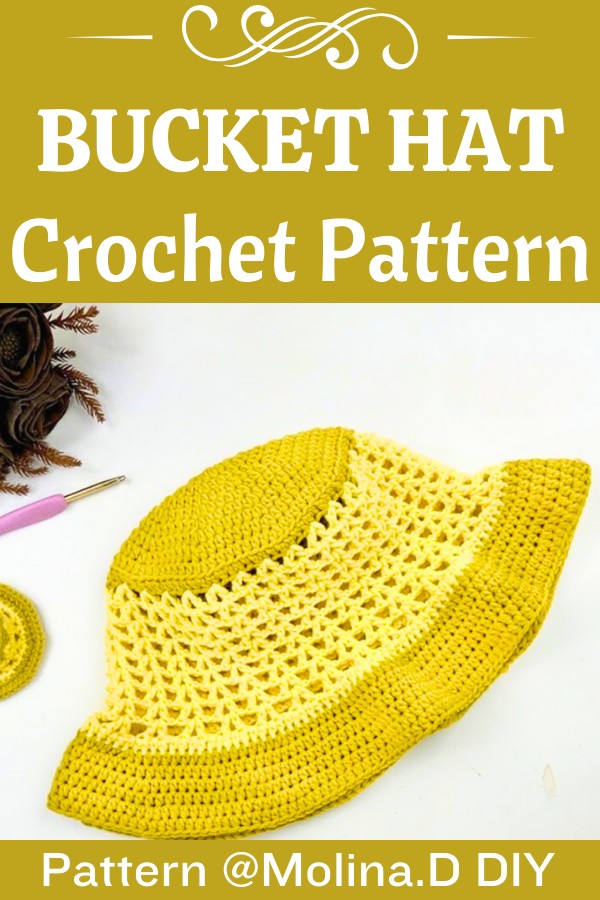
The V-Stitch Summer Bucket Hat combines style and comfort. It’s a lightweight and breathable accessory that’s perfect to shield you from the sun while making a fashion statement. If you’re going to the beach, running errands, or just having fun outdoors, this hat is a must-have for sunny days. Its textured V-stitch pattern adds depth and charm, making it a fun and simple design for both making and wearing.
Crochet V-Stitch Summer Bucket Hat
This Crochet Bucket Hat Pattern is beginner-friendly, using soft milk cotton yarn for a comfortable yet durable finish. The hat works well with one solid color or multiple hues for a pop of personality. The versatile design ensures the perfect balance between functionality and elegance, making it a great addition to any wardrobe. If you’ve never tried making a bucket hat before, this is a lovely choice to start.
Credit Molina.D DIY
Key Features and Construction Steps:
- Worked in the round, starting with a magic ring for a clean, seamless top.
- Shaping through increases builds the bucket hat base, transitioning smoothly from crown to sides.
- Incorporates back loop-only stitches for dimension and structure.
- V-Stitch detailing creates breathable, decorative texture perfect for summer wear.
- Mix and match yarn colors for custom striping or keep it monochrome for a classic look.
- Finished with a sturdy brim using strategic increases for a flattering, slightly flared edge.
This beginner-friendly bucket hat starts with the foundation of a clean magic ring technique, which creates a neat and polished crown. From there, rounds of half double crochet (HDC) are worked in spirals, with consistent increases to gradually build a strong, flat top. These key shaping techniques ensure the hat fits comfortably, designing a base that measures approximately 18 cm (7 inches) in diameter before transitioning into the sides.
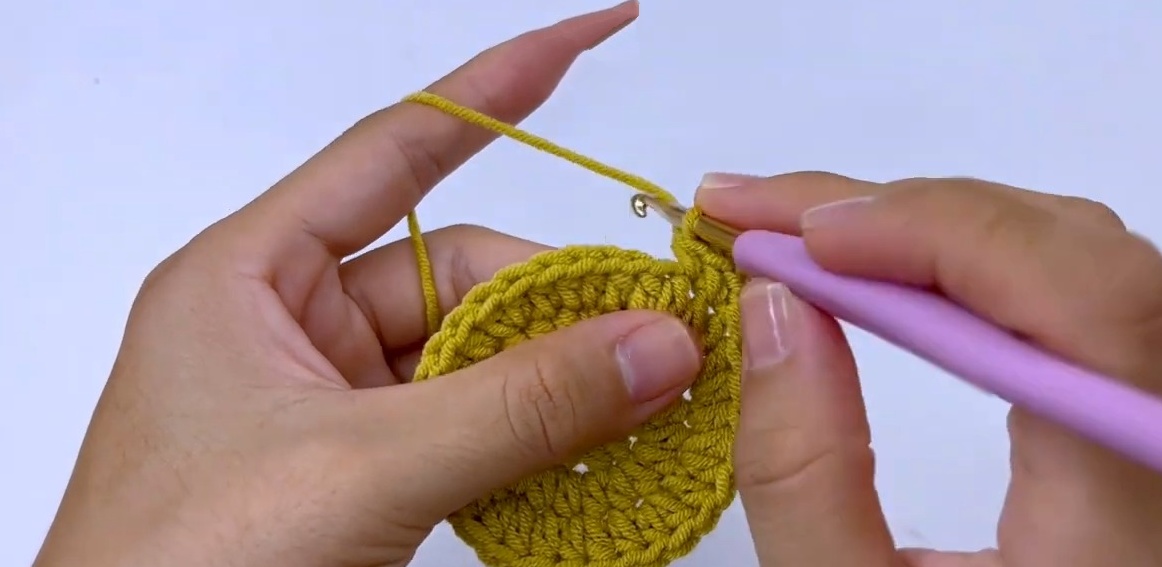
Once the top of the hat is complete, the pattern switches gears to introduce texture and depth. The use of back loop-only stitches following the crown creates a subtle ridge for structural division, marking the start of the hat’s sides. This is where you can switch yarn colors for added flair or continue with a single shade for a timeless effect.
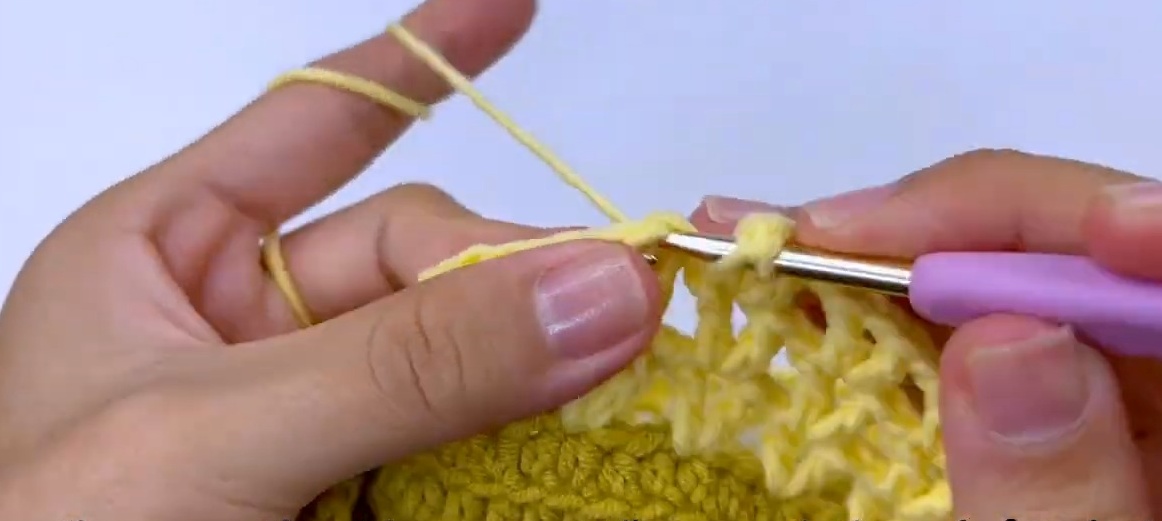
The playful V-stitch pattern really brings this bucket hat to life. Using chain spaces and double crochets, the design alternates to form a breathable yet visually striking texture. The V-stitches are repeated over several rows, effortlessly blending functionality with style. This technique is not only easy to master but also adaptable for various color combinations, making the hat perfect for personalization.
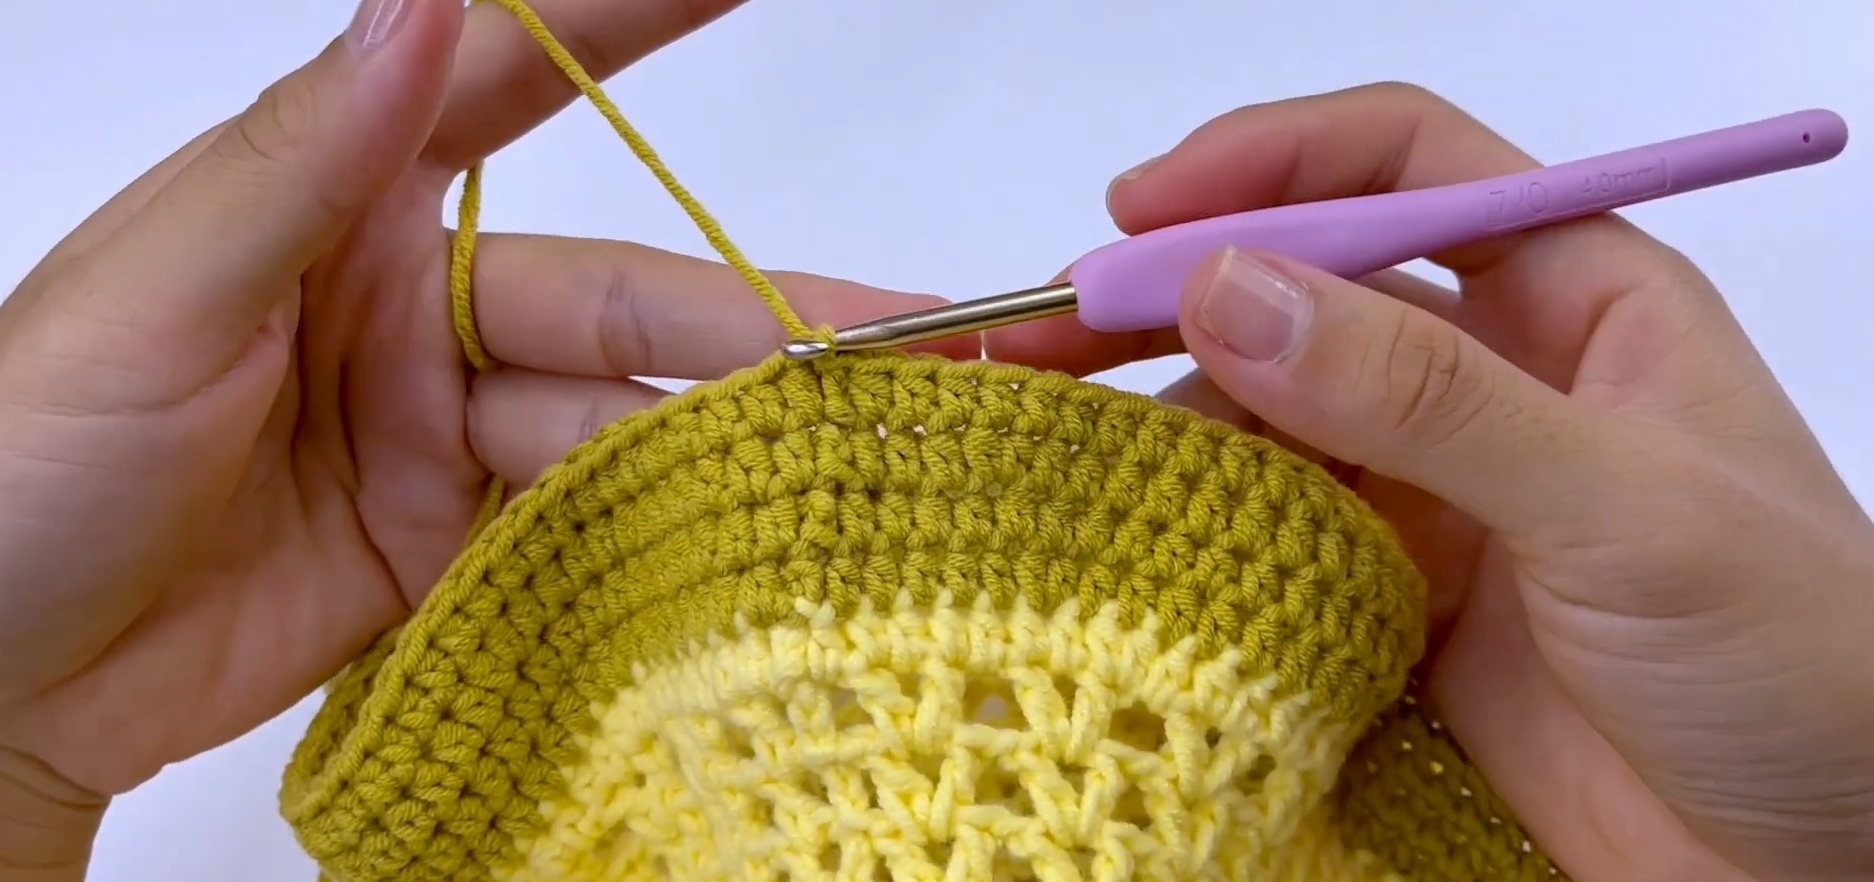
Finally, the brim is shaped through additional HDC rows with increases along strategic intervals. These increases create a gentle flare that adds elegance to the finished piece while maintaining its practicality. The brim is large enough to offer shade without overpowering the hat’s lightweight, summer-ready look. Clean slip stitches and carefully hidden tails ensure an immaculate finish.
Video Tutorial
Step-by-Step Pattern
Materials & Tools Needed:
- Yarn: Milk Cotton Yarn (5-ply), 125g preferred. Other soft yarns may also work.
- Hook Size: 4mm crochet hook
- Tools:
- Scissors
- Darning needle (for weaving ends)
Finished Size:
- The top part of the hat measures approximately 18 cm (7 inches) in diameter.
- Suitable for Medium to Large fits.
Customization Ideas:
- Use a single color throughout or switch to multiple colors to create vibrant summer vibes.
- Easily modify the size by adjusting the increasing rounds of the top circle and base structure.
Pattern Abbreviations & Terminology:
- Ch: Chain
- HDC: Half Double Crochet
- DC: Double Crochet
- Inc: Increase (make 2 stitches in one stitch)
- Sts: Stitches
- Sl St: Slip Stitch
- Magic Ring: A looped starting point for circular crochet
This pattern uses US crochet terminology.
Step-by-Step Instructions:
Hat Structure Overview:
- Top Circle: The increasing rounds form the crown of the hat.
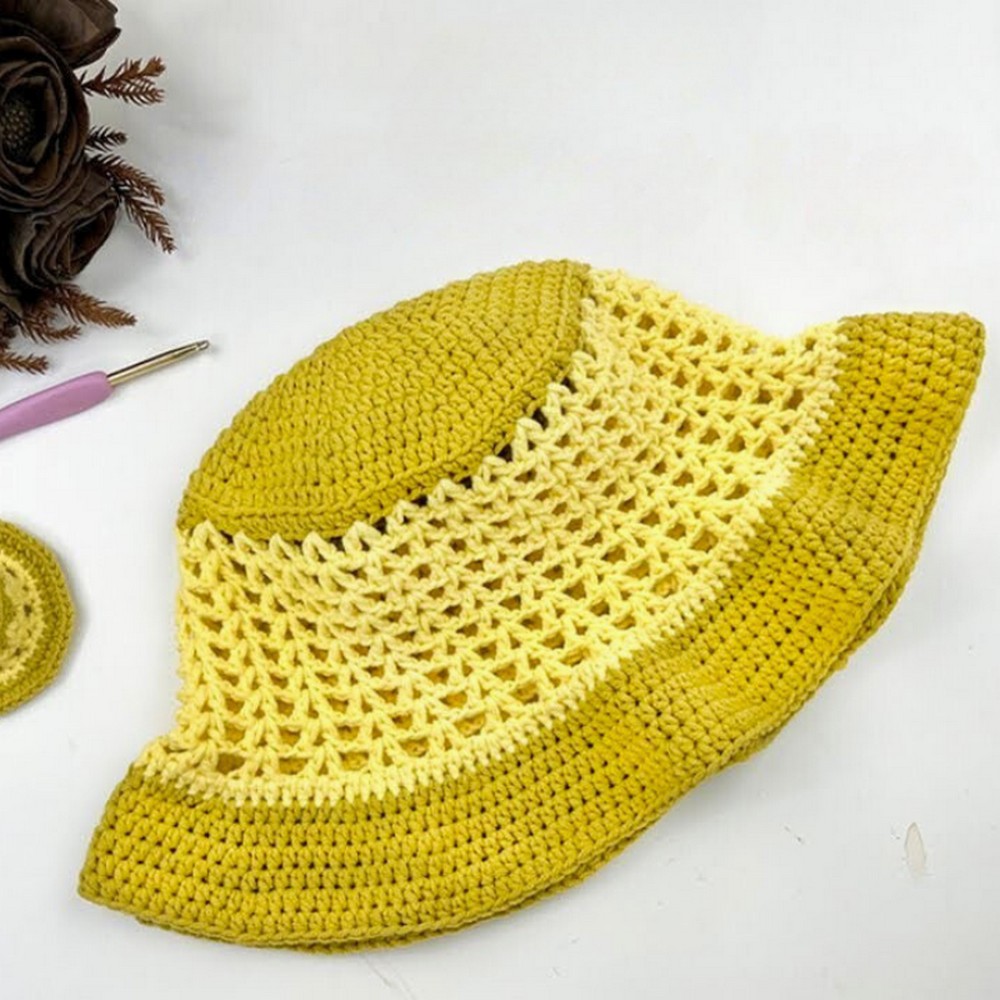
- Band: Made using the V-stitch pattern, creating an airy, lightweight design.
- Brim: A wide brim made with structured increases.
1. Top Circle (Crown):
Follow these rounds to crochet the top of the hat.
- Round 1:
- Create a magic ring.
- Chain 2 (counts as the first stitch).
- Work 10 HDCs into the magic ring.
- Sl St to join. (10 stitches)
- Round 2:
- Chain 2.
- Inc HDC in every stitch around.
- Sl St to join. (20 stitches)
- Round 3:
- Chain 2.
- Work 1 HDC, Inc HDC around (repeating the pattern 10 times).
- Sl St to join. (30 stitches)
- Round 4:
- Chain 2.
- Work 2 HDC, Inc HDC around (repeating the pattern 10 times).
- Sl St to join. (40 stitches)
- Round 5:
- Chain 2.
- Work 3 HDC, Inc HDC around (repeating the pattern 10 times).
- Sl St to join. (50 stitches)
- Continue increasing similarly (adding 1 HDC before every increase in each round) until the diameter reaches 18 cm (7 inches). For most users, this happens by Round 11.
2. Band (V-Stitch Pattern):
The airy, V-stitch band gives the hat its summer feel.
- Round 1 (Transition Round):
- Chain 2.
- Work 1 HDC in each stitch around (in the back loops only).
- Sl St to join. (100 stitches)
- Round 2 (Attach Color):
- Introduce a new color (optional).
- Chain 4, skip 2 stitches, then:
- Make 1 DC, Ch 1, 1 DC in the same stitch (creates the first V-stitch).
- Repeat this process (Ch 1, skip 2 stitches, [DC, Ch 1, DC] in the next stitch) until the end.
- Sl St into the Chain 4 space.
- Round 3 – Round 8:
- Chain 4.
- Make 1 DC in the Chain-1 space of the previous V-stitch.
- Next, work [(DC, Ch 1, DC in the middle of the next V-stitch)], repeating this until the end of the round.
- Sl St to join. (119 stitches remain constant)
- Tip: Use as many rounds of V-stitches as you’d like for the band height. The tutorial continues the pattern until Round 20.
3. Brim:
The brim is constructed with structured increases.
- Round 21:
- Chain 2.
- Work 7 HDC, Inc HDC (repeating this pattern 14 times).
- Sl St to join. (133 stitches)
- Switch back to the first color (if using multiple colors).
- Round 22:
- Chain 2.
- Work 7 HDC, Inc HDC (repeating this pattern 16 times), then work 5 HDC at the end.
- Sl St to join. (149 stitches)
- Round 23:
- Chain 2.
- Work 1 HDC in every stitch around.
- Sl St to join. (149 stitches)
- Round 24:
- Chain 2.
- Work 11 HDC, Inc HDC (repeating this pattern 12 times), then work 3 HDC at the end.
- Sl St to join. (159 stitches)
- Round 25:
- Chain 2.
- Work 1 HDC in every stitch around.
- Sl St to join. (159 stitches)
- Round 26:
- Chain 2.
- Work 14 HDC, Inc HDC (repeating this pattern 10 times), then work 11 HDC at the end.
- Sl St to join. (171 stitches)
- Round 27 (Final Round):
- Chain 2.
- Work 1 HDC in every stitch around.
- Sl St to join. (171 stitches)
Finishing Techniques:
- Cut the yarn and leave a tail.
- Use the darning needle to weave in loose ends securely.
- Block the hat by lightly wetting it and shaping it to ensure the brim lies flat.
Troubleshooting and Suggestions
Common Issues & Tips:
- Uneven Stitches: Beginners may struggle with stitch consistency, especially with V-stitch patterns. Count stitches at the end of each round to stay on track. Using a stitch marker at the start of rounds will help ensure accuracy.
- Magic Ring Challenges: If forming the magic ring feels tricky, try practicing with thicker yarn first—it’s easier to manage and provides a clearer visual of the technique.
- Color Changes: When switching yarn colors, always pull the new yarn through at the end of the previous round’s slip stitch to create a clean transition.
Creative Modifications:
- Color Play: Use bold stripes or ombré effects by alternating two or more colors in the V-stitch rows.
- Embellishments: Attach floral appliqués, faux pearls, or even a thin ribbon around the lower edge for extra flair.
- Adaptations: Modify the brim size for a trendier look. A smaller brim turns this piece into a snug cloche hat, while a wider brim transforms it into a floppy sun hat.