Crochet Toddler Headband Pattern with Puff Stitch Motifs
Make an adorable stretch-fit crochet headband with textured puff motifs and elastic backing, sized easily for infants, toddlers, older children, or adults.
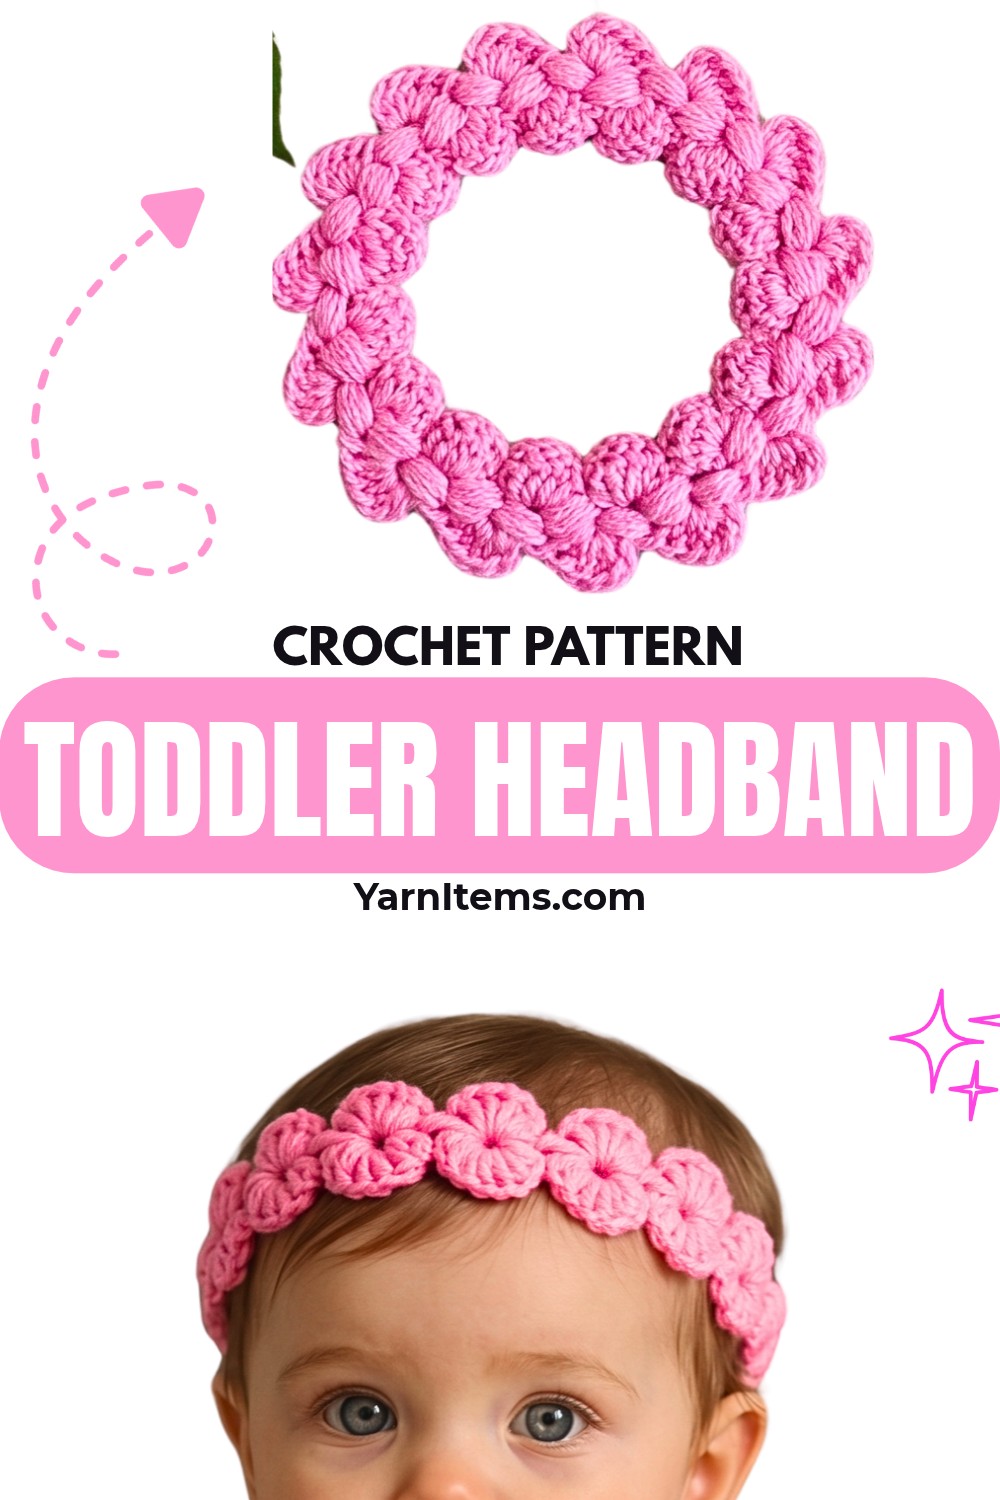
Tiny textured motifs give this crochet headband its floral character, while the elastic at the back creates comfortable stretch around little heads. Puff stitches and raised petal shapes add dimension without making the finished crochet band feel overly complicated, making it especially sweet for everyday wear or special outfits.
Begin by covering one hair elastic with single crochet, then build the first motif from a small chain ring before repeating the same puff-and-half-finished-dc sequence along the band.
Length is controlled through motif repeats, so check circumference as you work rather than relying on fixed stitch counts. Once the band reaches the desired size, bring the opposite end back to the elastic and secure it with matching single crochet stitches.
Credit Crochet with Love
Materials & Tools Needed
- Yarn: Medium-weight or baby-friendly soft yarn, shown in light pink
- Crochet Hook: Size suitable for chosen yarn
- Hair Elastic/Tie: 1 standard elastic band for stretchy back closure
- Scissors
- Yarn Needle: For weaving in ends
Finished Size & Customization
Finished length is fully adjustable. Continue repeating the core motif until the band reaches the desired head circumference for the intended wearer, allowing the hair elastic to provide additional stretch at the back.
For infants and toddlers, use fewer motif repeats. Older children and adults can be accommodated by adding more repeats until the band reaches a comfortable circumference.
Yarn choice can also change seasonal feel. Soft cotton works well for warmer months, while plush acrylic can give the band warmer winter texture.
For extra decoration, sew a small crochet bow or flower onto the finished band once all ends have been secured.
Pattern Abbreviations & Terminology
- ch: Chain
- sc: Single Crochet
- sl st: Slip Stitch
- dc: Double Crochet
- st / sts: Stitch / Stitches
- Puff Stitch (5): [Yarn over, insert hook into specified space, pull up loop] repeated 5 times; yarn over and pull through all loops on hook
- Half-finished dc: Yarn over, insert hook into specified space, pull up loop, yarn over and pull through 2 loops, leaving 1 loop on hook

How to make Elastic Base
Step 1: Create a slip knot on the crochet hook.
Step 2: Insert hook directly through center of hair elastic, pull up loop, and make 1 sc.
Step 3: Continue working sc tightly around the hair elastic until you have a secure, wide base of approximately 10–12 sc.
Step 4: Sl st into the very first sc to join the round.
Keep stitches firm enough to cover elastic securely, but avoid pulling them so tightly that elastic loses its ability to stretch.

First Motif Ring
Step 1: Ch 6.
Step 2: Sl st into first chain to form a small ring.
This ring becomes the starting space for the first textured motif.
First Motif
Step 1: Ch 3.
Step 2: Make 1 Puff Stitch (5) into ring: yarn over, insert hook into ring, pull up loop; repeat this insertion and loop-pulling action 5 times.
Step 3: Yarn over and pull through all loops on hook.
Step 4: Ch 1 to secure top of puff stitch.
Step 5: Working into same ring, make 5 half-finished dc. For each one, yarn over, insert hook into ring, pull up loop, yarn over and pull through 2 loops, leaving remaining loop on hook.
Step 6: After the fifth half-finished dc, you will have 6 loops on the hook.
Step 7: Yarn over and pull through first loop only.
Step 8: Yarn over and pull through 2 loops. Repeat this action continuously until only 1 loop remains on the hook, creating a textured petal shape.
Watch the first motif closely as it forms. Puff sits at center while half-finished dc section spreads outward into raised petal shape. Keeping all five partial dc stitches in the same ring gives the motif its defined texture.

Repeat Floral Motifs
Step 1: Ch 3.
Step 2: Work Puff Stitch (5) into space at top of previous motif, using gap formed by ch-1 and top of previous petal.
Step 3: Yarn over and pull through all loops on hook.
Step 4: Ch 1 to secure puff.
Step 5: Work 5 half-finished dc into same space at top of motif.
Step 6: You will again have 6 loops on hook.
Step 7: Yarn over and pull through first loop only.
Step 8: Yarn over and pull through 2 loops. Repeat until only 1 loop remains on hook.
Step 9: Continue repeating Part 4 until headband reaches required length for desired head circumference.
As motifs accumulate, check band against intended wearer’s head or measure around head circumference. Stop when length reaches required fit, remembering that elastic at back will provide additional stretch.
Keep each new motif worked into the correct top space rather than moving into nearby stitches. Consistent placement keeps floral shapes connected in one even line.

Join Band to Elastic
Step 1: Once crochet band reaches required length, fold it over toward exposed side of hair elastic.
Step 2: Insert hook into elastic band and pull up loop to join crochet band using 1 sc.
Step 3: Add more sc around the elastic at this joining point to widen the attachment. Match the width and security of the opposite elastic side.
Step 4: Sl st into final stitch to lock attachment securely.
Check both elastic joins before finishing. They should sit evenly at opposite ends, allowing elastic to stretch while keeping crochet motifs aligned.
Finishing
Step 1: Fasten off by cutting yarn with short tail and pulling tail through final loop on hook. Pull tight to secure.
Step 2: Thread tail onto yarn needle and weave ends back and forth through dense motif stitches or sc base until ends are hidden securely.
Step 3: Snip remaining excess yarn.

Quick Fit Check
Stretch finished band gently before first wear to check elastic recovery and attachment points. For infant or toddler sizing, ensure band sits comfortably without excessive tightness.
If more length is needed, add additional motif repeats before joining to elastic. For smaller sizing, stop after fewer repeats and check circumference before making final attachment.