Crochet Braided Leaf Headband with Colorful Petal Loops
Turn colorful crochet loops into a dimensional braided leaf headband with ribbed borders and a clever final loop that doubles as a button closure.
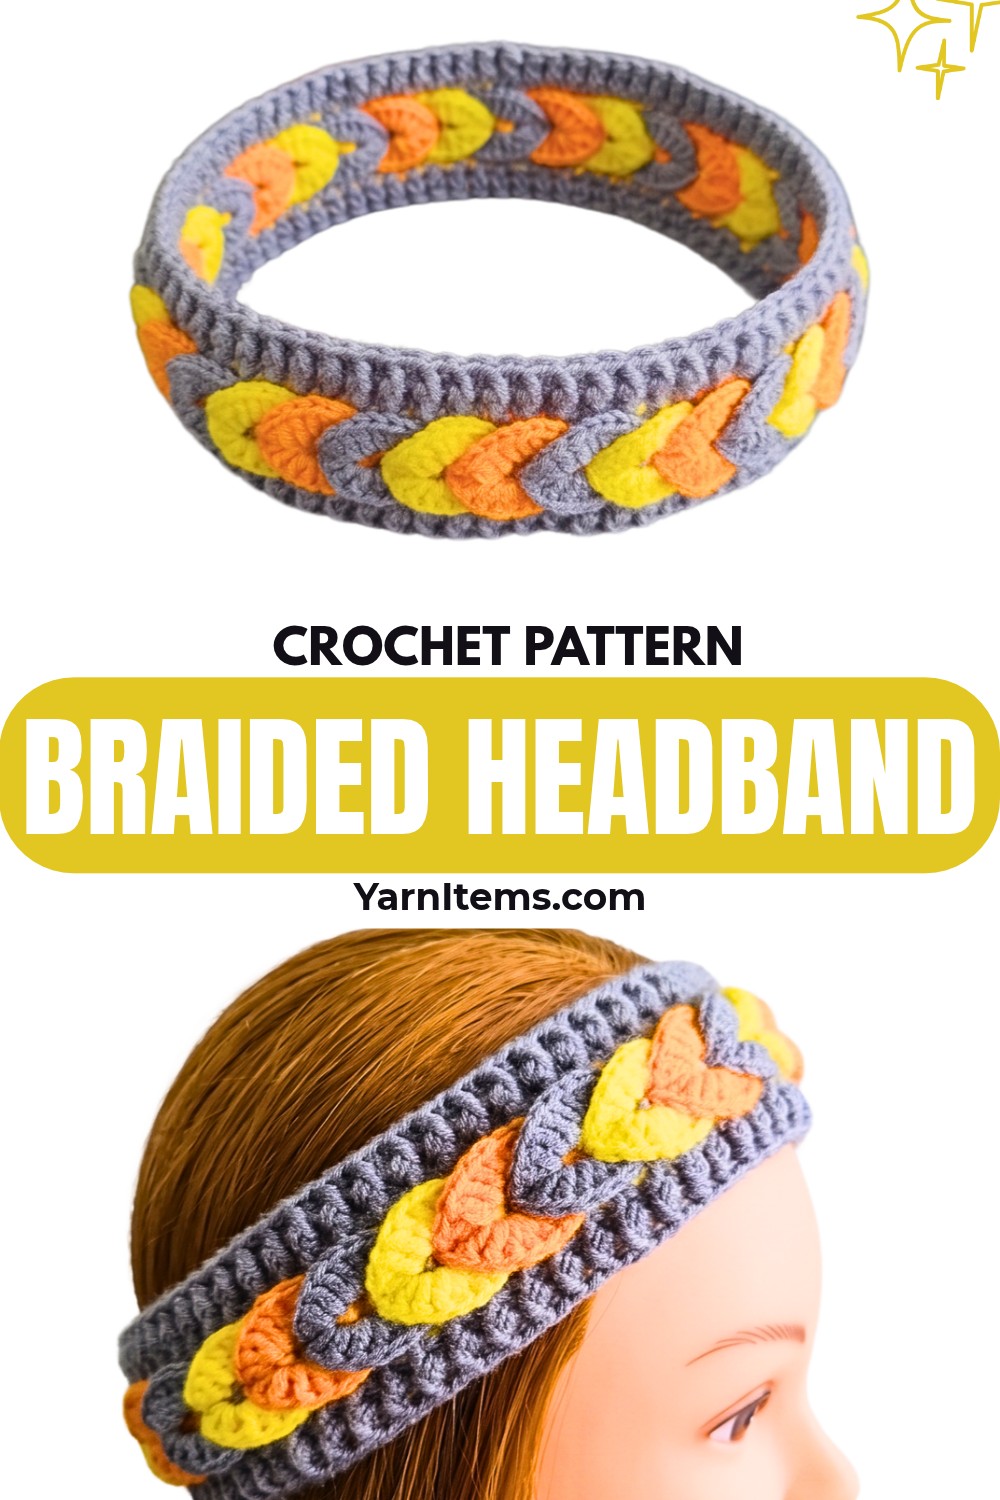
Layered loops create striking 3D leaf-like texture across this crochet headband, with Grey, Orange, and Yellow modules adding playful color along its center. Ribbed side borders give edges definition, while the final loop works as a built-in buttonhole for adjustable wear.
Begin with a short foundation strip, then build repeating 14-chain loops and fill each loop with 20 double crochets to create individual petal sections. After enough modules wrap comfortably around the head, add matching ribbed borders before pulling loops through one another in sequence. Keeping each loop upright during braiding is important, since correct order creates a finished raised crochet pattern.
Credit Knitting Home
Materials & Tools Needed
- Yarn: Medium/Worsted weight yarn in 3 colors, such as Grey, Orange, and Yellow
- Crochet Hook: 2.50 mm (US Size 4/0) Tulip hook
- Scissors: For cutting yarn during color changes
- Yarn Needle: For weaving in ends and attaching button
- Closure: 1 standard wooden button
Finished Size & Customization
Headband length is adjustable. Continue adding alternating color modules until flat strip stretches comfortably around intended wearer’s head.
For babies, children, or adults, change finished circumference by increasing or reducing number of repeated modules.
For single-color styling, work entire headband in one shade to emphasize raised cable-like appearance. For colder wear, bulky yarn with larger hook creates thicker fabric and gives finished headband warmer ear-warmer character.
Pattern Abbreviations & Terminology
- ch: Chain
- st / sts: Stitch / Stitches
- sl st: Slip Stitch
- dc: Double Crochet
- FPdc: Front Post Double Crochet
- BPdc: Back Post Double Crochet

Grey Base Setup
Starting Chain: Ch 8.
Row 1: Make 1 dc in the 3rd ch from the hook, then work 6 dc across the remaining chains. Stitch Count: 7 sts total, counting the turning chain.
This short strip establishes the foundation for the first petal module. Keep first row even, since later loop sections are built directly from this base.
Grey Petal Module
Row 2 – Loop Base: Ch 2, turn; work 1 dc in next 3 sts; ch 14; sl st into base of chain just made to form large loop; work 3 dc in remaining 3 sts.
Row 3 – Filling Grey Loop: Ch 2, turn; work 1 dc in next 3 sts; work 20 dc directly around ch-14 loop; work 3 dc in remaining 3 edge sts; sl st to finish row; fasten off Grey yarn.
When working 20 dc around the loop, spread stitches evenly around the chain rather than bunching them together. Full loop coverage creates broad petal shape needed for later interlocking.

Orange Petal Module
Row 4: Attach Orange yarn; ch 2, turn; work 1 dc in next 3 sts; ch 14; sl st to base of chain to form loop; work 3 dc in remaining 3 edge sts.
Row 5: Ch 3, turn; work 1 dc in next 3 sts; work 20 dc directly around Orange ch-14 loop; work 3 dc in remaining 3 edge sts; fasten off.
Keep Orange loop upright beside Grey loop before continuing. This makes later braiding easier to follow and helps preserve module order.

Yellow Petal Module
Row 6: Attach Yellow yarn; ch 2, turn; work 1 dc in next 3 sts; ch 14; sl st to base of chain to form loop; work 3 dc in final 3 edge sts.
Row 7: Ch 3, turn; work 1 dc in next 3 sts; work 20 dc around Yellow ch-14 loop; work 3 dc in final 3 sts; fasten off.
Three completed modules now establish repeating color sequence and raised loop structure.

Continue Color Modules
Repeat Rows 4–7, alternating colors sequentially in Grey, Orange, Yellow order until flat strip is long enough to wrap comfortably around intended wearer’s head.
Add complete modules rather than stopping midway through one color section. Check length around head as you approach desired circumference, since each additional module adds another raised loop and changes finished fit.

Grey Side Borders & Ribbing
Border Base Round: Attach Grey yarn to side edge of long unbraided strip; work 2 dc into side of every horizontal row across entire length of headband.
Ribbed Round: Ch 2, turn; alternate 1 FPdc and 1 BPdc across previous row’s double crochets to create stretchy ribbed texture.
Repeat Border Base Round and Ribbed Round along opposite long side so both edges receive matching Grey ribbed borders.
Weave in loose ends after both borders are complete. Keeping border height and post-stitch sequence consistent on both sides helps frame raised center evenly.
Interlocking Leaf Braid
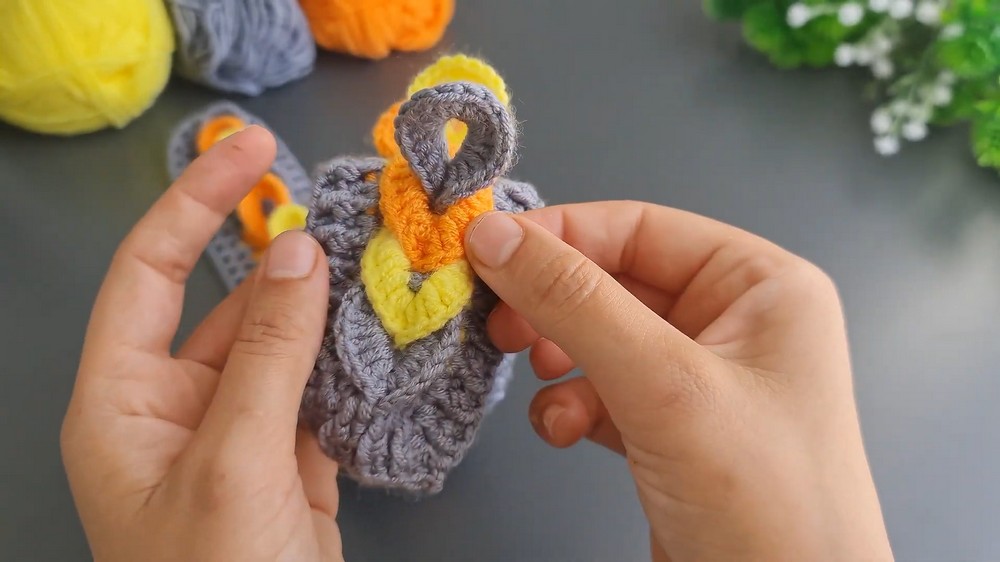
Lay completed flat headband down with all 20-dc loops standing upright.
Starting at first Grey module, take second Orange loop and pull it through center of first Grey loop.
Take third Yellow loop and pull it through center of second Orange loop.
Continue pulling each following loop through center of preceding loop until reaching opposite end of headband.
Work gradually from one end toward other instead of pulling several loops at once. Each loop should remain visibly separated while being passed through previous loop. This creates overlapping 3D braid resembling connected leaves down center of headband.

Button Closure
Sew wooden button onto bottom starting edge of headband.
Final braided loop at opposite end functions as natural buttonhole. Wrap finished headband around head, bring final loop over button, and secure closure.
Before final wear, check that button is firmly attached and final loop passes over it without excessive stretching.

Adjustable Fit Check
Try finished headband around intended wearer’s head before trimming any remaining ends. If circumference needs changing in another version, adjust number of repeated color modules rather than changing border or braid sequence.
For smaller sizing, remove one or more complete modules. For larger sizing, continue Grey–Orange–Yellow sequence until strip reaches comfortable circumference.