How to Make a Stylish Summer Hat for Sunny Days
Nothing completes a sunny outfit quite like a beautifully handmade crochet summer hat that feels as good as it looks. This lightweight piece adds effortless charm while offering welcome shade on bright, warm days.
Its eye-catching woven texture makes it easy to pair with dresses, casual outfits, or beachwear. Every detail blends comfort and style into an item you’ll enjoy wearing all season long.

A timeless design and practical comfort come together in this stylish crochet summer hat. The breathable pattern helps keep things cool while giving the finished piece a polished, fashionable look.
It’s an excellent choice for picnics, vacations, seaside walks, or everyday outings under the sun. With its elegant finish and versatile appeal, this crochet handmade item is sure to become a favorite in your warm-weather collection.
Credit Nala Crochet
Materials Needed
- Yarn
- Type: Summer milk cotton yarn
- Thickness:
- Option 1: 2 mm thickness, held double (2 strands together), equivalent to 4 mm thickness. Approx. 200 g.
- Option 2: 4 mm cotton yarn (if available). Skip holding strands together.
- Crochet Hook
- Size: 3.5 mm
- Craft Plastic Wire / Hat Wire
- Length: 80–100 cm
- Purpose: Adds shaping and structure to the project.
- Stitch Marker (Optional)
- Use: To help keep track of rounds or specific points in your pattern.
- Tapestry Needle
- Use: For weaving in the yarn ends (after finishing).
- Scissors
- Use: For trimming the yarn.
- Tape Measure
- Use: To check measurements as you progress.
Notes
- If you have access to 4 mm cotton yarn, you can use it directly (no need to hold 2 strands of 2 mm yarn together).
- The wire gives structure to the finished project, helping it maintain its intended shape (important for hats, baskets, etc.).
Gauge
- 18 single crochet (sc) stitches × 20 rounds = 10 cm × 10 cm (4″ × 4″) in single crochet.
Pattern Notes
- Construction:
This hat is worked top-down:- Start with a magic ring to form the crown.
- Continue straight for the body.
- Add staggered increases for the brim.
- Round Joining:
- Each round is closed with a slip stitch (sl st) into the first sc of the round.
- Begin a new round with Chain 1 (ch 1) (this chain does not count as a stitch).
- Staggered Increases:
- To ensure a round crown without hexagonal corners, split increase rounds.
For example: On an increase round like “16 sc + inc”, the increases are staggered with half at the start and half at the end of the round.
- To ensure a round crown without hexagonal corners, split increase rounds.
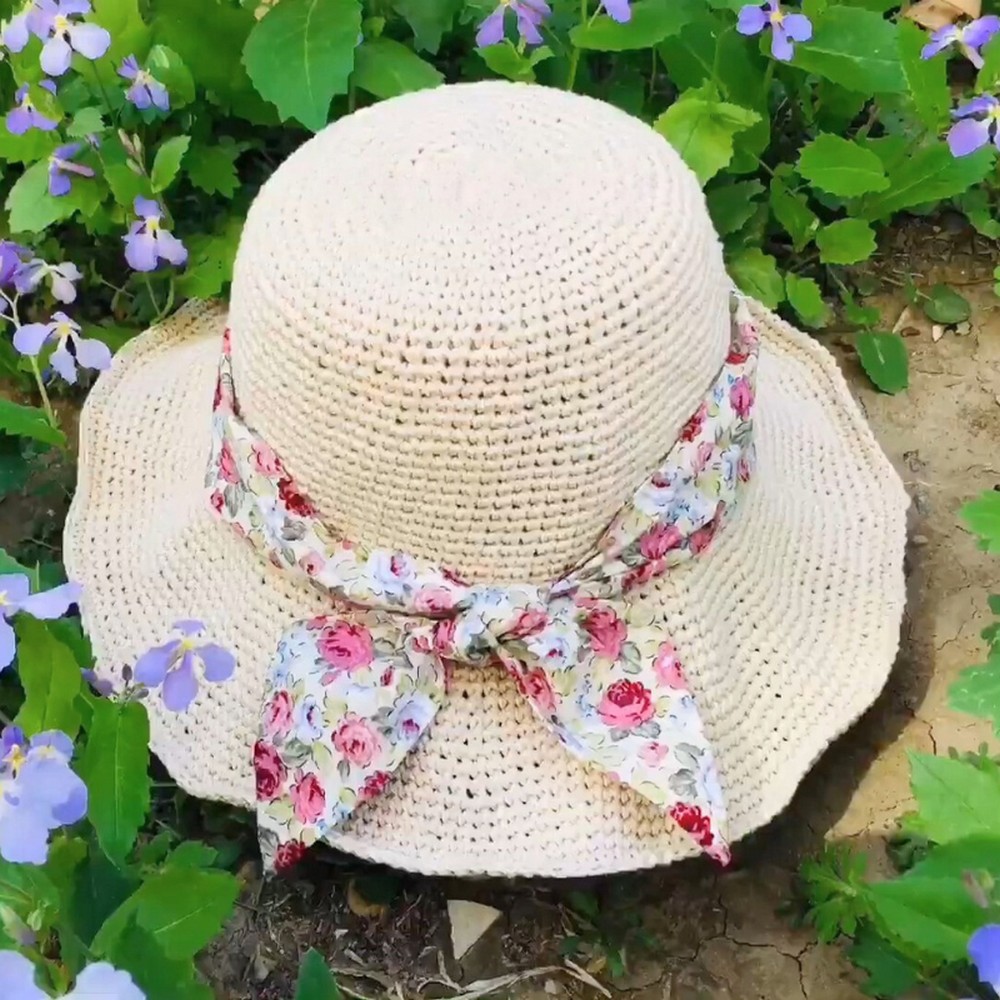
Specifications Overview
- Crown Diameter: 9.5–10 cm (flat, before tapering).
- Hat Depth: 15.5–16 cm (from top of the crown to base of the brim).
- Head Circumference: Fits adult sizes (54–57 cm / 21.5″–22.5″).
Customization Ideas Recap
- Wider Brim:
- Extend the increase pattern (e.g., 16 sc + inc, 17 sc + inc, etc.) for more rounds before adding the wire. This creates a larger brim for added sun protection or style.
- Color Blocks/Stripes:
- Switch yarn colors in your project by pulling in the new color on the final slip stitch at the end of a round. Consider contrasting or complementary colors to create standout patterns.
- Decorative Ribbon:
- Add textural or embellishment details by weaving a leather cord, silk ribbon, or raffia braid around the base of the crown, just above the brim.
Pattern Abbreviations & Terminology (US Terms)
- MR: Magic Ring
- ch: Chain
- sc: Single Crochet
- inc: Increase (2 single crochet into 1 stitch)
- sl st: Slip Stitch
- st(s): Stitch(es)
- [ ] x N: Repeat the sequence inside the brackets N times
Step-by-Step Crochet Instructions
Part 1: Top Crown (Increases)
Work all rounds by joining with a slip stitch (sl st) to the first single crochet (sc) of the round, and chain 1 (ch 1) at the start of each round.
- Round 1 (Magic Ring):
- Form a Magic Ring (MR).
- Ch 1, work 8 sc into the ring.
- Pull the tail tight to close the ring.
- Join with sl st to the 1st sc. (8 sts in total)
- Round 2:
- Ch 1, work 1 increase (inc) = 2 sc into every stitch around.
- Join with sl st to the 1st sc. (16 sts in total)
- Round 3:
- Ch 1, repeat [1 sc, 1 inc] 8 times around.
- Join with sl st. (24 sts in total)
- Round 4:
- Ch 1, repeat [1 inc, 2 sc] 8 times around.
- Join with sl st. (32 sts in total)

- Round 5:
- Ch 1, repeat [3 sc, 1 inc] 8 times around.
- Join with sl st. (40 sts in total)
- Round 6 (Even Round):
- Ch 1, work 1 sc into each stitch around (no increases).
- Join with sl st. (40 sts in total)
- Round 7:
- Ch 1, 1 sc, 1 inc, then repeat [4 sc, 1 inc] 7 times.
- Finish with 3 sc.
- Join with sl st. (48 sts in total)
- Round 8 (Even Round):
- Ch 1, work 1 sc into each stitch around (no increases).
- Join with sl st. (48 sts in total)
- Round 9:
- Ch 1, repeat [5 sc, 1 inc] 8 times around.
- Join with sl st. (56 sts in total)
- Round 10 (Even Round):
- Ch 1, work 1 sc into each stitch around (no increases).
- Join with sl st. (56 sts in total)
- Round 11 (final increase round for the crown):
- Ch 1, 2 sc, 1 inc, then repeat [6 sc, 1 inc] 7 times.
- Finish with 4 sc.
- Join with sl st. (64 sts in total)
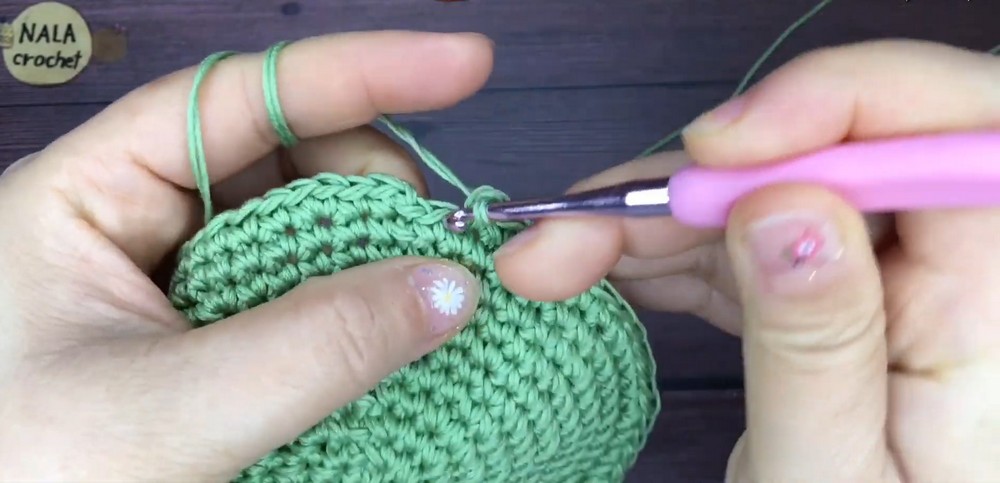
Part 2: Side Body (Hat Wall)
Now, work straight without any increases to form the body (or wall) of the hat.
- Rounds 12–26 (15 Rounds Total):
- Ch 1, work 1 sc into each stitch across all 64 stitches.
- Join with sl st at the end of each round. (64 sts per round)
At the end of Round 26, the hat depth from the center top to the edge should measure approximately 15.5 cm to 16 cm.
Part 3: Brim & Wire Finishing
The brim expands outward using staggered increase rounds.
- Brim Round 1:
- Ch 1, repeat [11 sc, 1 inc] 8 times around.
- Join with sl st. (72 sts in total)
- Brim Round 2:
- Ch 1, 5 sc, 1 inc, then repeat [12 sc, 1 inc] 7 times.
- Finish with 7 sc.
- Join with sl st. (80 sts in total)
- Brim Round 3:
- Ch 1, repeat [13 sc, 1 inc] 8 times around.
- Join with sl st. (88 sts in total)
- Brim Round 4:
- Ch 1, 6 sc, 1 inc, then repeat [14 sc, 1 inc] 7 times.
- Finish with 8 sc.
- Join with sl st. (96 sts in total)
- Brim Round 5:
- Ch 1, work 1 sc into each stitch around (no increases).
- Join with sl st. (96 sts in total)
- Brim Round 6:
- Ch 1, repeat [15 sc, 1 inc] 8 times around.
- Join with sl st. (104 sts in total)
- Brim Rounds 7–16:
- Continue expanding the brim by following the established staggered increase schedule:
- Alternate between rounds with increases (e.g., [16 sc, 1 inc]) and plain single crochet rounds (no increases).
- Continue until you reach Brim Round 16.
- Continue expanding the brim by following the established staggered increase schedule:

Brim Round 17 (Final Round with Brim Wire):
- Hold the plastic brim wire along the top edge of the stitches from the previous round.
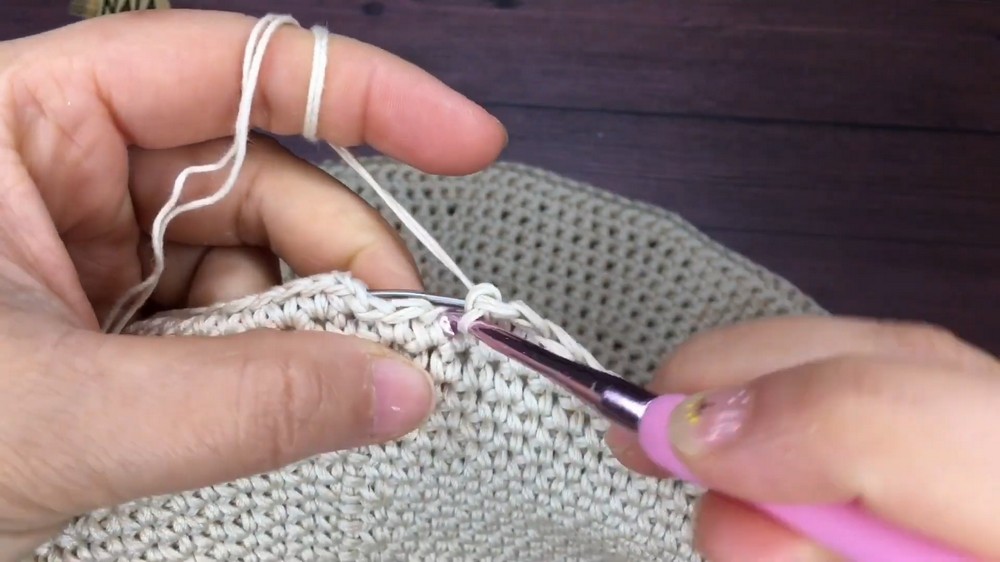
- Ch 1, then work 1 sc into each stitch around, inserting your hook under the wire so that the single crochet stitches enclose the wire inside.
- Near the end of the round:
- Overlap the ends of the plastic wire by about 2–3 cm.
- Secure the overlap with small tape or heat-shrink tubing if needed.
- Continue crocheting over the overlapped section.
- Fasten off yarn, leaving a 10 cm tail.
Finishing Techniques
- Invisible Join / Seaming:
- Fasten off the yarn.
- Use a tapestry needle to pull the yarn tail under both loops of the first stitch, and back through the center of the last stitch. This will create an invisible, seamless finish on the outer brim edge.
- Weaving in Ends:
- Thread all yarn ends through a tapestry needle.
- Weave securely through several stitches on the inside of the hat.
- Steam Shaping:
- Gently steam the brim with an iron, holding it 2–3 inches away (do not touch directly). This will smooth out ripples and shape the wire curve.