How to Crochet a Striped Sweater – Top-Down Pullover
Want a colorful handmade sweater? Create this top-down crochet pullover with three-color stripes, a simple yoke, and comfortable sleeves.
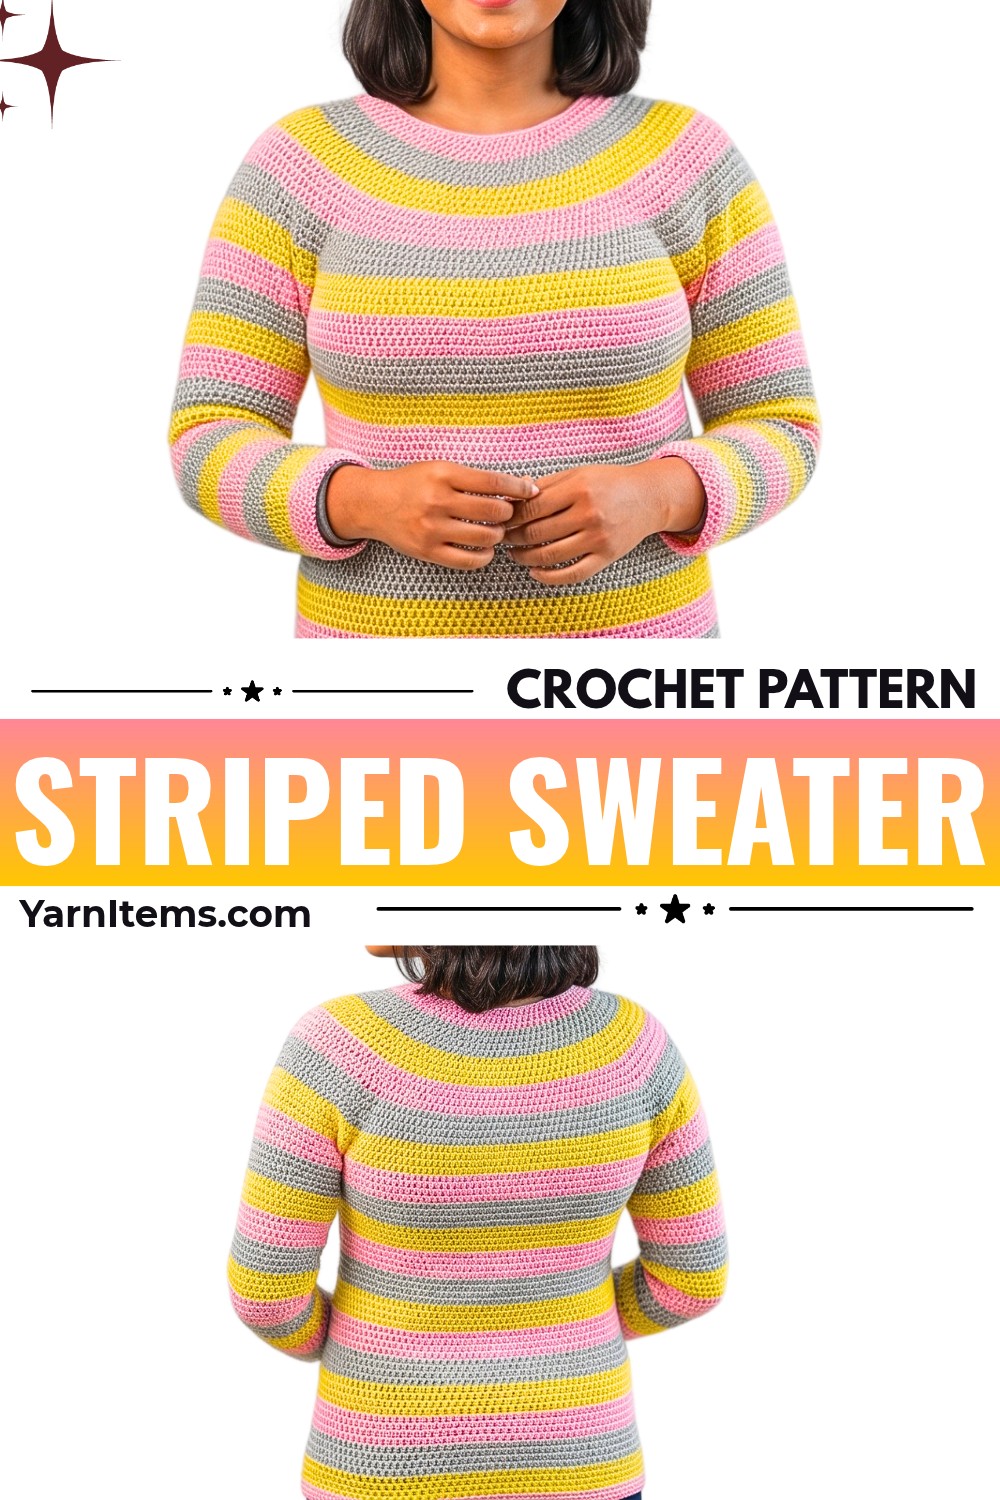
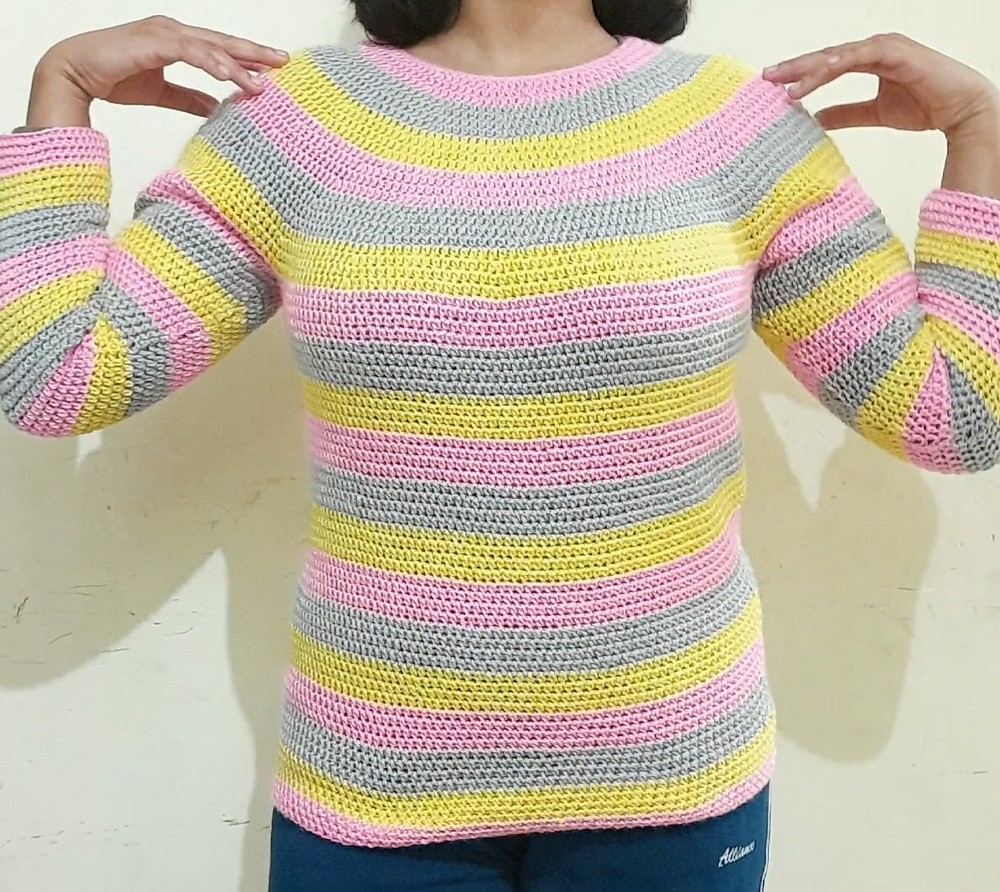
Bright stripes and a comfortable fit make this crochet pullover a lovely choice for cooler days. Worked from the neckline downward, the crochet sweater features three contrasting yarn colors arranged in repeating blocks, giving the finished garment a cheerful, coordinated look.
Starting with a circular collar, you’ll gradually expand the yoke with half double crochet increases before separating the sleeves from the body. Work the remaining sections in rounds, carrying matching color blocks through the body and sleeves. Follow the measurements and stitch instructions below to shape your own striped crochet sweater.
Credit LaDenser Crochets
Materials & Tools Needed
Gather your yarn and crochet supplies before starting. This pullover uses three contrasting colors arranged in repeating four-round sections.
- Yarn: 3-ply, 100% acrylic knitting yarn, such as Vardhman or an equivalent brand.
- Colors: Three contrasting shades, following the demonstrated Pink, Gray, and Yellow sequence.
- Yarn Quantity: Approximately 200g balls of each color are recommended; roughly 150g of each color is used in total.
- Crochet Hook: 4.0 mm crochet hook.
- Scissors: For cutting yarn during color changes and finishing.
- Yarn Needle: For weaving in the remaining yarn tails.
- Measuring Tape: For checking the yoke depth, armhole placement, and sweater length.
- Stitch Markers: For identifying the front, back, and sleeve separation points.
Finished Size & Customization Ideas
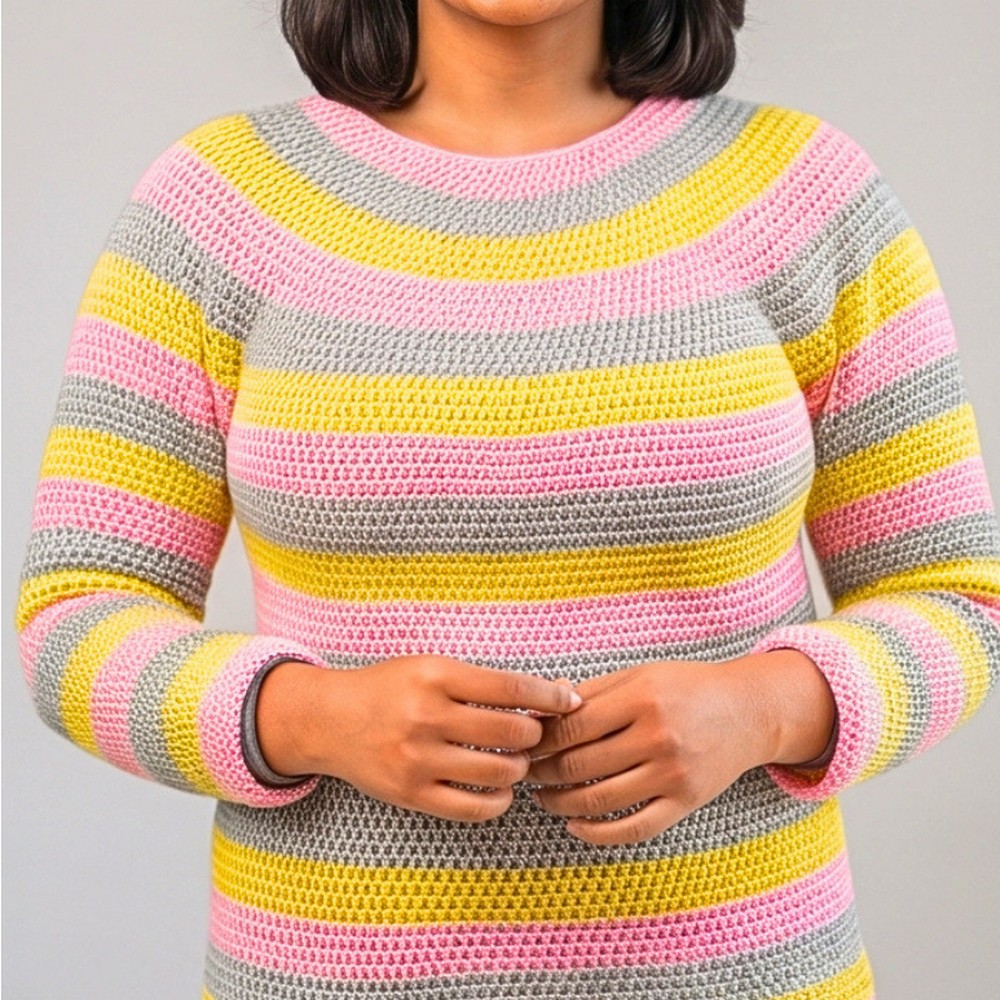
The demonstrated sweater is designed to fit approximately Large to 2XL. Its top-down construction makes it possible to check the fit as you work.
Yoke Depth: Continue increasing the yoke until it measures approximately 8 inches from the top collar down to the underarm division.
Body Fit: The original method uses half double crochet stitches with shaping and joining adjustments to create a body-conforming fit. If you prefer a straighter, less tapered appearance, you can substitute single crochet stitches for the body.
Sleeve Style: The sleeve instructions include an alternative method for adjusting the starting position of each round. This helps maintain a straighter sleeve appearance rather than creating unwanted spiral shaping.
Color Arrangement: Follow four-round color blocks in this order:
- Pink
- Gray
- Yellow
Repeat the sequence to create consistent horizontal stripes across the yoke, body, and sleeves.
Pattern Abbreviations & Terminology
- Ch: Chain
- Sl St: Slip Stitch
- Sc: Single Crochet
- HDC: Half Double Crochet
- St(s): Stitch / Stitches
- Rnd: Round
- Inc: Increase (working 2 HDC into the same stitch)
Step-by-Step Detailed Crochet Instructions
This sweater is worked from the neckline downward, beginning with a circular foundation and a single crochet base round. You’ll then build the yoke with alternating plain and increase rounds before dividing the body and sleeves.
Part A: Collar & Foundation Ring
The collar begins with a long foundation chain joined into a circle. Take care when joining the chain so the foundation does not twist, as this will affect the shape of the neckline.
Step 1 – Make a Slip Knot: Using your 4.0 mm crochet hook, create a slip knot and place it on your hook.
Step 2 – Create the Starting Ring: Chain 7. Pinch the seventh chain, remove your hook, and insert it back into the first chain.
Pick up the loop you left and pull it through to form a small starting ring.
Step 3 – Complete the Foundation Chain: Continue chaining until you have a total of 90 chains.
Step 4 – Join the Foundation: Add 1 extra chain at the end. Insert your hook through the very first joined chain and work a slip stitch to connect the foundation into a circle.
Before continuing, lay the chain flat and check that it is not twisted.
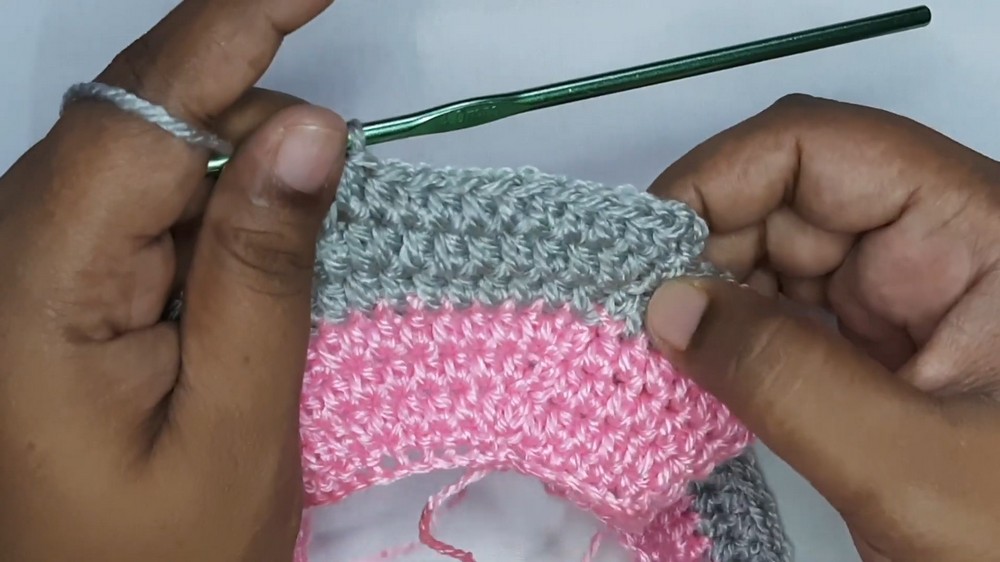
Step 5 – Foundation Single Crochet Round: Chain 1. This chain does not count as a stitch.
Work 1 single crochet into the same place where you joined the circle, then work 1 single crochet into every chain around.
You should have 90 single crochet stitches in total.
Join with a slip stitch into the first single crochet. Fasten off the foundation color if you are changing to another shade.
Part B: Yoke Construction (Top-Down)
The yoke is shaped through alternating half double crochet rounds and increase rounds. The increases gradually expand the circular neckline into a wider section that will eventually accommodate the body and sleeves.
Important Round Instructions:
- Chain 2 at the beginning of HDC rounds does not count as a stitch unless specified later.
- Join every round with a slip stitch into the top of the first HDC.
- Work four complete rounds in each color before changing to the next shade.
- Follow the color sequence Pink, Gray, and Yellow.
Fasten off the previous color and attach the new shade neatly at the joining point.
Round 1 – HDC Base Round: Chain 2.
Work 1 half double crochet into the same space as the joining slip stitch, then work 1 HDC into each stitch around.
You should have 90 HDC stitches.
Join with a slip stitch.
Round 2 – First Increase Round: Chain 2.
Work 1 HDC into each of the first 4 stitches. In the fifth stitch, work 2 HDC into the same stitch to create an increase.
Repeat the following sequence around:
4 HDC, increase in the fifth stitch.
Join with a slip stitch.
Round 3 – Plain Round: Chain 2.
Work 1 HDC into every stitch around without adding any increases.
Join with a slip stitch.
Round 4 – Increase Round: Chain 2.
Work 2 HDC into the very first stitch where you joined to create an increase. Then work 1 HDC into each of the next 5 stitches.
Repeat the following sequence around:
Increase in the first stitch, 5 HDC.
Join with a slip stitch.
Round 5 – Plain Round: Chain 2 and work 1 HDC into every stitch around.
Do not increase in this round.
Join with a slip stitch.
Round 6 – Increase Round: Chain 2.
Work 2 HDC into the first stitch, followed by 1 HDC into each of the next 6 stitches.
Repeat the following sequence around:
Increase in the first stitch, 6 HDC.
Join with a slip stitch.
Rounds 7+ – Continue Expanding the Yoke: Continue alternating one plain HDC round with one increase round.
Gradually increase the number of regular HDC stitches between increases by 1 stitch in each new increase round.
Follow this progression:
- 7 HDC between increases
- 8 HDC between increases
- 9 HDC between increases
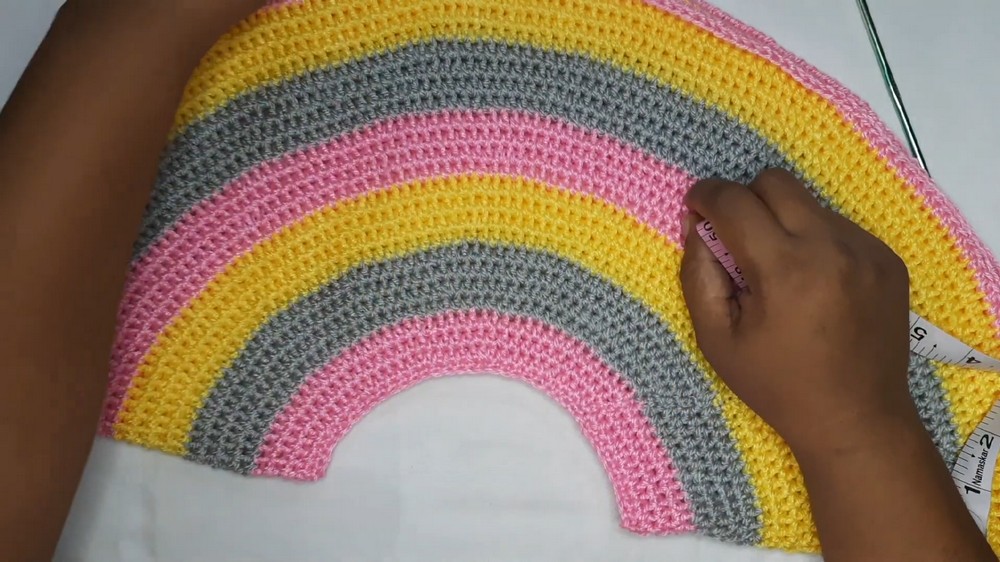
Continue until the yoke measures approximately 8 inches from the collar to the underarm division.
Maintain the four-round color blocks throughout the yoke, changing between Pink, Gray, and Yellow in the established sequence.
Part C: Body and Armhole Separation
Once the yoke reaches the required depth, the next step is to divide the stitches into the front, back, and sleeve sections. Chain bridges will connect the front and back panels underneath each arm.
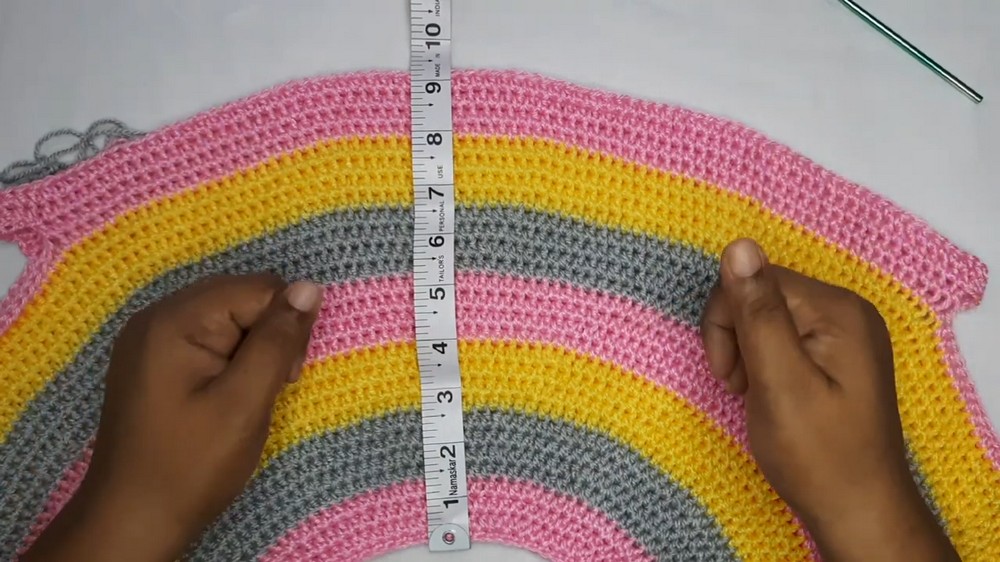
Step 1 – Find the Front and Back: Lay the yoke flat and fold it in half to identify the front and back sections.
Step 2 – Mark the Armholes: Measure 6.5 inches down each folded side to identify the arm openings.
Place stitch markers at the boundaries so you can clearly see where the sleeve stitches begin and end.
Step 3 – Begin the Body Round: Chain 2 and work HDC stitches across the front panel until you reach the first stitch marker.
Step 4 – Create the First Underarm Bridge: Chain 6 to bridge the armhole gap.
Skip all stitches designated for the first sleeve.
Step 5 – Connect the Back Panel: Continue working HDC into the next stitch marker on the opposite side, joining the front and back sections together.
Step 6 – Create the Second Underarm Bridge: Work HDC across the remaining panel until you reach the second armhole section.
Chain another 6 stitches to create the second underarm bridge, then skip the sleeve stitches.
Continue around and join the body round with a slip stitch.
Step 7 – Anchor the Underarm Chains: In the next round, work 1 HDC into each of the 6 chain stitches of the underarm bridge.
This secures the chain sections and creates a continuous body circumference.
Part D: Body Length
With the armholes separated, you can now continue working the sweater body in joined rounds.
Step 1 – Chain 2 as the First HDC: From this round onward, the chain 2 counts as the first half double crochet.
Step 2 – Skip the First Space: Skip the very first space directly underneath the chain-2. Work your next HDC into the second stitch space.
This placement follows the revised joining method for the body rounds.
Step 3 – Continue Around: Work HDC into every stitch around the body.
Maintain the four-round color blocks, following the Pink, Gray, and Yellow sequence.
Step 4 – Reach Your Desired Length: Continue working the body rounds until the sweater reaches your preferred length.
Finish with a final four-round Pink color block and fasten off securely.
Part E: Sleeves
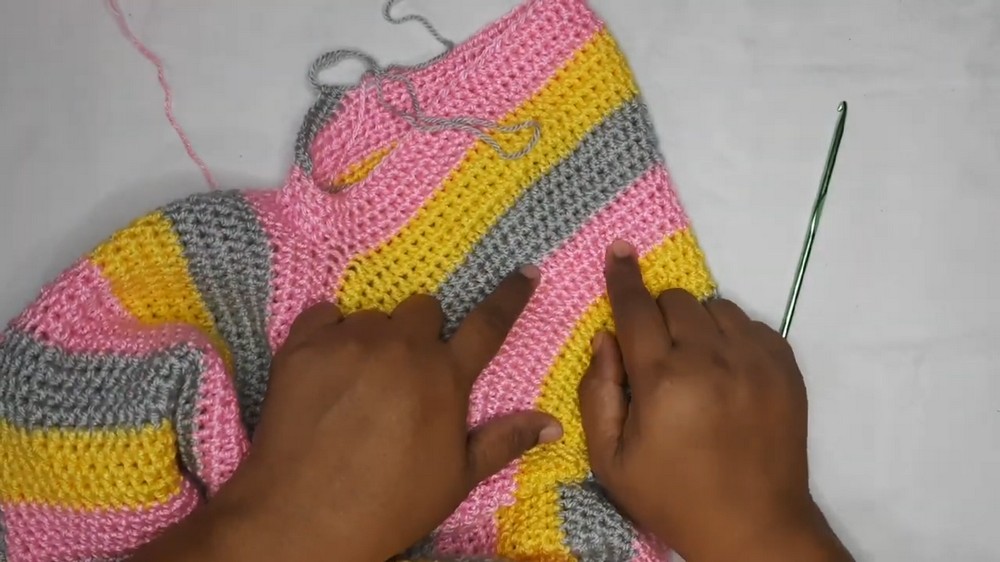
The sleeves are worked directly around the armhole openings. Both sleeves follow the same four-round color sequence used for the body.
Step 1 – Attach the Sleeve Yarn: Choose your starting sleeve color and attach the yarn at the exact center underarm stitch of one armhole ring.
Chain 2.
Step 2 – Work the First Sleeve Round: Work 1 HDC into every stitch around the armhole opening.
Make sure to pick up HDC stitches cleanly across the six-chain underarm bridge so there are no gaps beneath the arm.
Join with a slip stitch into the second chain.
Step 3 – Continue the Sleeve Color Blocks: Work complete four-round color sets down the length of the arm.
Follow the sequence: Pink → Gray → Yellow
Repeat the complete color sequence twice, using two full sets.
Step 4 – Alternative Straight Sleeve Positioning: If you want to avoid unwanted spiral twisting or shaping curves, alternate the starting position of each round.
- On odd-numbered rounds, work the first HDC directly in front of the chain-2 space.
- On even-numbered rounds, work the first HDC directly behind the chain-2 space.
Continue this adjustment when working the straight sleeve variation.
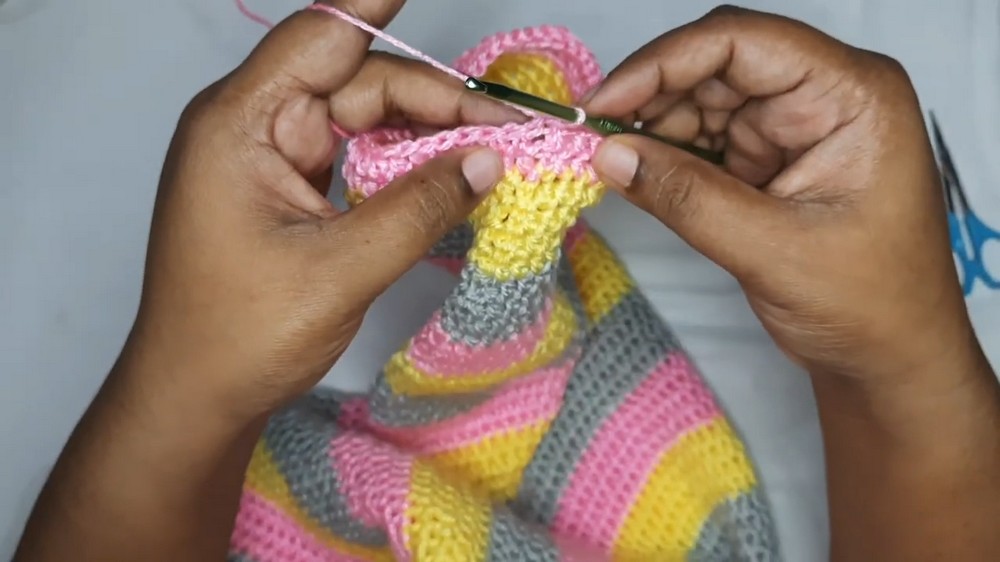
Step 5 – Finish the Sleeve Cuffs: Complete the sleeve with four rounds of Pink.
Join with a slip stitch, pull up a long yarn tail, and fasten off.
Repeat the same instructions for the second sleeve.
Assembly & Finishing Techniques
After completing the body and both sleeves, only a few finishing steps remain. Secure the yarn tails and check the neckline before preparing the sweater for its final shape.
Step 1 – Weave in the Yarn Tails
Thread your tapestry needle with the remaining yarn tails from the color changes.
Weave each tail neatly along the wrong side of the sweater, passing through the backs of the stitches to secure the ends.
Trim any excess yarn after weaving.
Step 2 – Inspect the Neckline
Check the 90-chain collar foundation to make sure it lies flat and evenly around the neckline.
The initial single crochet border provides the finished collar edge, so no additional edging is strictly required.
Step 3 – Final Pressing and Blocking
Gently block or smooth the completed pullover to help the half double crochet stitches settle into their final drape.
Allow the garment to retain its natural shape and let it dry completely if wet blocking is used.
Your three-color top-down crochet sweater is ready to wear!