How to Crochet a Mesh Top in Striped Pattern
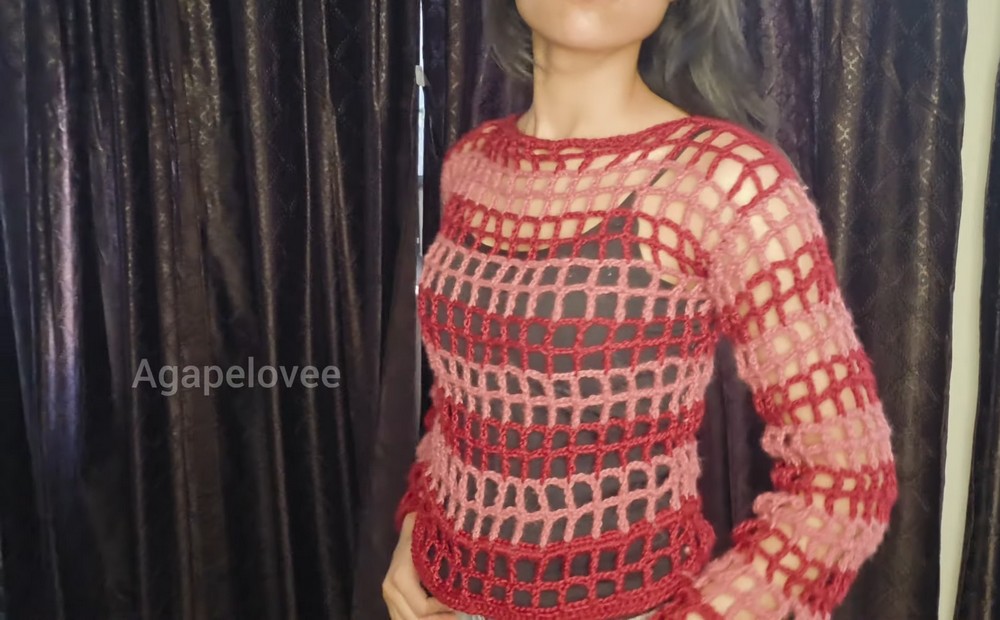
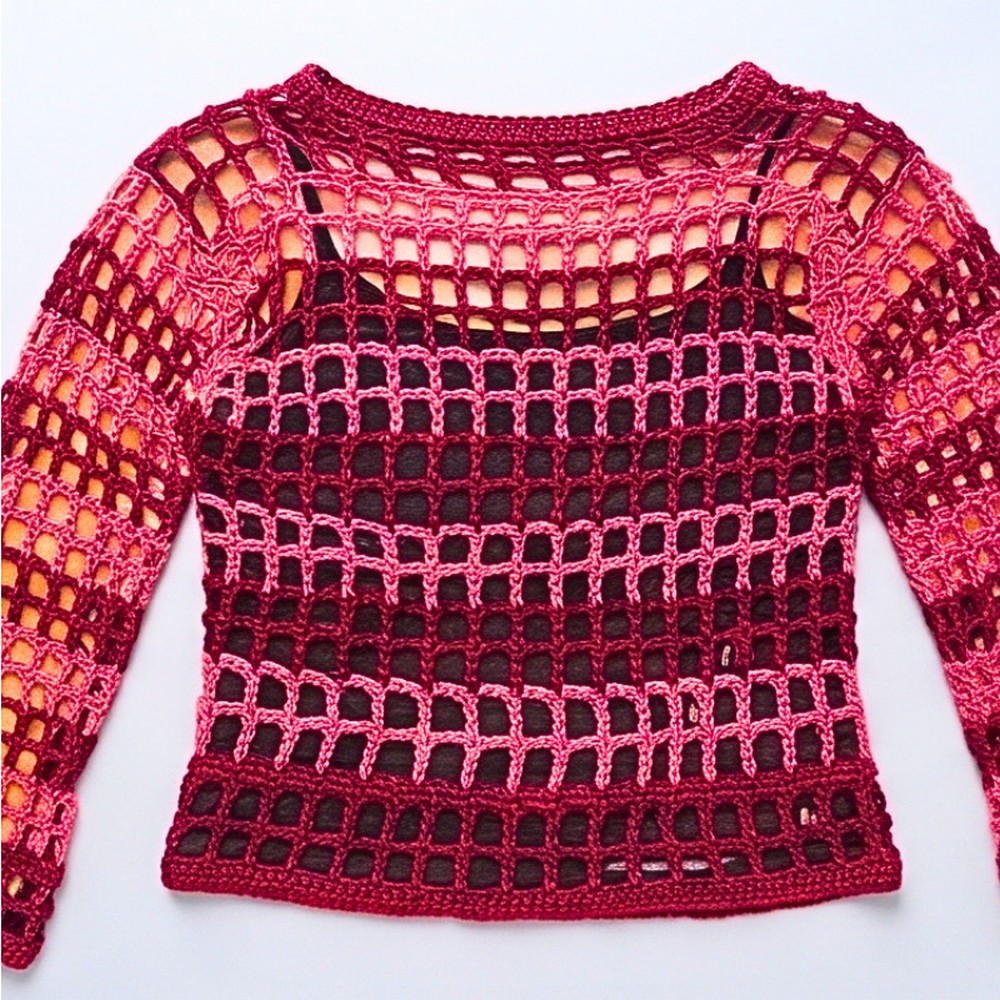
Make a lightweight striped mesh crochet top with an airy openwork design, two contrasting colors, and customizable sizing from small to extra-large.

A striped mesh crochet top is a lovely addition to a handmade wardrobe, especially when you want something lightweight with an open, relaxed texture. The mix of solid crochet rows and airy mesh sections creates a striped effect without complicated stitch patterns. With two contrasting yarn colors, you can give the top a fresh appearance while keeping the design simple and wearable.
Work this pattern in separate front and back panels, then join with two matching sleeves during assembly. You’ll begin with a double-crochet foundation, create the mesh with treble crochet stitches and chain spaces, and finish the body sections with half-double-crochet borders. The tutorial also includes four foundation-chain options, making it easier to choose a starting size and adjust your top or sleeve length. Let’s get started!
Credit Agape_love | crochet
Materials & Tools Needed
Prepare your supplies before starting so you can work through the body panels and sleeves without interrupting your crochet.
- Yarn: Two yarn colors, referred to throughout this pattern as Color A and Color B. Alternating these shades creates the striped mesh appearance.
- Crochet Hook: 4.00 mm crochet hook.
- Yarn Needle: For sewing the shoulder seams, side seams, and sleeves together.
- Scissors: For cutting the yarn when changing colors and finishing the pieces.
Finished Size & Customization Ideas
The demonstrated top is made in a Small size, but the foundation chain can be adjusted to create four different starting sizes.
Foundation Chain Options:
- Small: 72 chains
- Medium: 92 chains
- Large: 102 chains
- Extra-Large: 122 chains
Your starting chain count must be divisible by 4, so keep this pattern requirement in mind if you make any further adjustments.
Adjusting the Length: You can increase or decrease the total number of rows to change the length of the body and sleeves. Continue adding mesh rows for a longer top, or finish earlier if you prefer a shorter design.
Creating the Stripes: Alternate Color A and Color B every two mesh rows to achieve the striped appearance shown in the tutorial. The body can also follow the demonstrated color sequence of four rows in Color A and five rows in Color B, or another preferred arrangement.
Sleeve Customization: The sleeve foundation chain is 60 chains. You can adjust this starting length to match your measurements if you need a different sleeve width.
Pattern Abbreviations & Terminology
- Ch: Chain stitch
- Dc: Double crochet
- Tr: Treble (triple) crochet (yarn over hook twice)
- Hdc: Half double crochet
- St(s): Stitch(es)
Step-by-Step Detailed Crochet Instructions
The top consists of two matching body panels and two sleeves. First, crochet the front panel, repeat the same instructions for the back, then make the sleeves before joining all the pieces.
Part 1: Front Panel (Make 1)
Begin with Color A and your 4.00 mm crochet hook. Choose your desired starting size from the foundation-chain options before starting the first row.
Step 1 – Make the Foundation Chain: Create a slip knot using Color A and place it on your crochet hook. Work the foundation chain according to your chosen size:
- Small: 72 chains
- Medium: 92 chains
- Large: 102 chains
- Extra-Large: 122 chains
Make sure your selected starting chain count is divisible by 4.
Step 2 – Row 1: Double Crochet Base: Add 3 extra chains for turning. Skip the first 3 chains from your hook and work 1 double crochet into the fourth chain. Continue making 1 double crochet into each remaining chain across the entire row.
This creates the solid foundation for the open mesh pattern that follows.
Step 3 – Row 2: Mesh Setup: Chain 6 and turn your work. Yarn over your hook twice, skip 3 stitches, and work 1 treble crochet into the fourth opening. Chain 3.
Repeat the following sequence across the row:
Skip 3 stitches, work 1 treble crochet into the fourth opening, and chain 3.
At the end of the row, finish with a chain 3 and work 1 final treble crochet into the turning space.
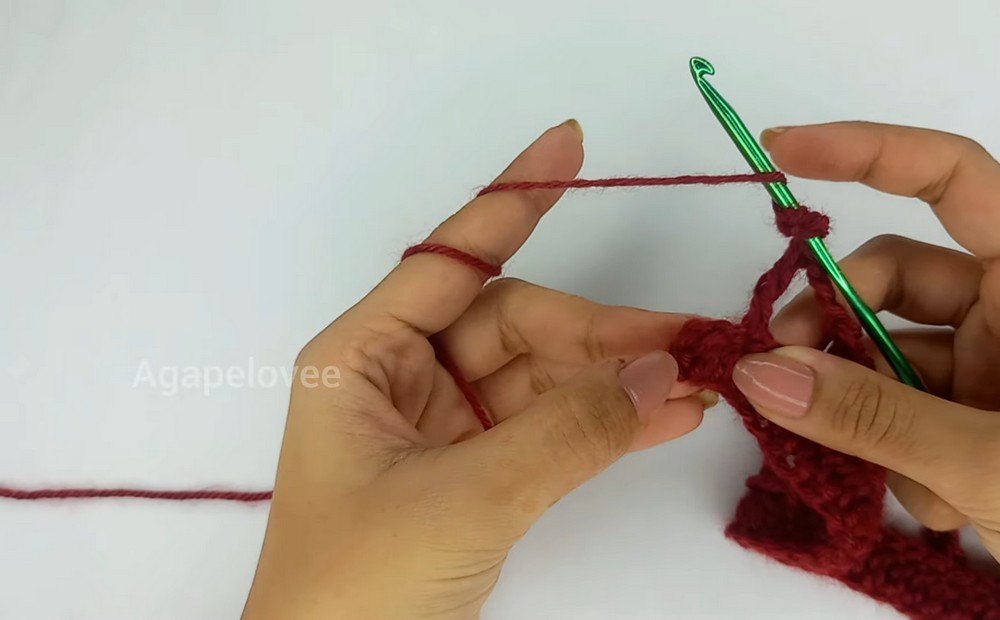
Step 4 – Row 3: Mesh Continuation: Chain 6 and turn your work. Yarn over your hook twice and work 1 treble crochet directly into the top of the previous row’s treble stitch.
Chain 3, then work another treble crochet over the next treble stitch. Continue repeating this treble crochet and chain-3 sequence across the row to maintain the open mesh pattern.
Step 5 – Row 4: Solid Border: Chain 1 and turn your work. Begin working into the mesh gaps or squares.
Work 3 half double crochets into each mesh gap. Then work the next half double crochet directly into the top of the previous treble stitch.
Continue following this arrangement across the row to complete 18 squares or sections.
This row creates a more solid edge between the mesh sections and prepares the panel for the next color block.
Changing Colors and Continuing the Front Panel
Once Row 4 is complete, you can introduce Color B and continue building the striped pattern.
Step 6 – Finish Color A: At the end of Row 4, chain 1 and pull up a long loop. Cut Color A and secure the yarn end.
Step 7 – Attach Color B: Make a slip knot with Color B and attach it to begin the next section. Chain 6 and turn your work.
Step 8 – Work the Color B Mesh Rows: Complete 2 rows of the treble crochet mesh pattern using Color B. Follow the same chain-6 turning method, treble crochet stitches, and chain-3 spaces established in the previous mesh rows.
Step 9 – Add the Half Double Crochet Border: After completing the two mesh rows, work a half double crochet border row using the same arrangement as Row 4.
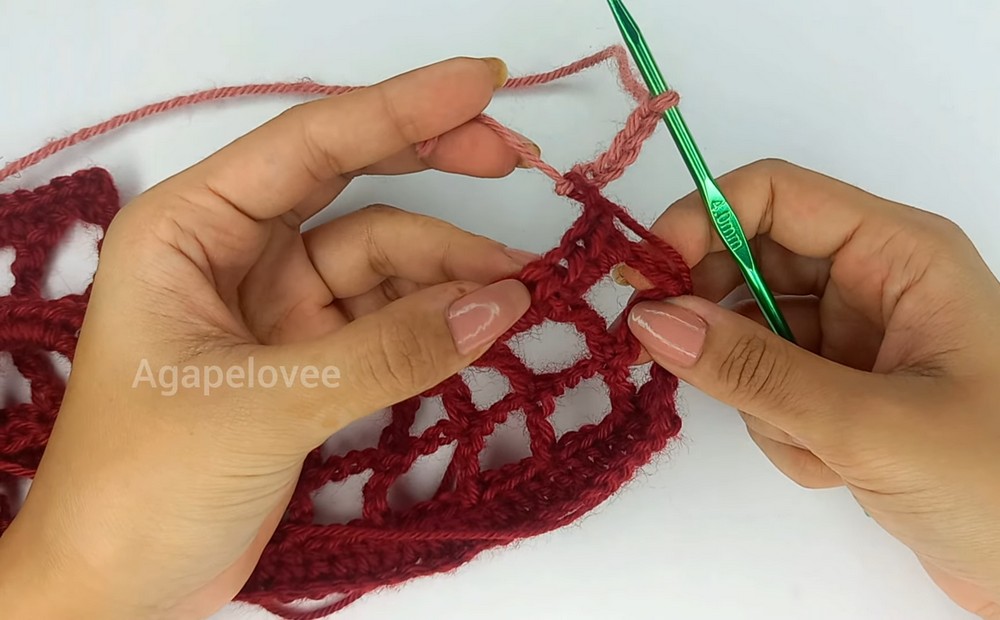
Step 10- Alternate the Color Blocks: Continue alternating Color A and Color B to build the remaining body length. The demonstrated sequence uses 4 rows of Color A and 5 rows of Color B, although you can follow your preferred color arrangement.
Keep the mesh rows and solid border rows in their established sequence as you work through the panel.
Step 11 – Finish the Front Panel: When the panel reaches your desired length, complete the final row with 3 half double crochets in each square and 1 half double crochet in the final treble stitch.
Fasten off securely and leave the panel ready for assembly.
Part 2: Back Panel (Make 1)
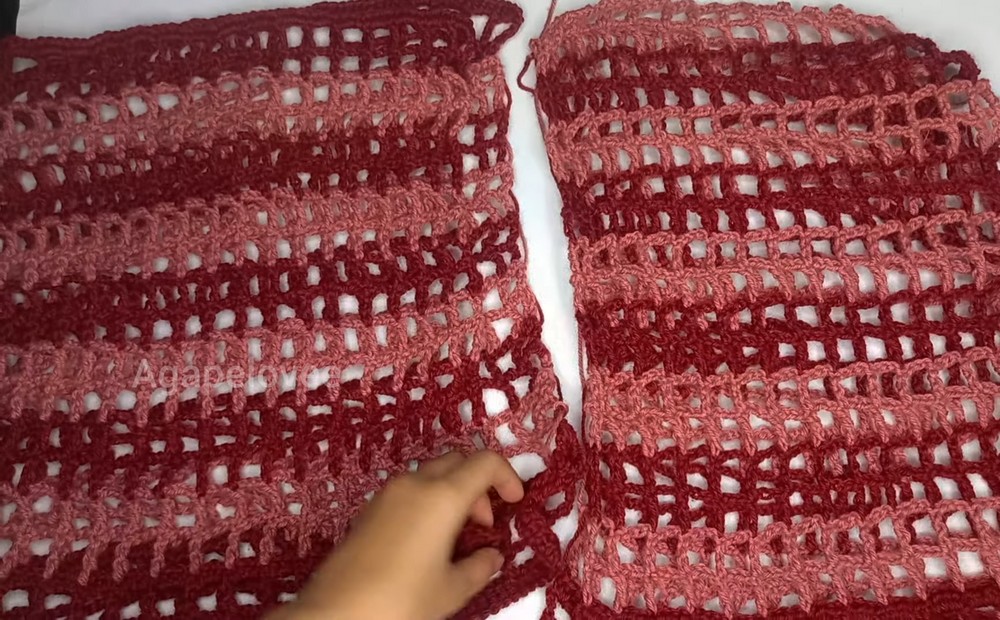
The back panel uses the same construction as the front, so maintaining the same stitch pattern and color sequence will help the two pieces match.
Step 1 – Start with the Same Foundation Chain: Use the same size as the front panel and make the corresponding foundation chain in Color A.
Step 2 – Repeat the Double Crochet Base: Work Row 1 using double crochet stitches across the foundation chain, following the same turning-chain instructions.
Step 3 – Recreate the Mesh Pattern: Repeat Rows 2 and 3 with treble crochet stitches and chain-3 spaces. Maintain the same stitch placement and turning method.
Step 4 – Work the Border and Color Changes: Complete the half-double crochet border row, introduce Color B, and continue alternating colors using the same sequence as the front panel.
Step 5 – Match the Finished Length: Continue until the back panel matches the front in length. Finish with the same final half double crochet border and fasten off securely.
Set both panels aside for assembly.
Part 3: Sleeves (Make 2)
The sleeves use the same mesh construction as the body panels but start with a different foundation chain count. Unlike the body, the sleeves do not have a final half double crochet border row.
Step 1 – Make the Sleeve Foundation Chain: Make a slip knot and chain 60. Adjust the chain length to your measurements if needed.
Step 2 – Work the Double Crochet Base: Complete 1 row of double crochet across the foundation chain, following the same base-row technique used for the body panels.
Step 3- Create the Mesh Rows: Begin the treble crochet mesh pattern. Chain 6 to turn your work, then work treble crochet stitches separated by chain-3 spaces.
Continue alternating mesh rows, changing colors every 2 rows to coordinate the sleeves with the main body.
Step 4 – Finish the Sleeve Without a Border: Unlike the front and back panels, don’t add the final half-double crochet border row to the sleeve.
Instead, finish with the final treble crochet mesh row. Pull up a long loop, cut the yarn, and secure the tail ends by tying three firm knots.
Step 5 – Make the Second Sleeve: Repeat the same foundation chain, double crochet base, mesh rows, color changes, and finishing method to create an identical second sleeve.
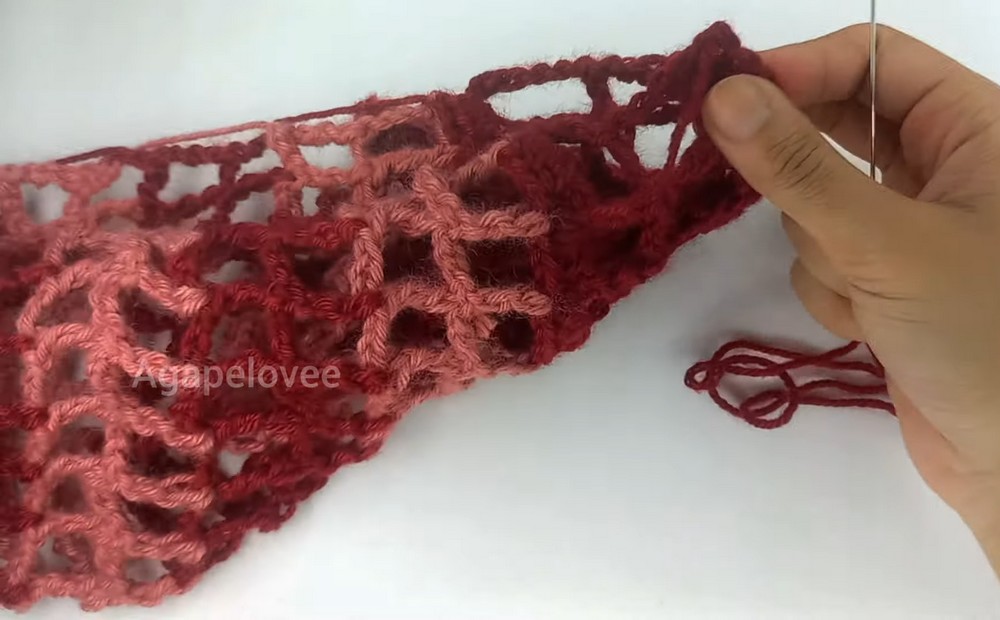
Part 4: Assembly & Finishing Techniques
With both body panels and sleeves complete, join the pieces to form the finished top. Take your time positioning the panels and sleeves before sewing so the seams and armholes are aligned properly.
Step 1 – Sew the Shoulder Seams
Lay the front and back panels together, wrong sides facing out. This positioning keeps the seam on the right side once the garment is turned.
Using a yarn needle and matching yarn, sew the top shoulder edges together on both sides. Leave the center section open to create the neckline.
Secure the yarn carefully so the shoulder seams remain firmly joined.
Step 2 – Mark the Armhole Positions
Starting at the shoulder seam, measure down both sides and skip 3 rows on each side.
These unseamed sections will sbecomethe armholes where tyou’ll attach the sleeves
Keep the openings aligned on both sides so the sleeves sit evenly.
Step 3 – Sew the Side Seams
Start at the bottom hem and sew the front and back panels together along one side, working up to the base of the 3 skipped armhole rows.
Secure the yarn with tight knots and trim any excess.
Repeat the same process along the opposite side. If needed, count 5 squares inward from the edge to help align the rounded armhole shape.
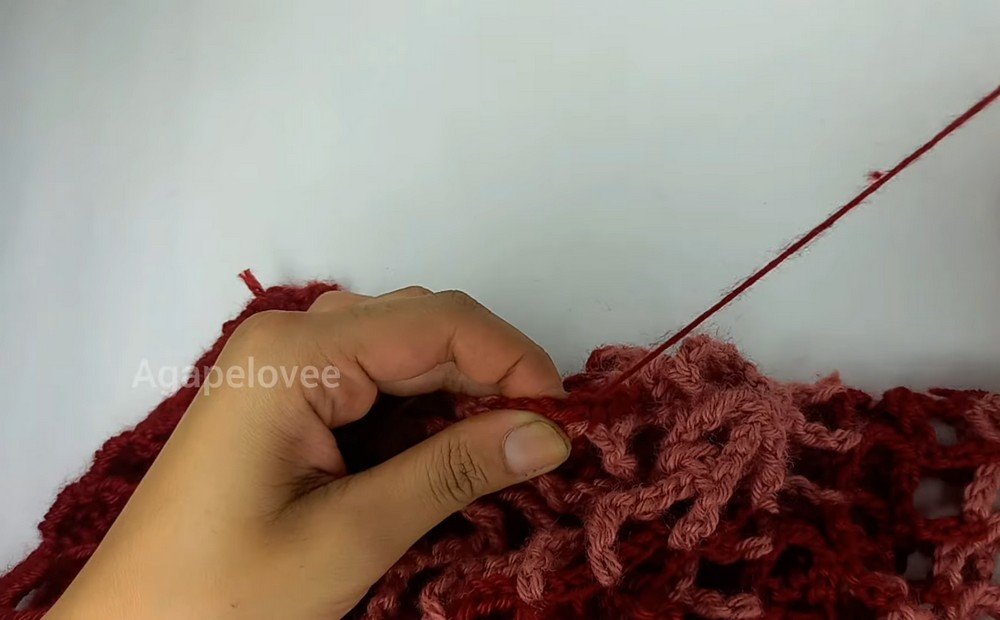
Step 4 – Attach the Sleeves
Fold each sleeve and position it inside the circular armhole opening. Align the wrong side of the sleeve with the wrong side of the body.
Using your sewing needle and matching yarn, sew the sleeve all the way around the armhole opening.
Work carefully around the entire opening to ensure the sleeve is securely attached and evenly positioned.
Repeat with the second sleeve.
Step 5 – Secure the Remaining Yarn Ends
Check all shoulder, side, and sleeve seams for loose yarn tails. Fasten off the remaining ends securely using multiple knots, then weave them into the seams with your yarn needle.
Trim any excess yarn after securing the ends.
Your striped mesh crochet top is now assembled and ready to wear!