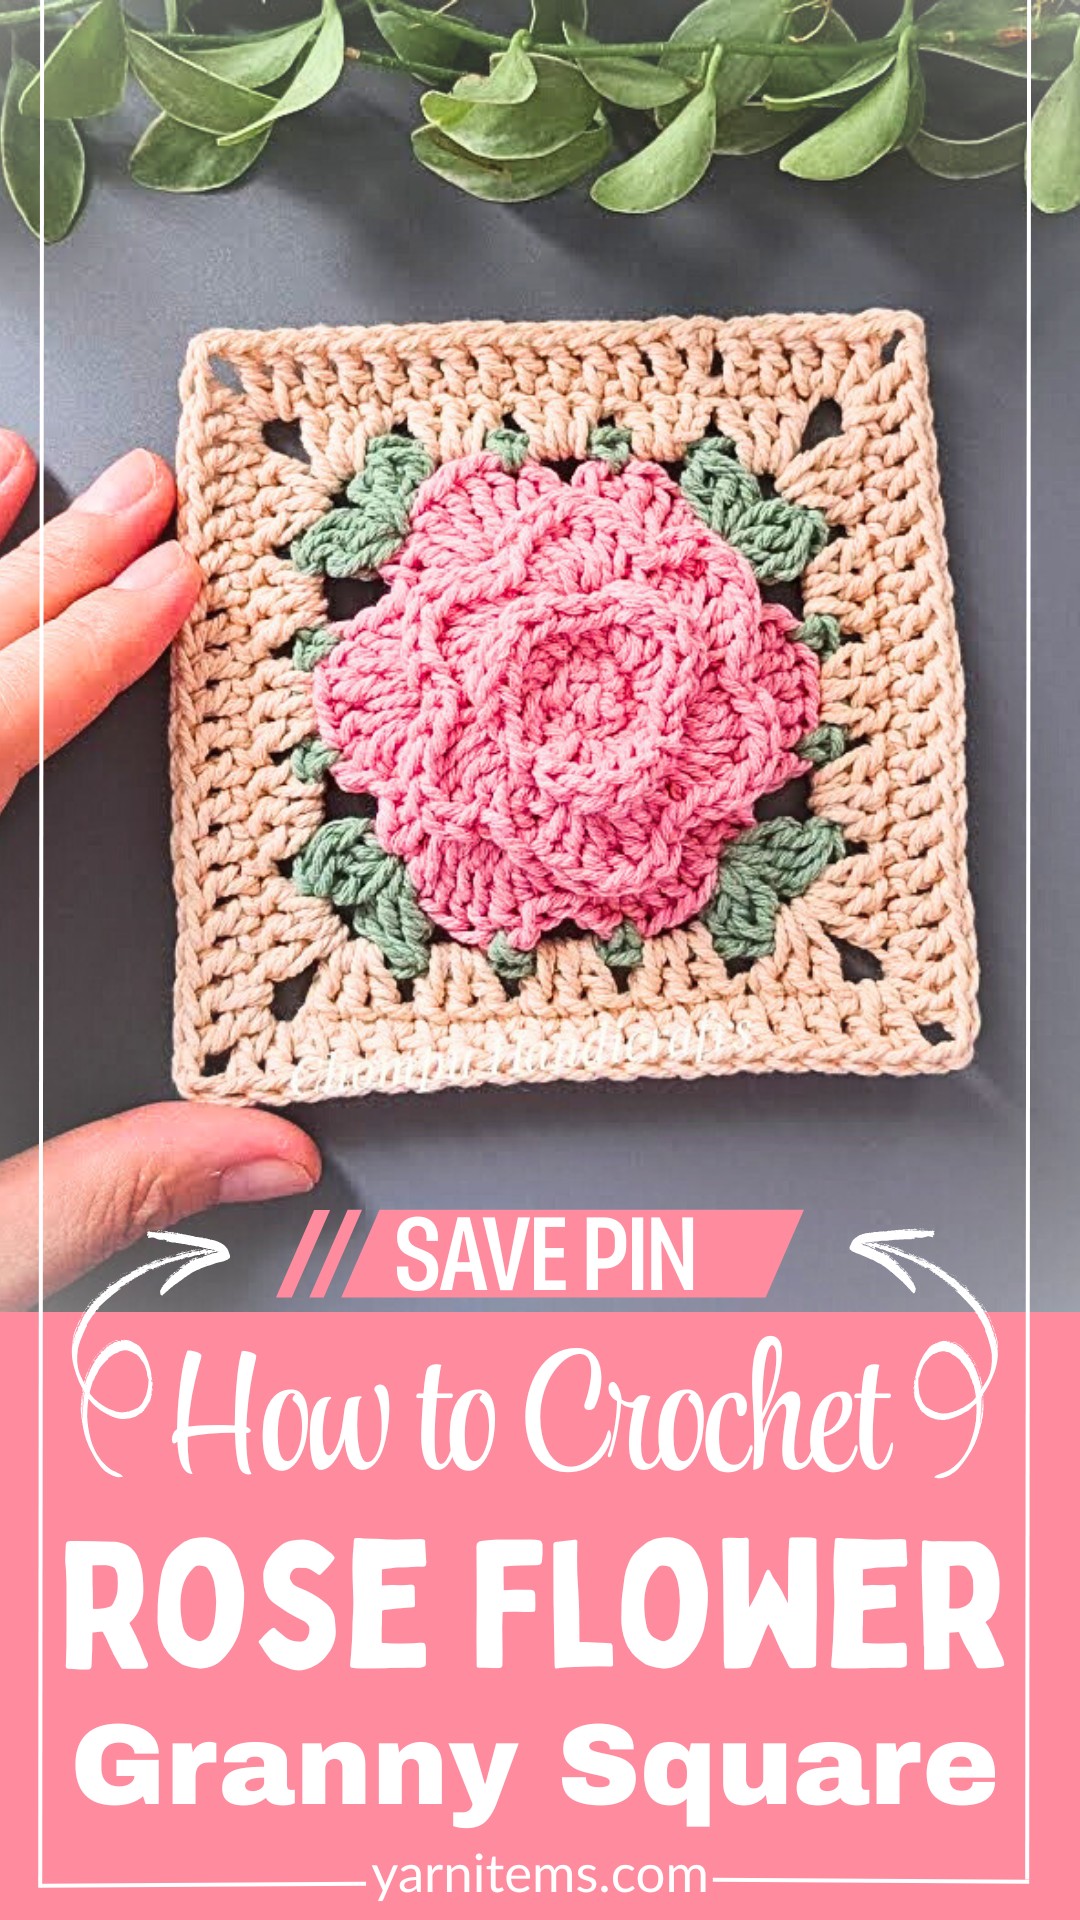
This beautiful Crochet Rose Granny Square combines a blooming 3D flower with a classic square backdrop, making it perfect for blankets, cushions, or decorative accents.

The Crochet Rose Flower Granny Square is an elegant and versatile crochet pattern, perfect for anyone who loves adding floral beauty to their creations. It features a lovely rose design in the center, surrounded by a classic square border, combining the timeless charm of flowers with the structure of a granny square. This rose granny square is ideal for making blankets, cushion covers, or decorative accents for your home.
How to Crochet a Rose Flower Granny Square
You can use these crochet squares in so many ways. Even a single square makes a lovely coaster or small display piece. The process of making a crochet rose granny square is simple yet satisfying. Starting from the rose in the center, you’ll build outward to create the square. The combination of soft petals and structured edges will inspire all crocheters.
Credit Chompu Handicrafts
- Begins with a small center ring that becomes a layered rose worked in the round
- Uses basic stitches (chains, single crochet, double crochet) to build dimensional petals
- Petals are worked in overlapping rounds to create a full, 3D flower effect
- Background is added around the rose to “square off” the motif into a traditional granny shape
- Ideal for joining blankets, cushions, bags, or as a decorative accent
How To Make:
The rose granny square starts with a simple center ring, usually made from chains joined into a circle. This little ring is the foundation for the entire flower. From there, you’ll work the first round of stitches directly into the ring, using basic stitches like chains and double crochets to form the base for your first set of petals. It’s all done in the round, so you’re constantly spiraling out from the middle, which keeps the flower neat and centered.
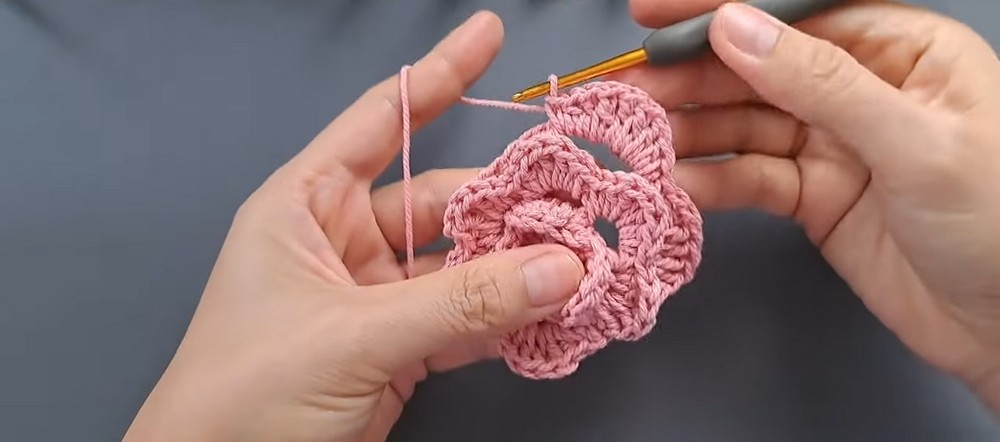
Next, the pattern builds up rounded petals by working into specific loops or spaces from the previous round. Often, the designer will have you crochet a round of chain “stems” or back-loop-only stitches behind the petals to anchor the next layer. This clever construction lets each new round of petals sit slightly above or behind the previous ones, giving that lovely layered effect without becoming bulky or messy.
As you add more rounds, the rose grows fuller and more dimensional. The petals are shaped with combinations of double crochets (or taller stitches) worked into the same stitch or space, which makes them fan out and curve naturally. The petals are usually grouped evenly around the center, so the flower looks balanced from every angle. By the time you finish the last petal round, you have a soft, 3D rose that looks like it’s blooming right off your hook.
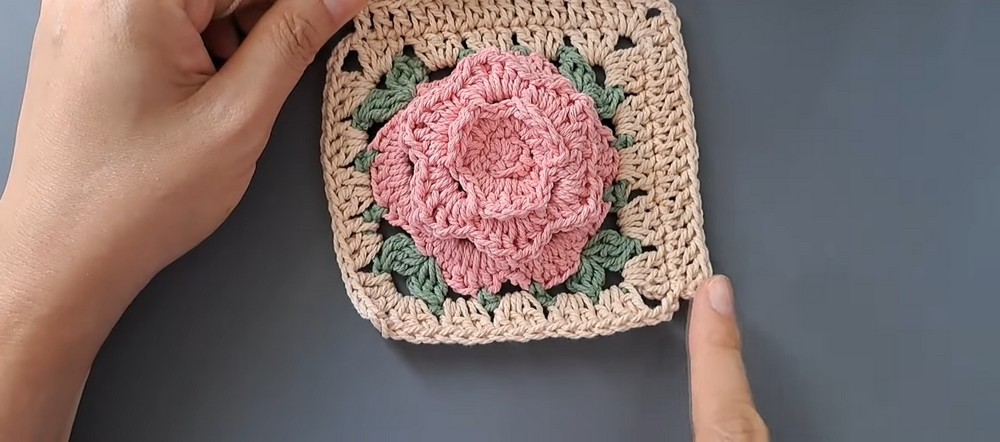
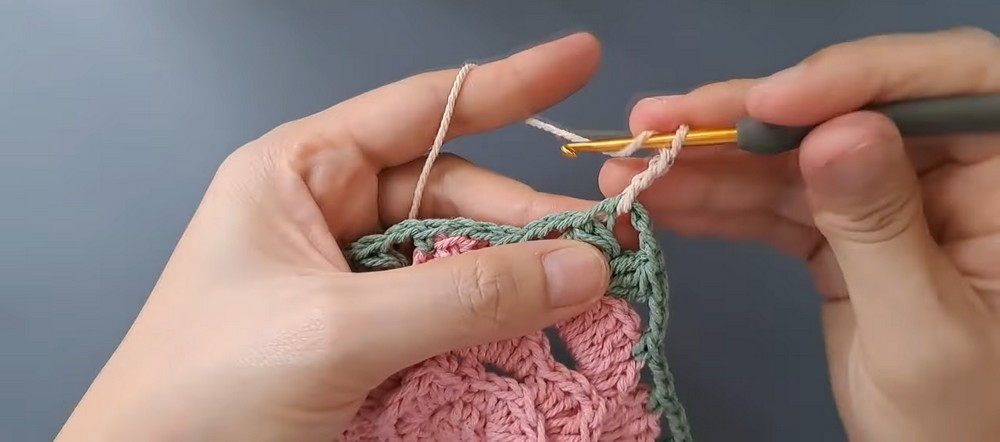
Once the flower is complete, the pattern transitions into building the square background. This is where you start to see the familiar granny square structure appear. Typically, you’ll crochet into designated spaces behind or between the petals, working clusters or sets of stitches on each side, with extra stitches and chain spaces at the corners to form a neat square. This part “locks in” the rose so it stays centered and stable, while also framing it with a flat, easy-to-join border.
You’ll finish with a final round or two around the edge to smooth out the square and prepare it for joining. Depending on the pattern, this might be a simple round of double crochets, granny clusters, or a more decorative edging. At this stage, you can stop with just one square as a standalone motif, or make several and join them into a larger pattern like a blanket, pillow cover, or even a bag panel.

Video Tutorial
Materials
Before you start, make sure you have everything you need:
- Yarn: Choose a worsted-weight yarn in two colors—one for the rose (e.g., pink or red) and another for the square background (e.g., green or white).
- Crochet Hook: A 4.0mm (G/6) crochet hook works well for worsted-weight yarn.
- Optional Tools: Scissors, a yarn needle for weaving in ends, and stitch markers if needed.
- Extras: Blocking mats if you plan to block your square for a polished finish.

Stitch Guide
Here are the basic stitches and techniques you’ll need:
- Chain (ch): Make a loop by pulling yarn through the existing loop.
- Slip Stitch (sl st): Insert hook into stitch, yarn over, pull through both loops on the hook.
- Single Crochet (sc): Insert hook into stitch, yarn over, pull up a loop, yarn over, pull through both loops.
- Double Crochet (dc): Yarn over, insert hook into stitch, yarn over, pull up a loop, yarn over, pull through two loops, yarn over, pull through last two loops.
- Treble Crochet (tr): Yarn over twice, insert hook into stitch, yarn over, pull up a loop, (yarn over, pull through 2 loops) three times.
Notes
- Gauge: Adjust your hook size if your stitches are too tight or too loose. You can also use fine-weight yarn for a more delicate rose or chunky yarn for a cozy, oversized square.
- Customization: Mix and match yarn colors for a unique touch, or sew beads in the center of the rose to add sparkle.
- Blocking: After completing the square, block it to ensure the edges are even and the rose lays flat.

Pattern Question
Question: What type of yarn works best for the Crochet Rose Flower Granny Square?
Answer: A medium-weight yarn, such as worsted, is ideal for this pattern as it provides the structure needed for the rose design while maintaining a soft and cozy feel.
Troubleshooting and Suggestions
- Petals look uneven or floppy: Make sure you’re placing each petal stitch into the correct loop or space. Keeping an even tension on your double crochets will help petals sit uniformly. If they’re very loose, try going down a hook size.
- Rose not sitting flat: A slight 3D lift is normal, but if it’s overly bulky, you may be adding too many stitches per petal or working too tightly. Relax your tension or check that you’re not accidentally doubling the number of clusters.
- Square looks wavy or ruffled: This often means there are too many stitches on the outer rounds. Count your stitches on each side and check that your corner stitches match the pattern’s instructions.
- Color changes with messy joins: When switching from flower color to background color, change colors in the final pull-through of the last stitch in the old color. Tighten both tails gently and weave them in securely behind petals for a hidden finish.