Crochet Granny Square Tote Bag Design Free
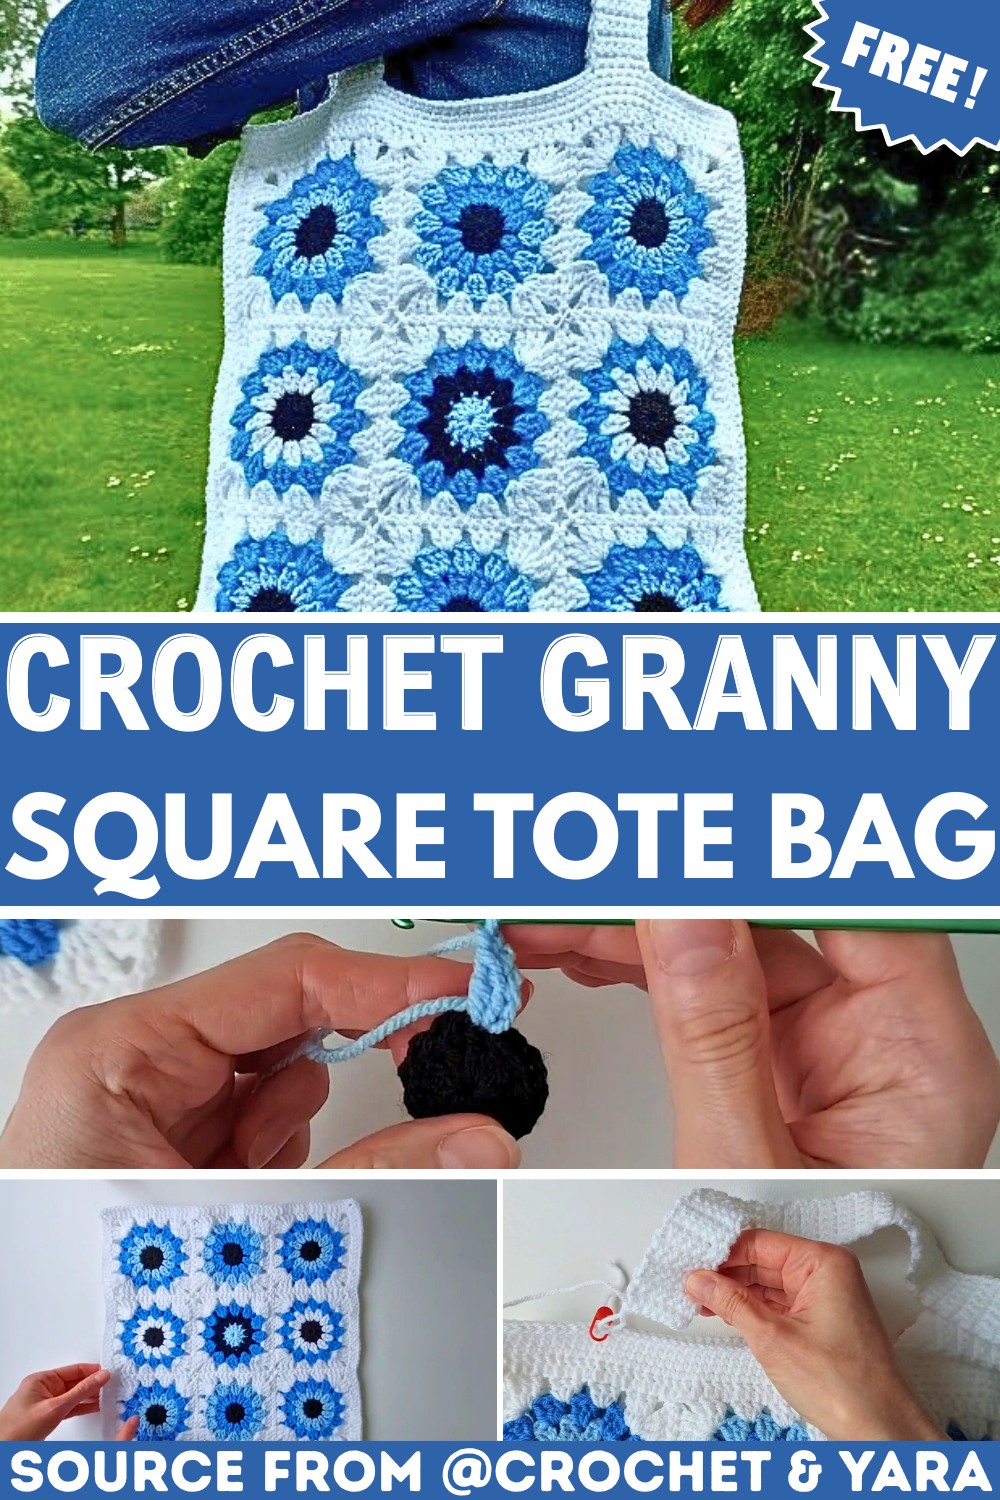
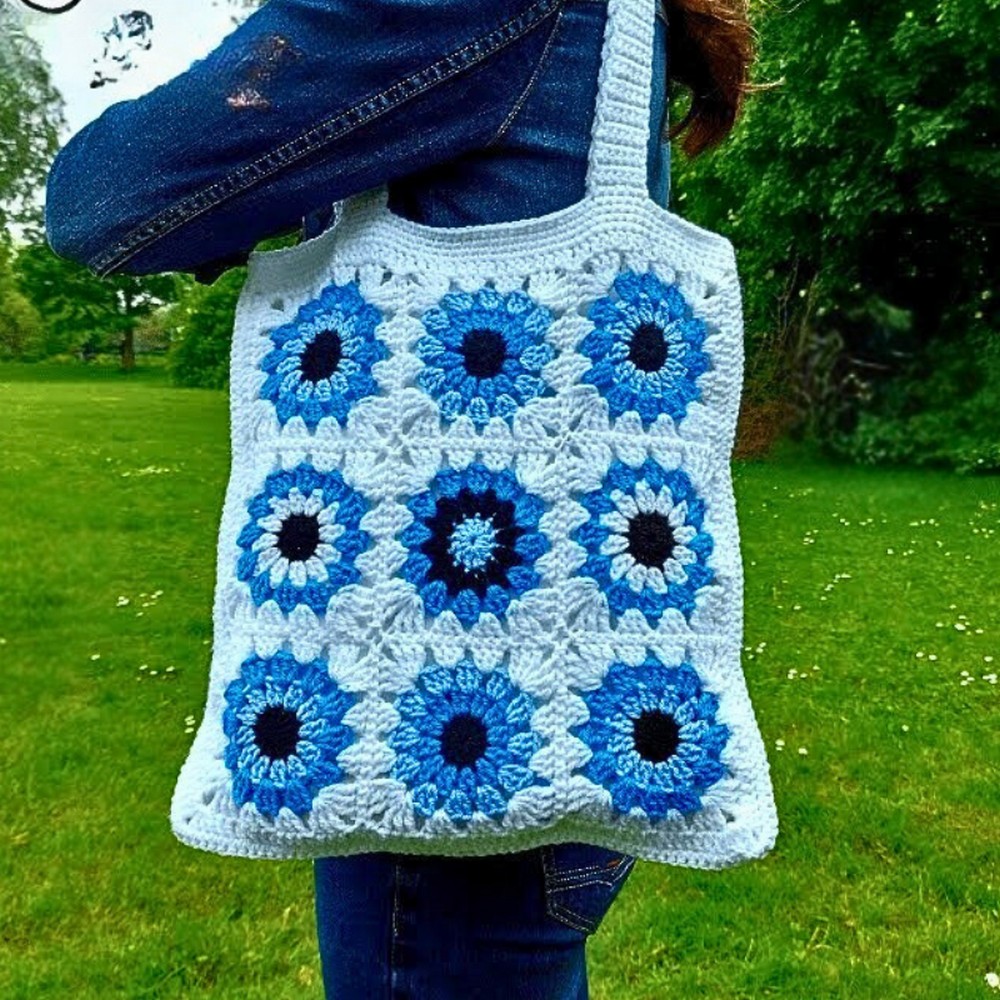
Nothing transforms simple crochet into a stylish everyday piece quite like a Granny Square Tote Bag. Bright granny squares come together to create a colorful item that feels both classic and modern.
The textured design adds handmade charm while keeping the bag practical for regular use. Every detail gives this crochet piece a warm and eye-catching finish.
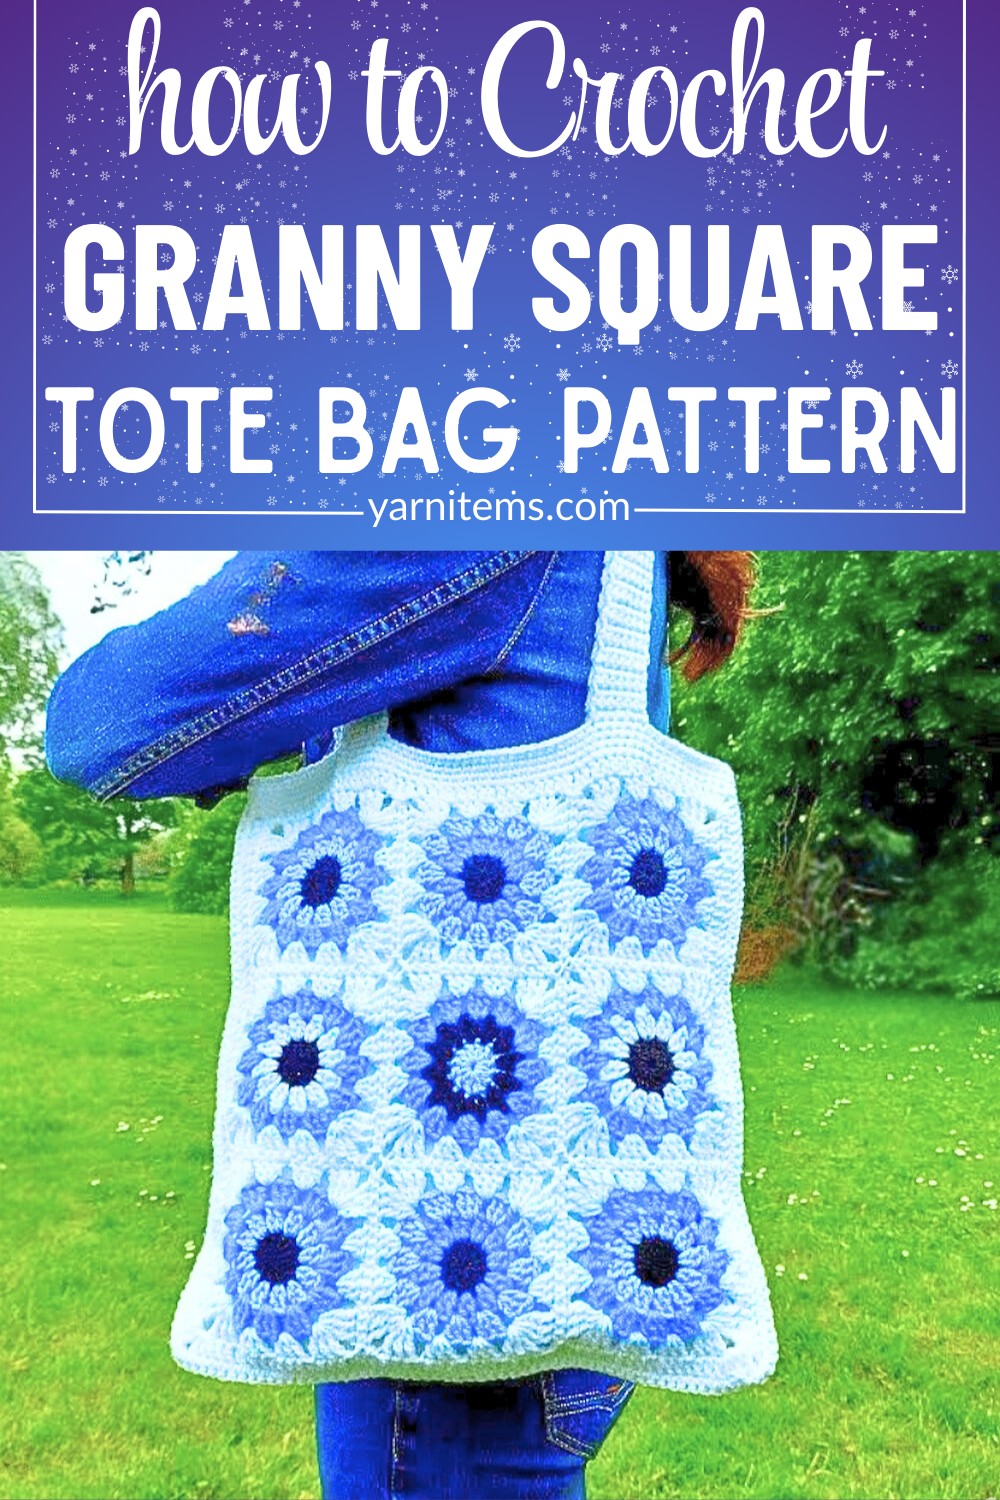
One look is enough to see why this crochet tote bag has remained a favorite for years. Its roomy shape makes it ideal for carrying books, groceries, or daily essentials without sacrificing style.
The sturdy construction offers reliable support while the cheerful pattern brings personality to every outfit. This beautiful crochet piece blends creativity with everyday convenience in the most effortless way.
Credit Crochet & Yara
Materials & Tools Needed
- Yarn (DK / Light Worsted, 100g / 241m per skein):
- Main / Joining / Border / Strap Color (White): 1 Skein
- Outer Circle Color (Medium Blue): 0.5 Skein
- Inner Circle Color (Light Blue): 0.5 Skein
- Center Color (Black): Small amount or scraps
- Crochet Hook: 3.5 mm
- Tapestry Needle / Darning Needle
- Scissors
- Stitch Markers: 2 markers (or use yarn scraps as substitutes)
Finished Size & Customization Ideas
- Square Motif Size: Each sunburst granny square measures approximately 10 cm x 10 cm.
- Bag Panels:
- Grid layout: 3 x 3 per panel (9 squares per panel; 18 squares total).
- Strap Length: Approximately 45 cm long (customizable by adding/removing SC rows).
- Color Customization:
- You can reverse or alternate colors for the inner and outer rings of the granny squares.
- Use the same stitch pattern regardless of your color placement.
Pattern Notes
- Construction Steps:
- Create 18 sunburst / evil-eye granny squares as individual motifs.
- Join squares into two 3×3 panels (per side of the bag) using a tapestry needle.
- Work a double crochet border around each full panel.
- Join the two panels along their side and bottom edges with Single Crochet.
- Add a single crochet band around the top opening of the bag.
- Finally, work the straps directly onto the top edge.
- Turning Chains:
- Ch 3 (Chain 3): Counts as a Double Crochet (Dc) throughout.
- Ch 4 (Chain 4): Counts as a Treble Crochet (Trc) throughout.
Pattern Abbreviations & Terminology
- MR: Magic Ring
- Ch: Chain
- Sl St: Slip Stitch
- Sc: Single Crochet
- Dc: Double Crochet
- Trc: Treble Crochet (Yarn over twice)
- Sp / Sps: Space / Spaces
- St / Sts: Stitch / Stitches
Tips Before You Start
- Weave Ends Early:
Weave in yarn tails at the end of each round or square using a tapestry needle to save assembly time later. - Consistent Tension:
Keep your tension uniform so all 18 squares match in dimensions before joining. - Color Variations:
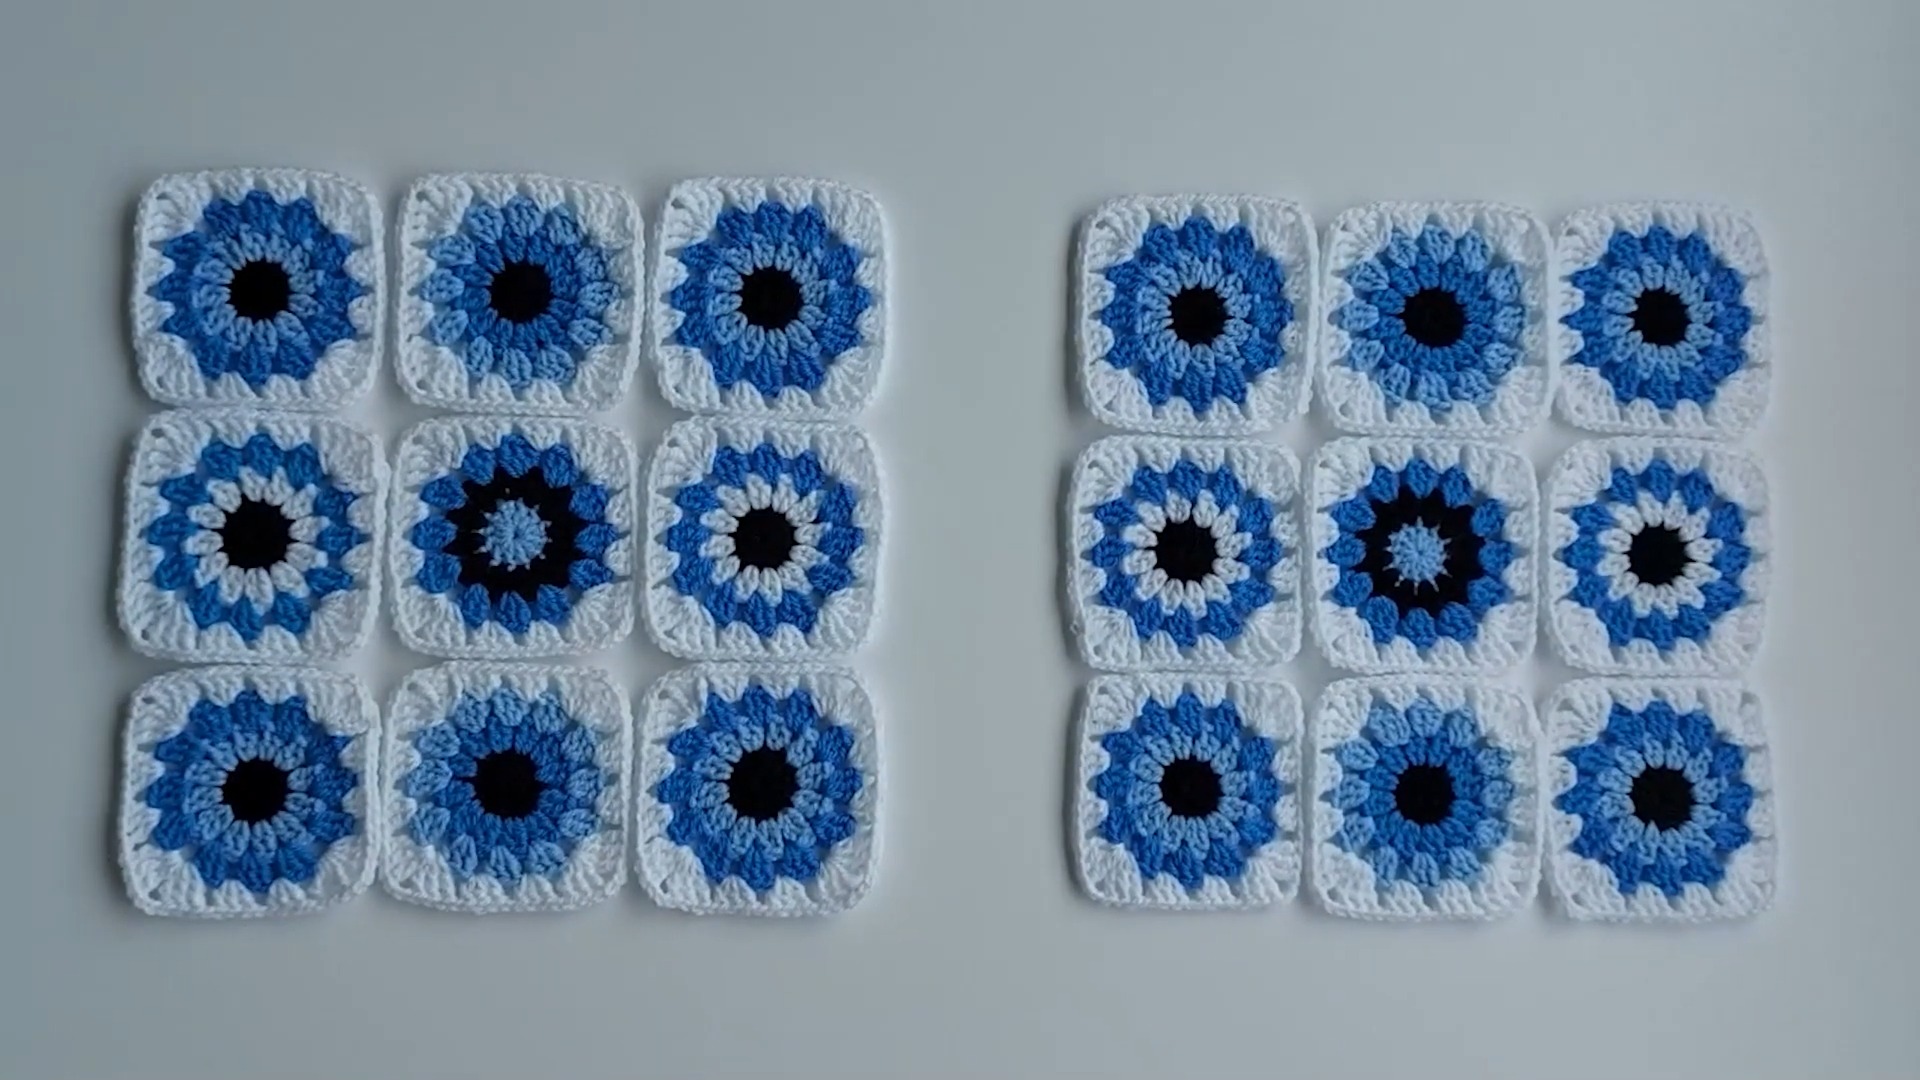
Create 4 variations of color arrangement for a visually interesting pattern across the 18 squares.
Step-by-Step Crochet Instructions
1. Making the Sunburst Granny Square Motif
You will be making 18 squares total for this bag.
Round 1 (Center – Black Yarn)
- Start with a Magic Ring using black yarn.
- Ch 3 (counts as the 1st Dc).
- Work 11 Dc into the magic ring.
- Pull the tail tightly to close the magic ring.
- Join with a Sl St to the 3rd chain of the initial Ch 3.
- Ch 1, cut yarn, and pull through.
- Weave in the tail.
Total Stitch Count: 12 Dc.
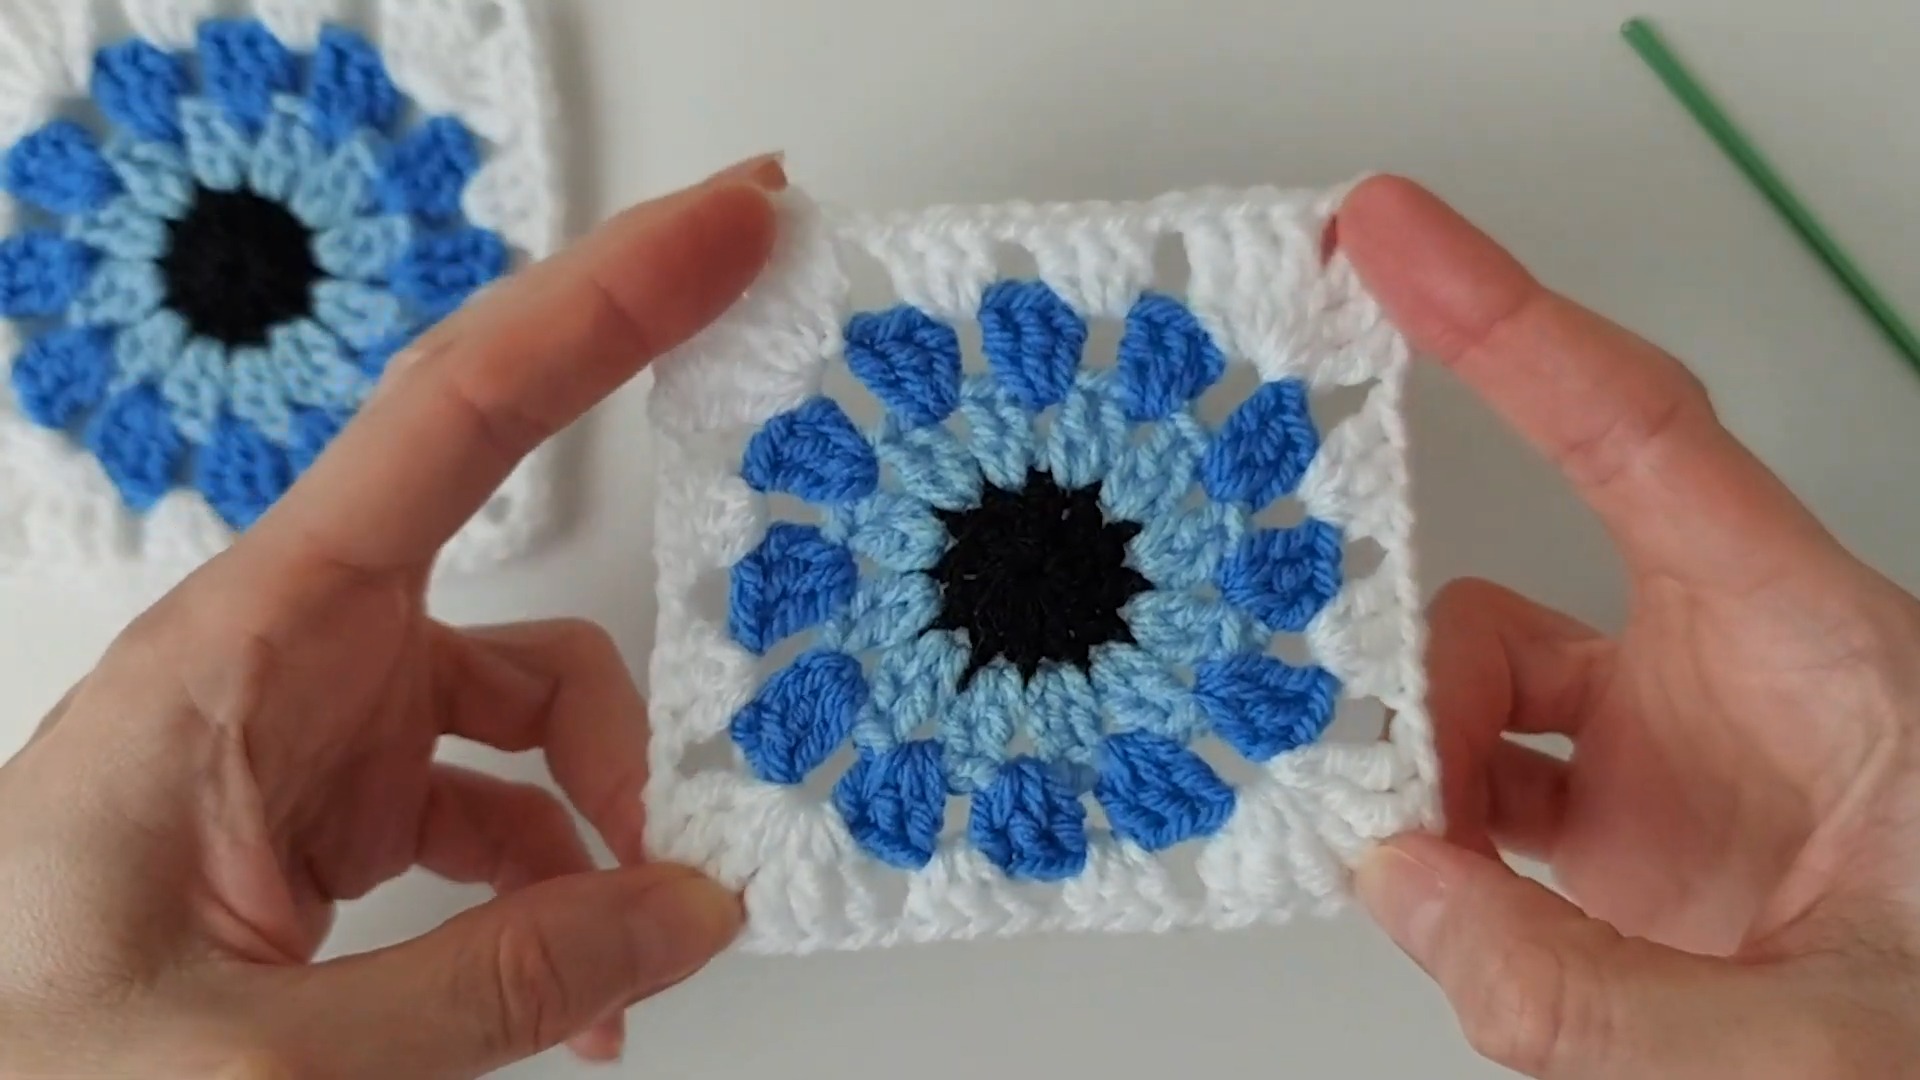
Round 2 (Light Blue Yarn)
- Fasten light blue yarn onto your hook with a slip knot and attach to any Dc stitch from Round 1.
- Ch 3, 1 Dc into the same space (counts as a 2-Dc group).
- Ch 1.
- (2 Dc in the next st, Ch 1) — Repeat in each stitch around.
- Join with a Sl St to the top of the initial Ch 3.
- Ch 1, cut yarn, and weave in ends.
Total Stitch Count: 12 groups of (2 Dc, Ch 1).
Round 3 (Medium Blue Yarn)
- Fasten medium blue yarn with a slip knot and attach to any Ch-1 space from Round 2.
- Ch 3, 2 Dc into the same Ch-1 space (counts as a 3-Dc group).
- Ch 1.
- (3 Dc into the next Ch-1 space, Ch 1) — Repeat in each Ch-1 space around.
- Join with a Sl St to the 3rd chain of the initial Ch 3.
- Ch 1, cut yarn, and weave in ends.
Total Stitch Count: 12 clusters of (3 Dc, Ch 1).
Round 4 (Squaring the Circle – White Yarn)
- Attach white yarn into any Ch-1 space from Round 3 with a slip knot.
First Corner:
- Ch 4 (counts as Trc), 2 Trc, Ch 2, 3 Trc, Ch 1 into the same Ch-1 space.
Side Sections:
- (3 Dc, Ch 1) into each of the next two Ch-1 spaces.
Second Corner:
- (3 Trc, Ch 2, 3 Trc, Ch 1) into the next Ch-1 space.
Repeat the same sequence for the third and fourth corners, with 2 sides of (3 Dc, Ch 1) between each corner.
- Join with a Sl St to the 4th chain of the initial Ch 4.
- Ch 1, cut yarn, and weave in ends.
Motif Result: 1 square with 4 corners and 2 side granny groups per side.
2. Panel Joining & Border
Joining Squares into Two Panels (3×3 Grid)
- Lay out 9 Sunburst Granny Squares in a 3×3 layout for Panel A and another 9 squares for Panel B.
- Thread a long length of white yarn through a tapestry needle and make a slip knot at the end.
- Align two adjacent squares at the edges.
- Using an under-and-over whip stitch, sew the squares together row by row.
- Then, stitch vertically in the cross direction.
- Repeat the process for Panel B.
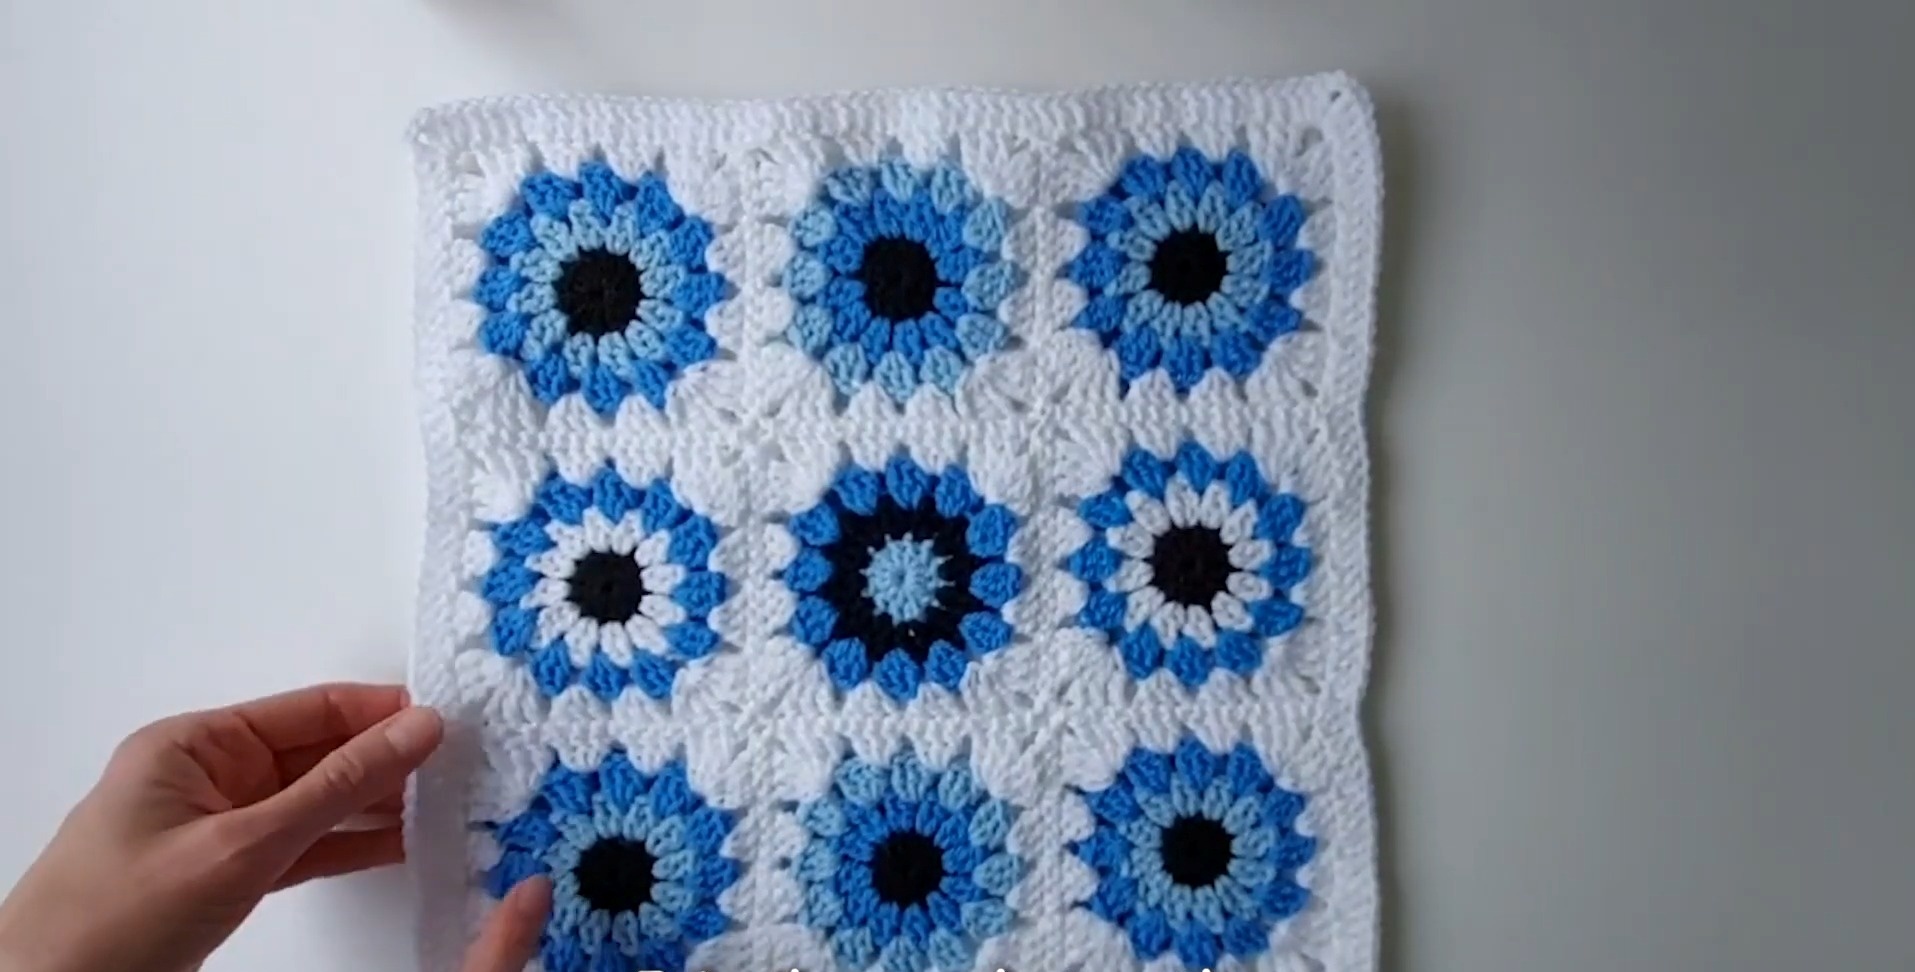
Border Around Each Panel (1 Row of Dc)
- Attach white yarn to any corner Ch-2 space of Panel A.
Corners:
- Work (Ch 3, 2 Dc, Ch 2, 3 Dc) into each corner Ch-2 space.
Sides:
- Work 1 Dc in each stitch and 1 Dc in each Ch-1 space along the edges to the next corner.
- At corner intersections, work (3 Dc, Ch 2, 3 Dc).
- Continue around all 4 sides. Join with a Sl St to the 3rd chain of starting Ch 3.
- Fasten off and weave in ends for Panel A.
- For Panel B, repeat the border but do not cut the yarn.
Final Assembly
Joining Front & Back Panels
- Place the two panels together with right sides facing out.
- Use the white yarn from Panel B’s working edge.
- Ch 1, then insert your hook through both layers (front and back panels).
- Work 1 Sc in each stitch along the left side, bottom edge, and right side to join the panels together. Leave the top edge open.
Top Edge Band
- At the top opening, work 4 continuous rounds of Sc in every stitch around the opening to create a sturdy band.
- At the end of the 4th round, close with a Sl St, cut yarn, and weave in the tail.
Strap Construction (2 Straps)
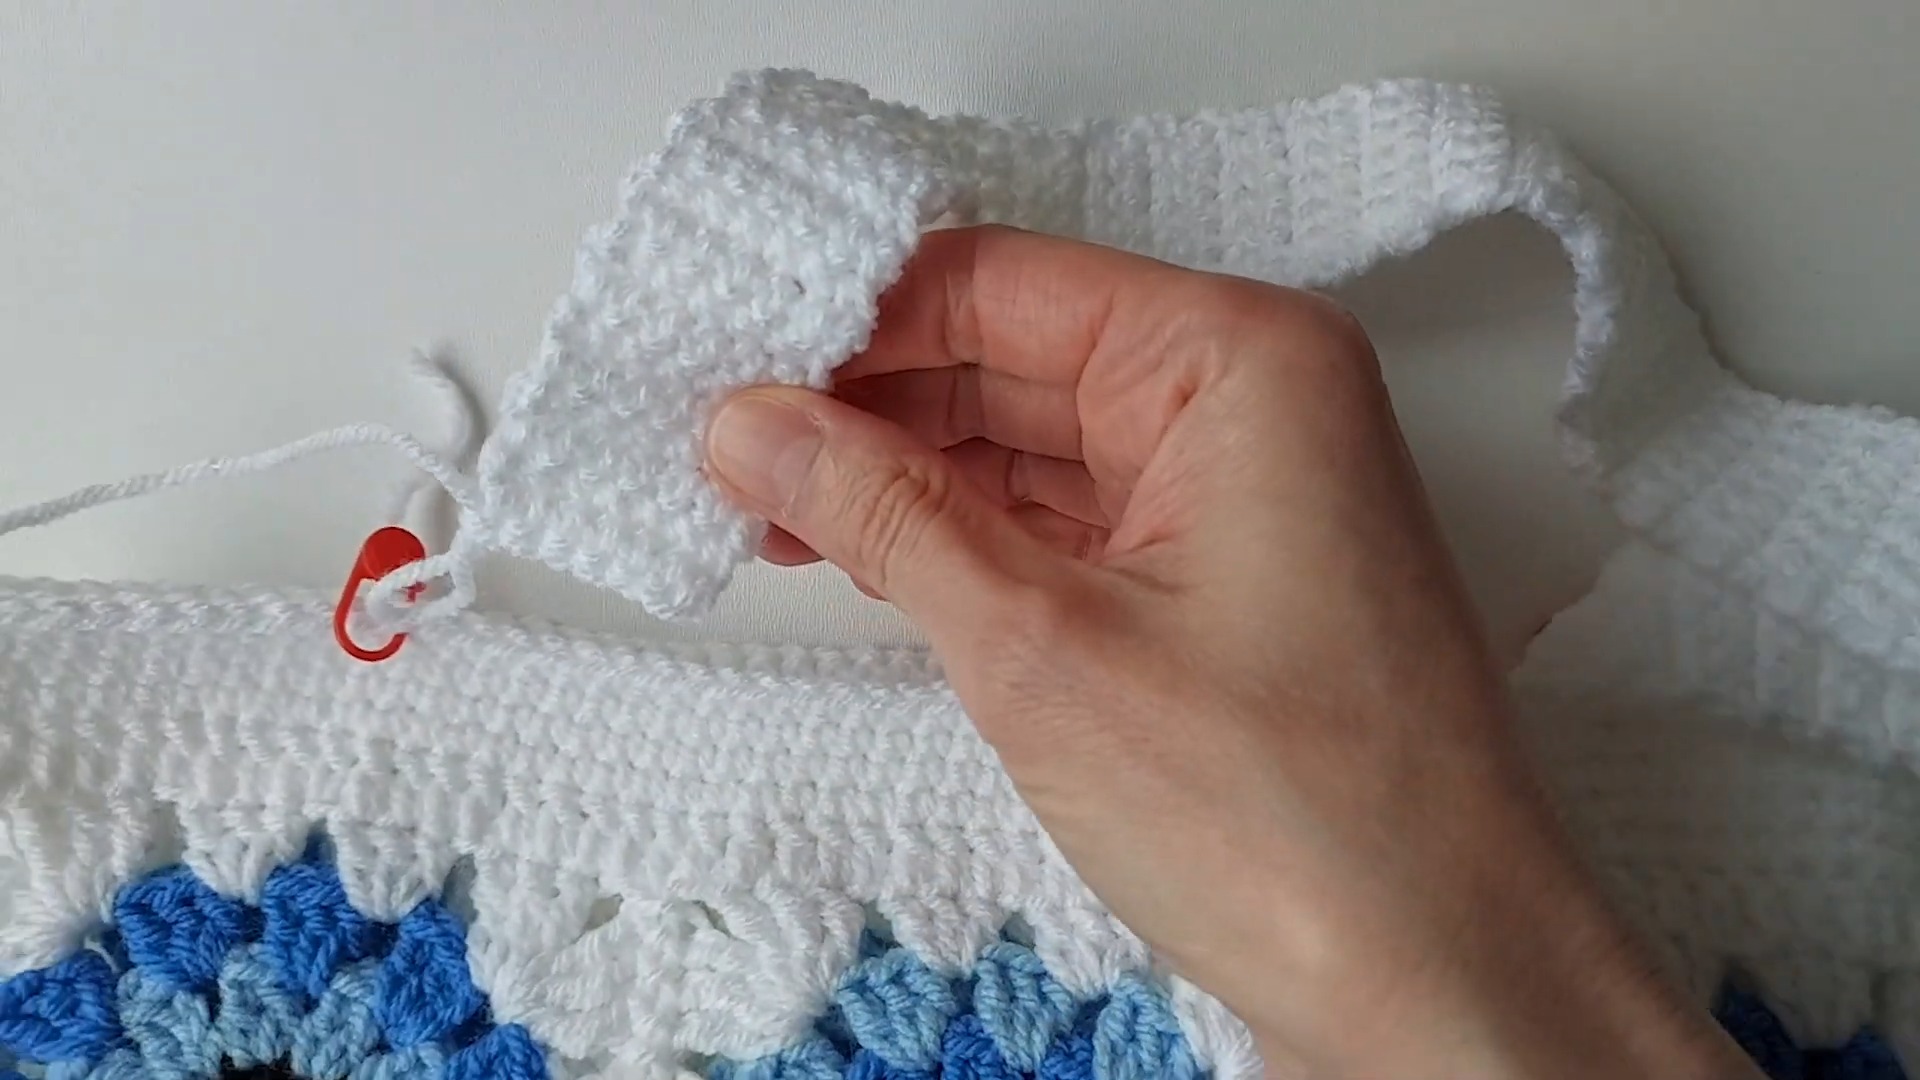
- Marker Placement: Place stitch markers symmetrically along the top edge of the front panel. Position them ~6–7 cm in from the edges.
First Strap:
- Attach white yarn at the first stitch marker with a slip knot.
- Ch 1, Sc into the same st, and work 6 Sc across the next stitches.
- Ch 1, turn, and repeat 6 Sc back and forth until the strap measures approximately 45 cm in length.
- Align the strap’s end with the second marker. Secure by stitching the strap onto the top edge using Sc.
- Fasten off and weave in ends.
Second Strap:
- Repeat the same steps for the second strap, attaching it to the back panel.
Finishing Touches
- Weave in all remaining yarn ends neatly with a tapestry needle on the inside of the bag.
- Your Crochet Granny Square Tote Bag is now complete and ready to use!