
This simple mesh stitch crochet pattern creates a breathable and versatile fabric, perfect for scarves, wraps, market bags, or lightweight summer garments.
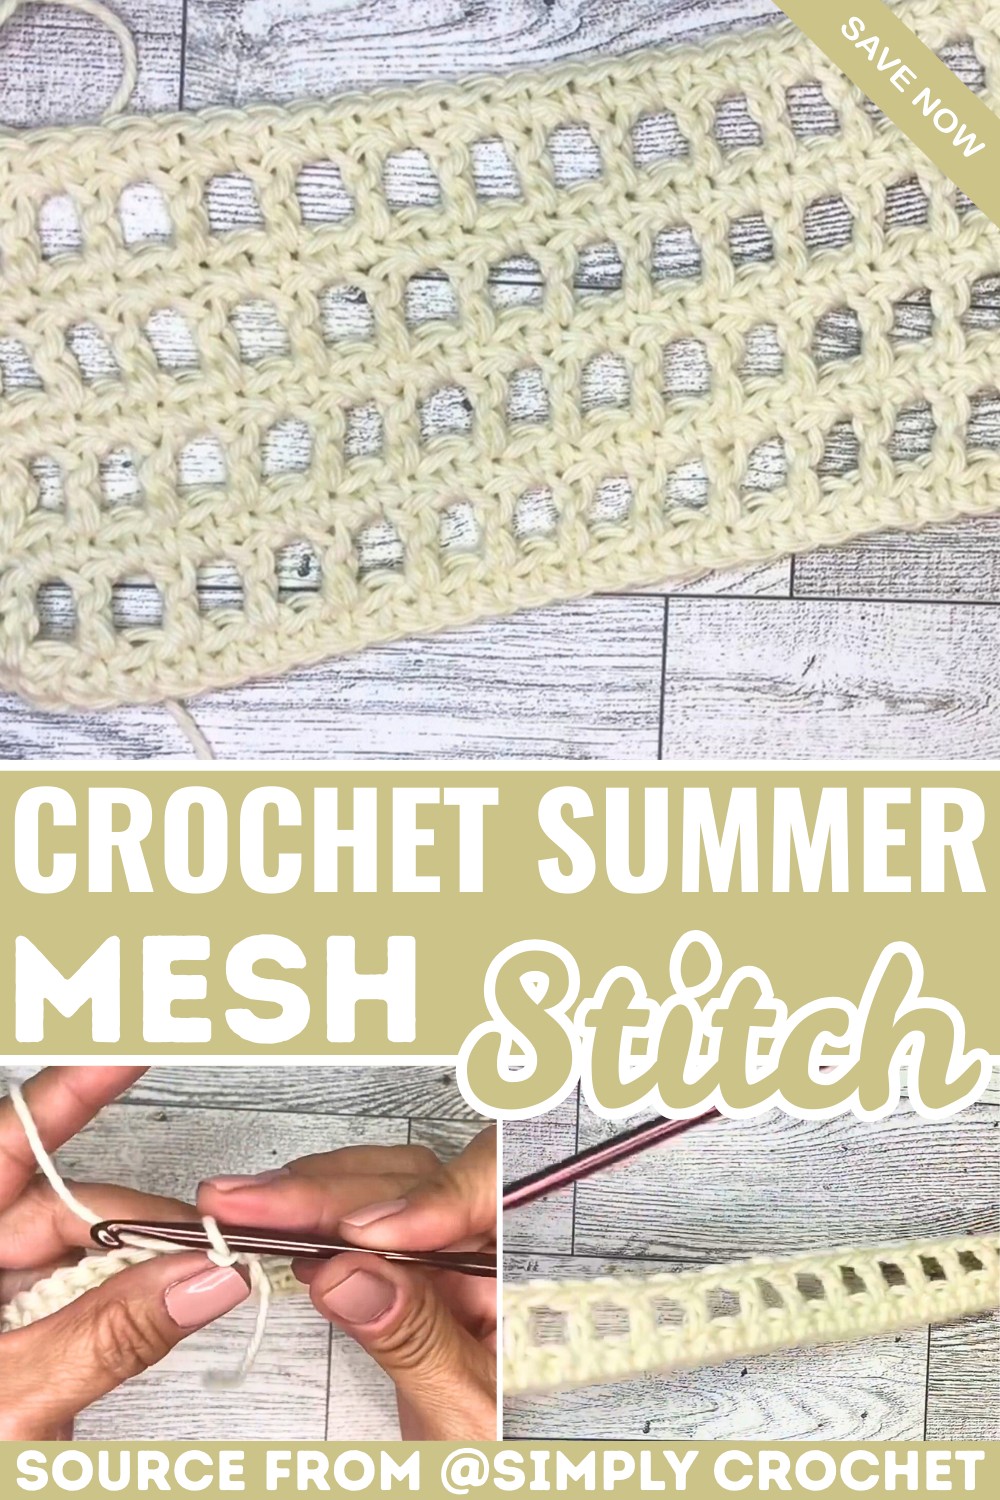
The crochet mesh stitch is a simple, airy, and versatile pattern that creates a light, netted design. It’s especially beginner-friendly and uses basic stitches like single and double crochet, making it easy to learn. This stitch is perfect for making items like beach bags, market totes, scarves, or even delicate beach cover-ups. The lightweight texture makes it both stylish and practical, ideal for creating items that look great and feel functional.
Easy Crochet Mesh Stitch Tutorial
What makes this crochet stitch stand out is its flexibility; you can use any type of yarn and adjust the size easily to suit your design. If you prefer smaller, tighter spaces or a more open, airy look, the pattern adjusts effortlessly based on your yarn and hook size. Its repetitive rows of single and double crochet atop chain spaces make for a relaxing and meditative crochet experience.
Credit Simply Crochet
Key Features of the Pattern:
- Beginner-friendly construction combining basic stitches: single crochet, double crochet, and chains.
- Alternates between solid rows of single crochet and open mesh rows for a lightweight, airy texture.
- Customizable in size, making it easy to adapt to a wide variety of patterns.
- Includes optional techniques for color changes, seam joining, and finishing for neat, professional results.
- Flexible: Pair this stitch with different yarns (from laceweight to chunky) to create unique variations.
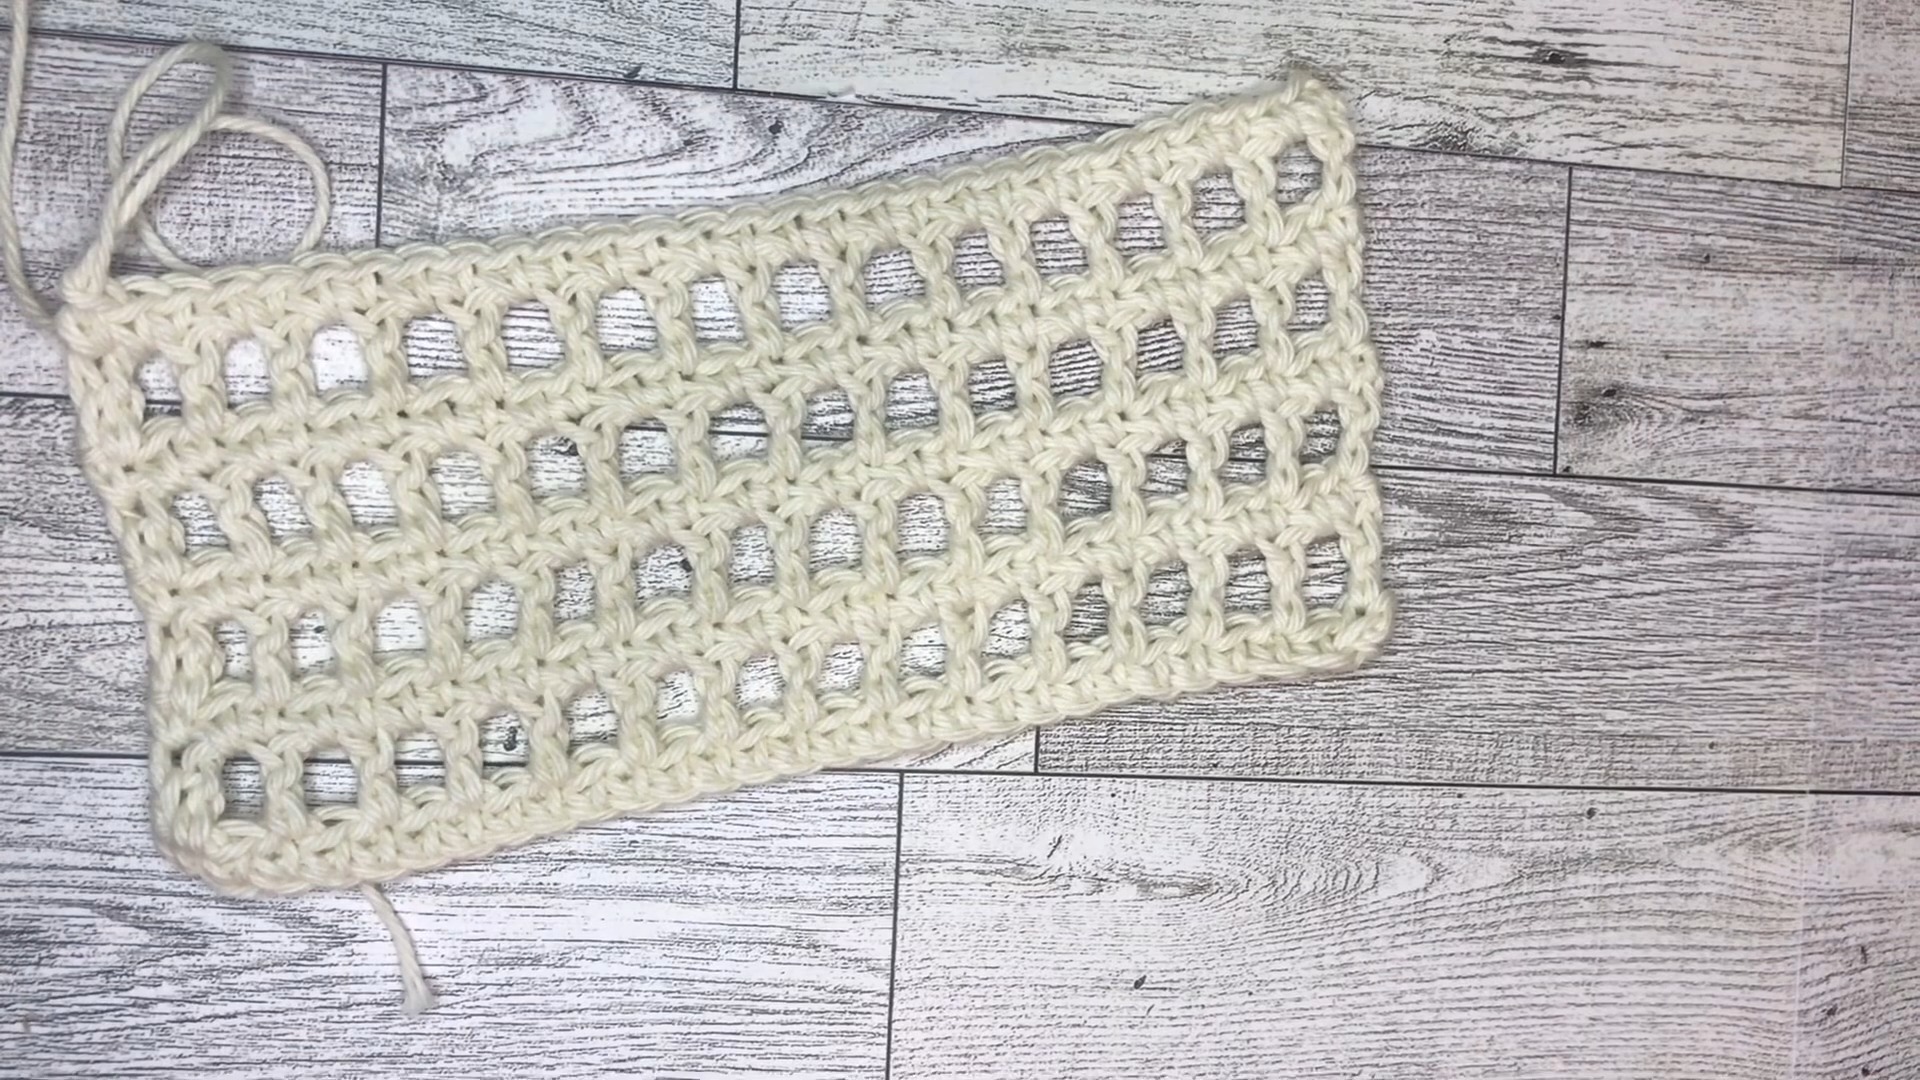
You’ll begin with a foundation row of single crochets, setting the stage for this alternating pattern. The first row adds stability, ensuring your pattern starts with a solid and structured base. By chaining an even number of stitches, you can easily customize the width of your piece—great for exploring patterns of all sizes, from a slim scarf to a wide wrap.
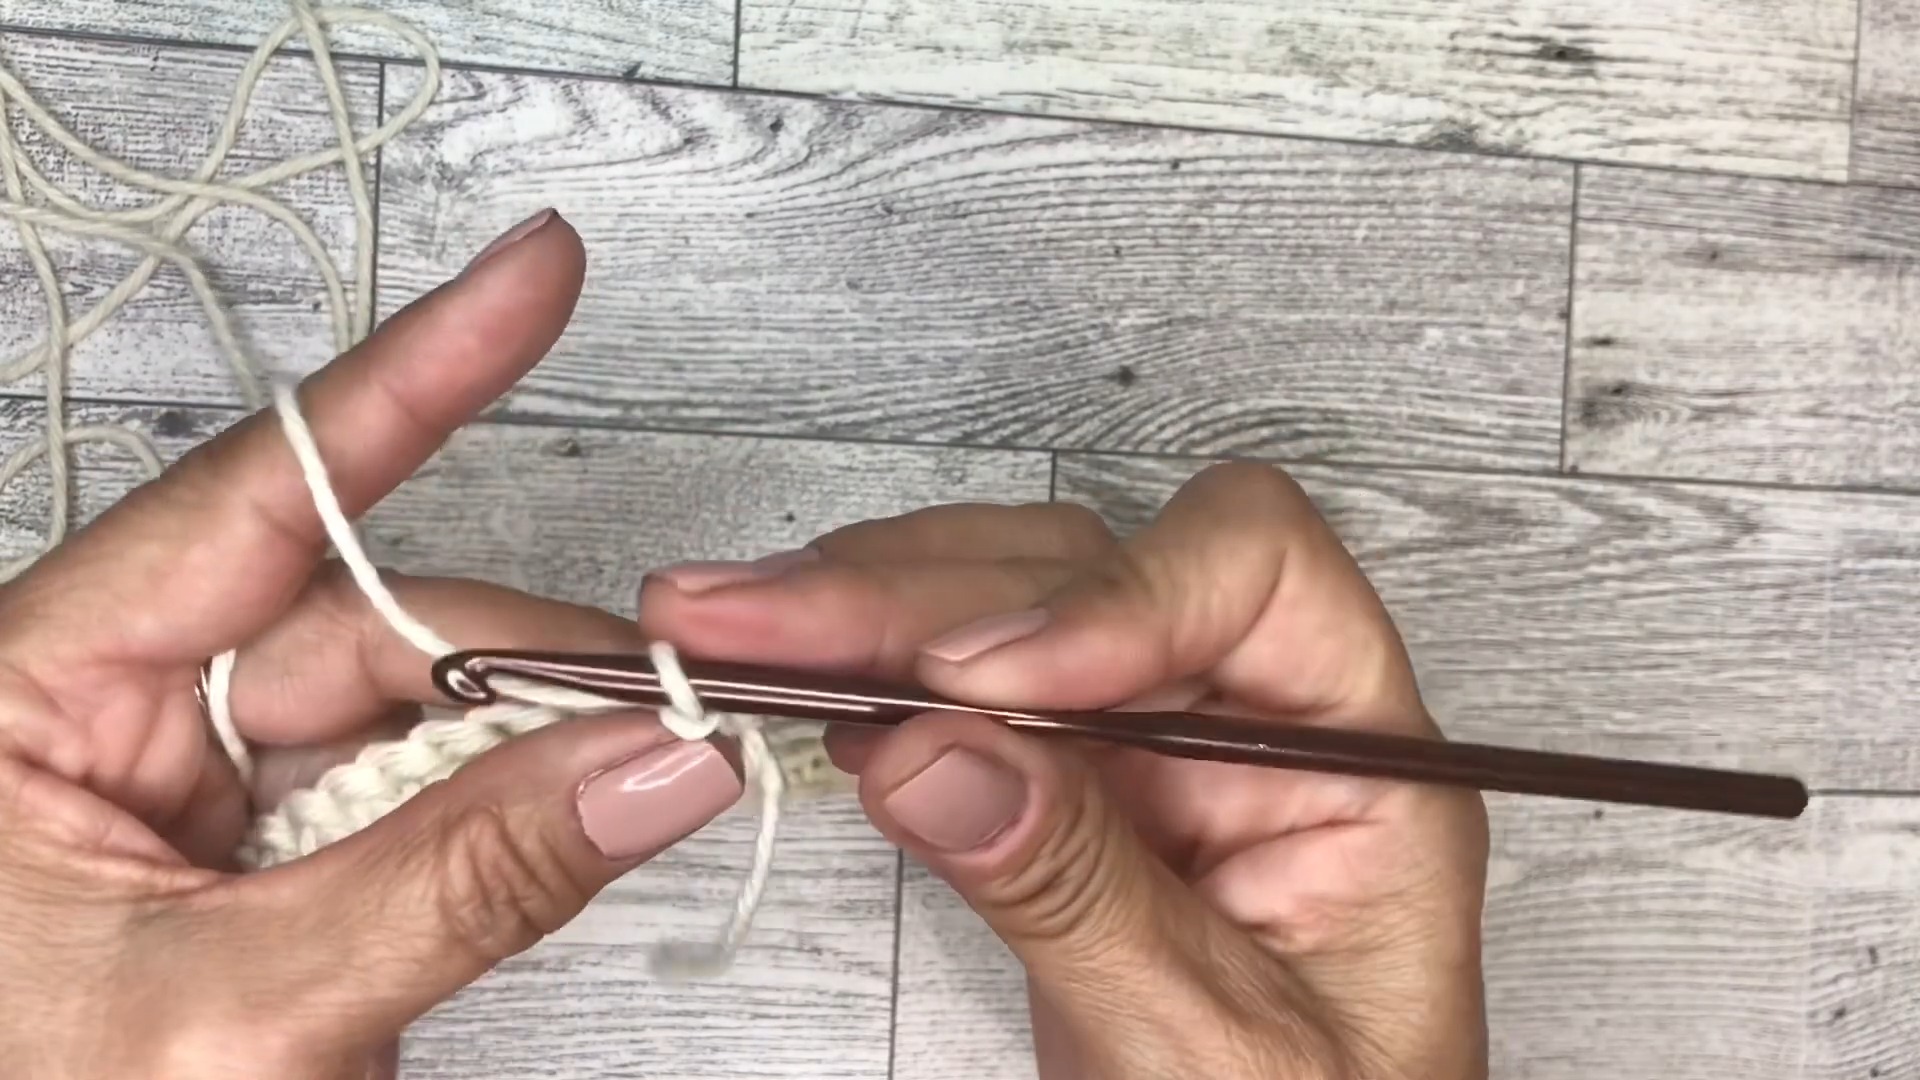
The second row introduces the mesh stitch. Alternating between double crochets and chain spaces, this row creates a light and open grid-like design. The chain spaces make the fabric breathable and provide the signature airy look, while the double crochets anchor the rows together. The beauty of this row lies in its rhythmic ease: just chain 1, skip a stitch, and double crochet into the next—repeating this sequence across the row.

In the third row, you’ll return to single crochet stitches, filling in the “windows” from the mesh row below. Working single crochets into the chain spaces and the tops of the double crochets creates a balanced fabric that maintains structure and stability. These alternating rows of solid and mesh stitches give the piece depth and interest, while ensuring it stays soft and flexible.
Once you’ve mastered Rows 1–3, the pattern becomes beautifully repetitive. By simply repeating the mesh and single crochet rows, you can extend the pattern to your desired length. The even nature of the rows also makes it easy to incorporate color changes for stripes or color-block effects. To switch colors, you’ll simply complete the final yarn-over of a double or single crochet with the new color and continue working seamlessly.
For patterns requiring specific shapes (like infinity scarves or wraps), the pattern allows you to seam edges together with slip stitches or hand-sew them for a clean finish. And, at the very end, weaving in ends is quick and easy, leaving you with a smooth, polished result.
Video Tutorial
Materials & Tools Needed
- Yarn: The tutorial uses “I Love This Cotton Yarn” from Hobby Lobby, but any type of yarn works for this pattern depending on your preference.
- Hook Size: An H hook (5.0mm) is used in the tutorial. Adjust your hook size based on the yarn weight for different mesh sizes.
- Additional Materials: Scissors, yarn needle (optional for finishing).
Finished Size & Customization Ideas
- Finished Size: The pattern’s size depends on the number of chains you begin with and how many rows you complete. The mesh stitch is highly versatile.
- Customization Ideas:
- Use larger hooks for bigger, more open mesh spaces (ideal for beach cover-ups).
- Use smaller hooks for tighter mesh spaces (suitable for scarves or shawls).
- Suitable for patterns like market bags, beach bags, scarves, beach cover-ups, or lightweight blankets.
- Adjust the width by starting with any even number of chains and adjust the length by the number of rows worked.
Pattern Abbreviations & Terminology
(US Crochet Terms used in the video tutorial)
- ch: Chain
- sc: Single Crochet
- dc: Double Crochet
- sk: Skip
- st: Stitch

Step-by-Step Detailed Instructions
Foundation Row
- Start with a slip knot on your hook.
- Chain an even number of chains (e.g., 20 or 30 chains, based on the tutorial). You can make it longer or shorter based on your pattern.
Row 1 (Single Crochet Row)
Stitch Count: Same as the number of chains.
- Insert your hook into the second chain from the hook.
- Work 1 single crochet (sc) into the second chain.
- Continue across the row by working 1 single crochet (sc) into each chain until the end of the row.
- You should now have a solid row of single crochet stitches.
Row 2 (Mesh Stitch)
Stitch Count: Starting count stays even, reduced slightly due to skipped stitches.
- Chain 1, turn your work.
- Work 1 double crochet (dc) into the first stitch of the row.
- Chain 1, skip 1 stitch, then work 1 double crochet (dc) into the next stitch.
- Continue this pattern:
- Chain 1.
- Skip 1 stitch.
- Work 1 double crochet in the next stitch.
- Repeat across the row until the end.
- At the end, skip 1 stitch and finish with 1 double crochet in the last stitch.
Row 3 (Single Crochet Row)
Stitch Count: Matches original foundation row.
- Chain 1, turn your work.
- Work 1 single crochet (sc) into the first stitch.
- For the rest of the row:
- Work 1 single crochet (sc) into each space between the double crochets.
- Work 1 single crochet (sc) into the top of every double crochet stitch from the previous row.
- Continue this pattern until you reach the end of the row.
Repeat the Pattern
Once Rows 1-3 are complete, repeat Rows 2 and 3 until your piece reaches the desired length.
Joining Methods, Color Changes, and Finishing Techniques
Joining:
- If creating larger pieces, continue working in rows without breaking the yarn. Alternatively, join edges using slip stitches or whipstitch to create cylindrical or seamless designs.
Color Changes:
- To change colors, finish the last stitch of a row with the new color (pull through the new yarn on the final yarn-over). Continue the pattern with the new color.
Finishing Techniques:
- When your pattern reaches the desired size, fasten off the yarn and cut, leaving a small tail.
- Use a yarn needle or crochet hook to weave in the loose ends securely.
Additional Notes From the Tutorial
- You can customize this pattern in many ways by choosing different yarn types or adjusting the hook size for tighter or larger mesh looks.
- The simple alternating rows of single crochet and mesh stitch make this pattern ideal for beginners.

Troubleshooting and Suggestions
Common Issues and Fixes:
- Uneven edges: If your edges look jagged, make sure you’re not skipping the first or last stitch of each row. Count your stitches regularly, especially in the early rows.
- Tension problems: Be mindful when chaining for the mesh rows—chains that are too tight can make the fabric pucker, while overly loose chains may look messy.
- Lost stitch alignment: Each single crochet row should have the same stitch count as your foundation chain. Use stitch markers to track the first and last stitches of rows if needed.
Creative Modifications:
- Change stitch spacing: Add more chains between double crochets for an even looser mesh or reduce the chains for tighter openings.
- Experiment with borders: Frame your finished piece with a border, like a scalloped edge, picot stitches, or a row of slip stitches, for added detail.
- Combine textures: Alternate mesh sections with rows of other fun stitch patterns (e.g., rows of bobbles or puff stitches) for an eclectic or textured look.
- Reusable bags: Reinforce the edges or handle areas when making market totes to ensure durability.
- Multicolor designs: Use self-striping or variegated yarn for effortless color blends, or create bold contrasts by switching yarn every few rows.


