Crochet Halloween Cats: Skeleton, Mummy & Witch Tutorial
Create three adorable Halloween-themed crochet cats—Skeleton, Mummy, and Witch—with charming details, fun accessories, and endless customization possibilities.
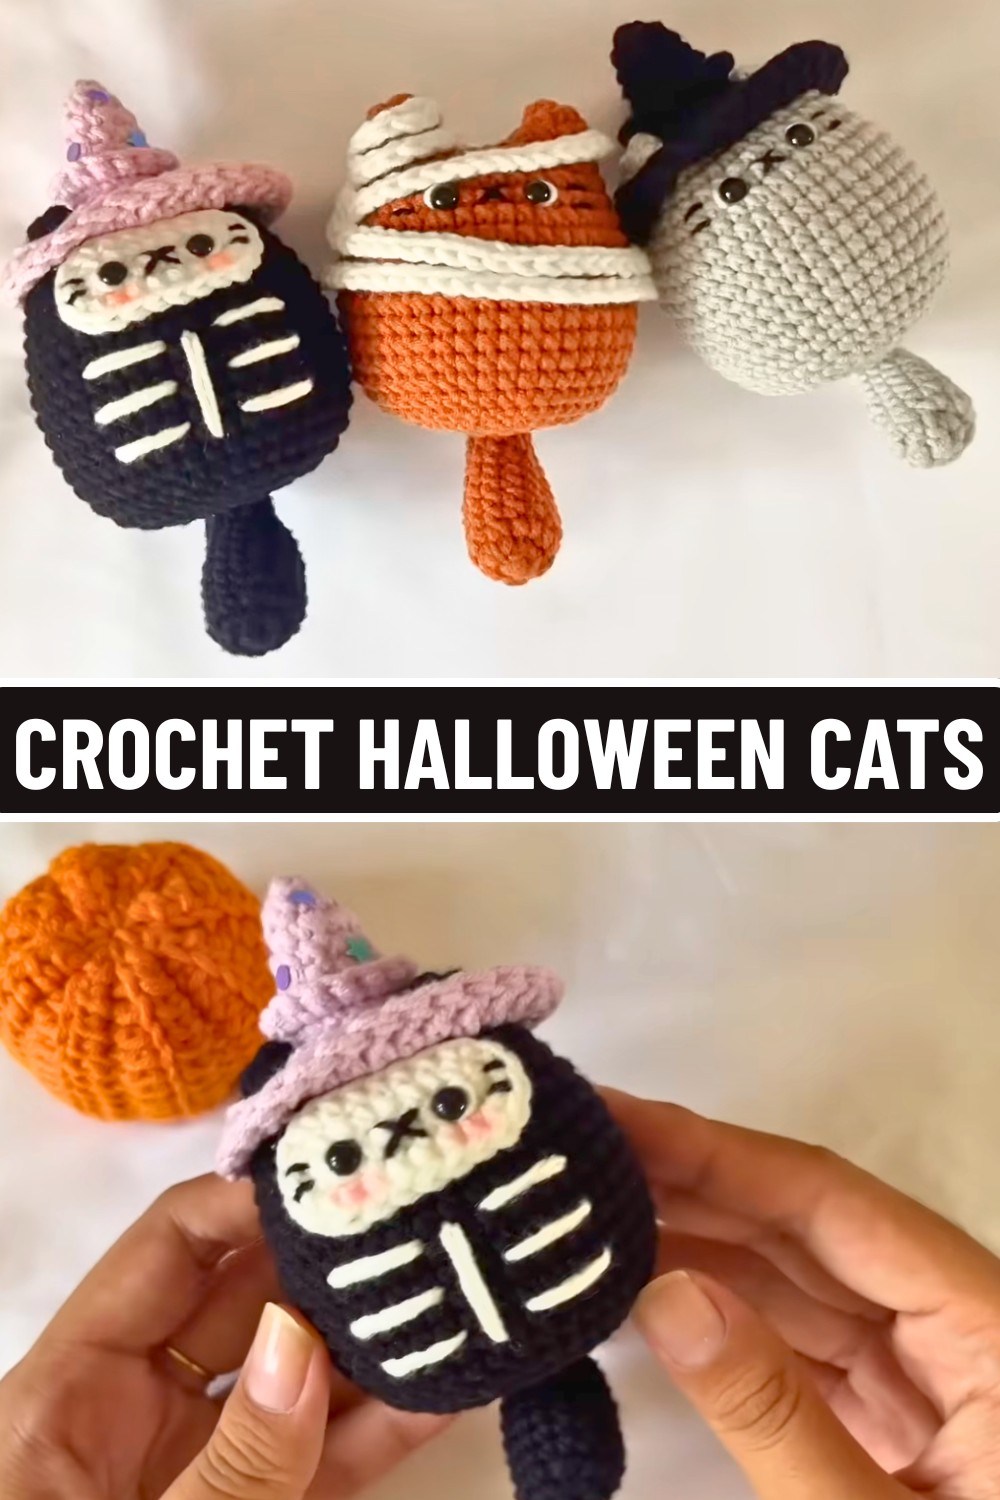
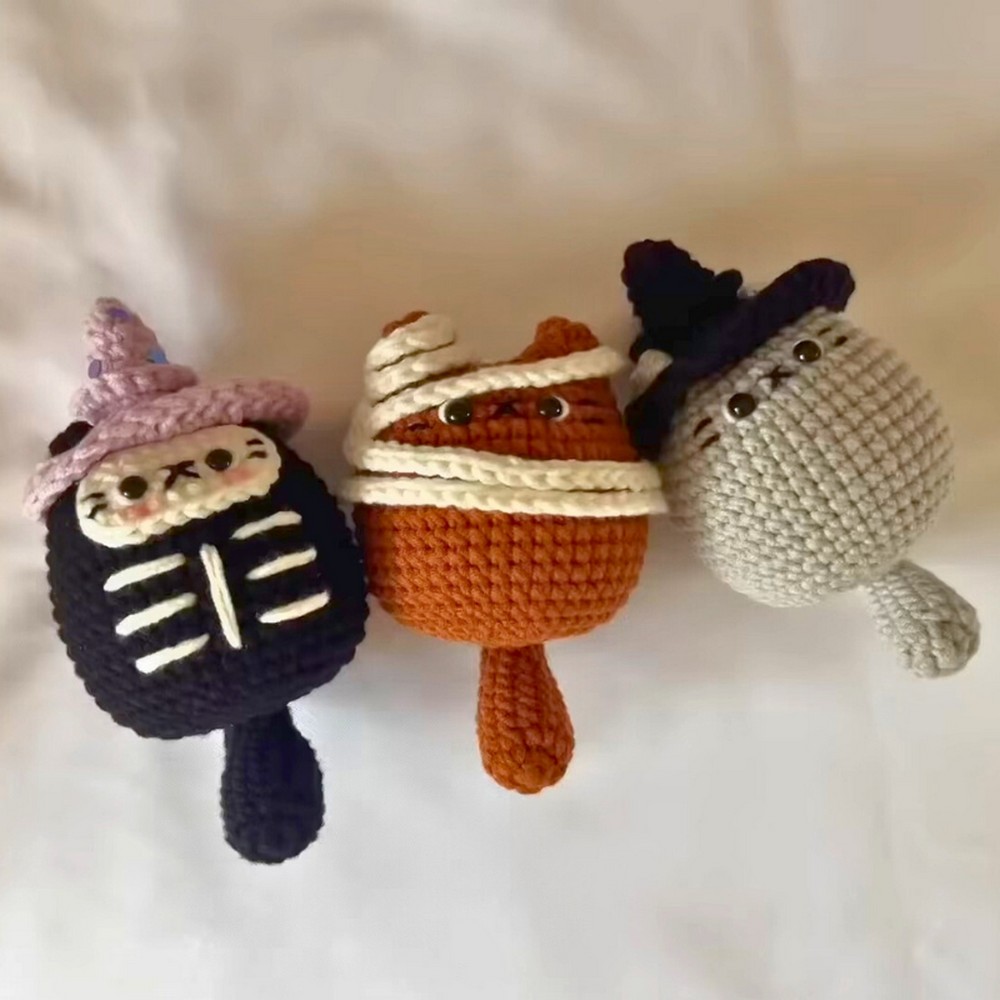
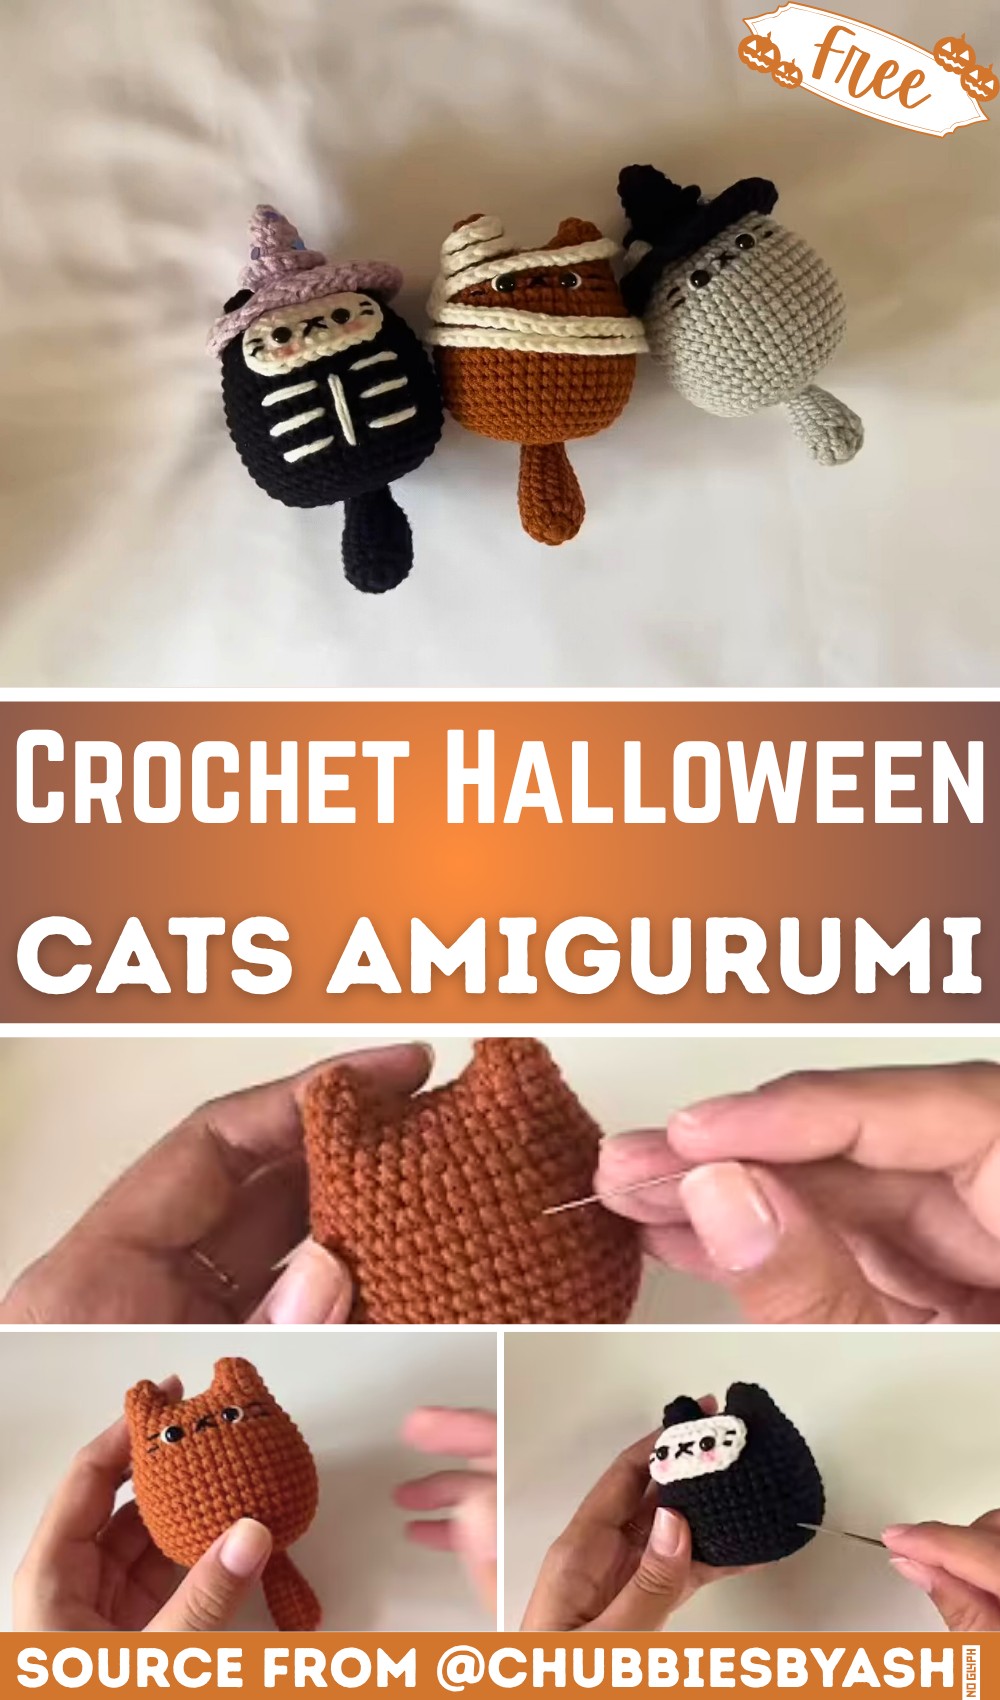
These Halloween crochet cats are the perfect mix of spooky and cute. Each cat has its own personality—there’s a skeleton cat with a removable hat, a mummy cat wrapped in playful bandages, and a witch cat with an adorable hat. They’re ideal for Halloween decor, little gifts, or even playful desk companions. These crochet creations brighten up any space and are sure to make anyone smile.
Crochet Halloween Cat Pattern
Making this Crochet Halloween Pattern is easier than it looks. You’ll start by shaping the body (starting with the ears!), then move on to the special details, like adding patches, stitching on whiskers, or wrapping a mummy cat’s bandages. Even their hats and tails are quick to crochet, giving each cat a unique, spooky style. Beginners can enjoy this too, thanks to simple repetitive stitches and helpful tips like using stitch markers for better accuracy.
Credit chubbiesbyash
Key Features and Construction Summary:
- Versatile Designs: Make three different Halloween cats – skeleton, mummy, and witch – each with distinct visual details and accessories.
- Beginner-Friendly Techniques: Incorporates working in the round, single crochet increases/decreases, and clever use of a magic ring.
- Customizable: Options to embroider, sew, or glue embellishments like faces, whiskers, and Halloween-themed details.
- Unique Add-Ons: Includes accessories such as a removable witch hat, face patches for skeleton detailing, and mummy bandages.
- Final Touches: Uses thoughtful stitch placement and embroidery to bring expressive faces and character-specific features to life.
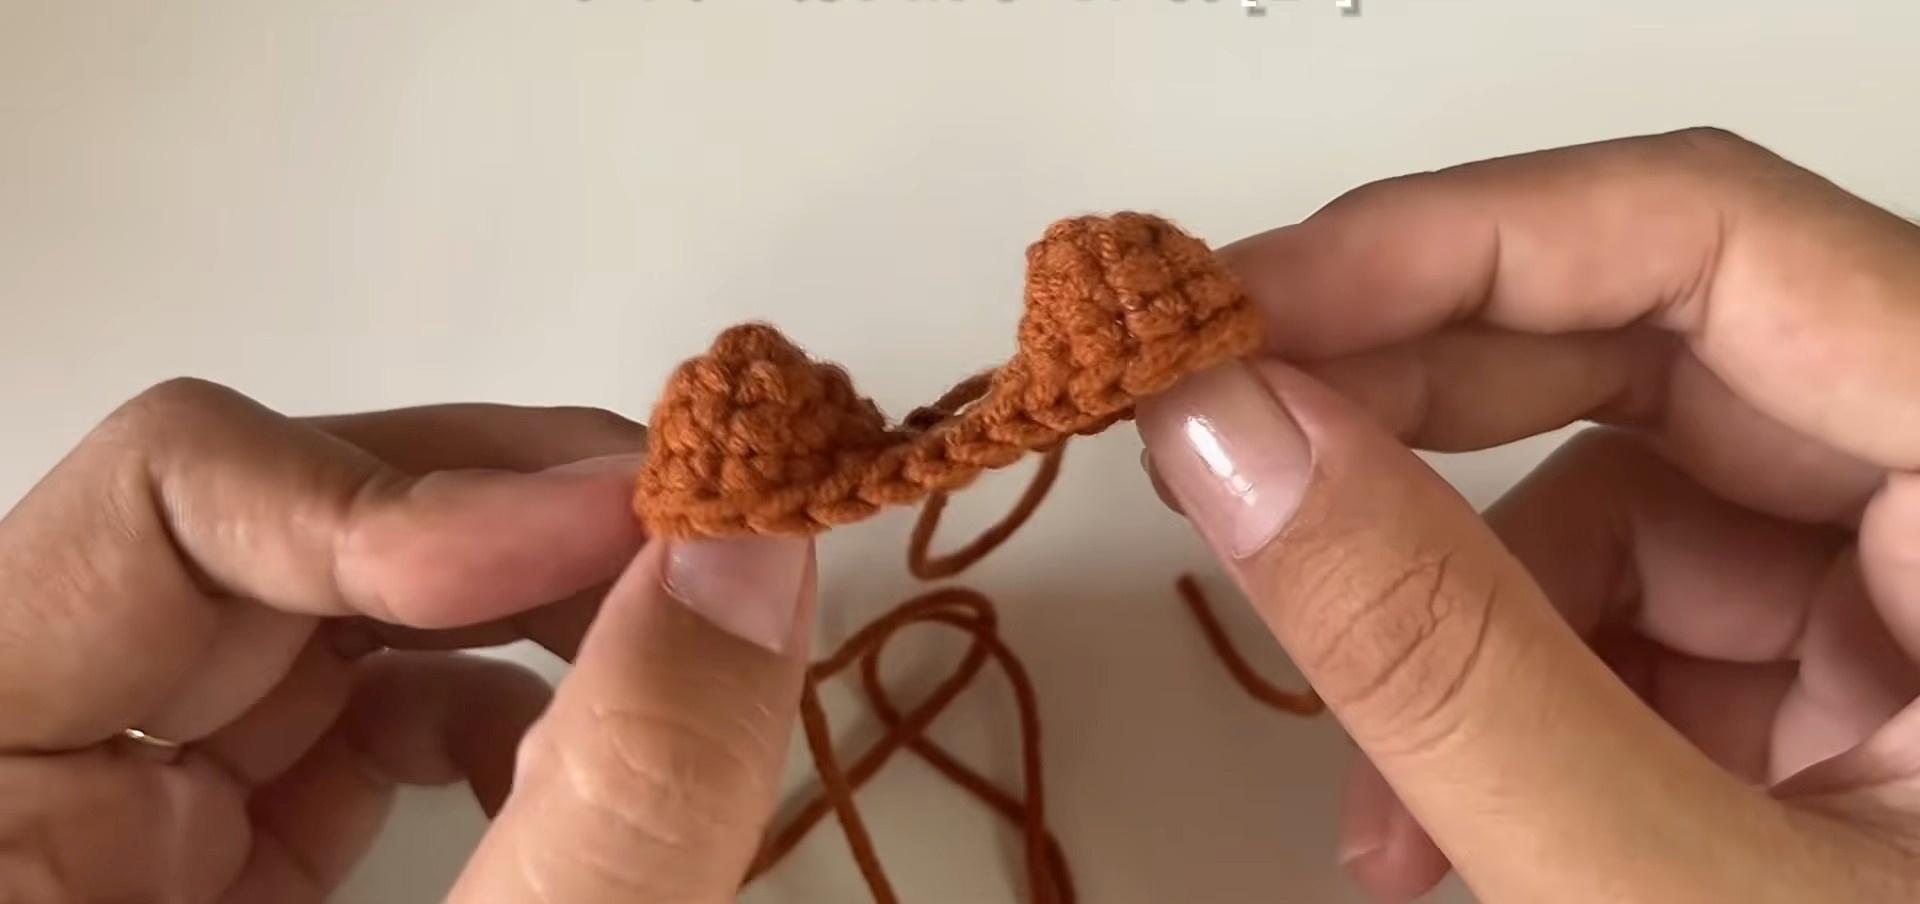
This fun and festive pattern starts with creating the cat’s body, which cleverly utilizes the “working in the round” technique. You’ll begin by crocheting two identical rounded ear shapes with a magic ring, then seamlessly connect them using a series of chain stitches to form the foundation for the head and torso. From there, simple rounds of single crochets are worked to gradually shape the body, paired with increases and decreases that help define the cat’s silhouette. The stuffing process is built into the final rounds for easy assembly.
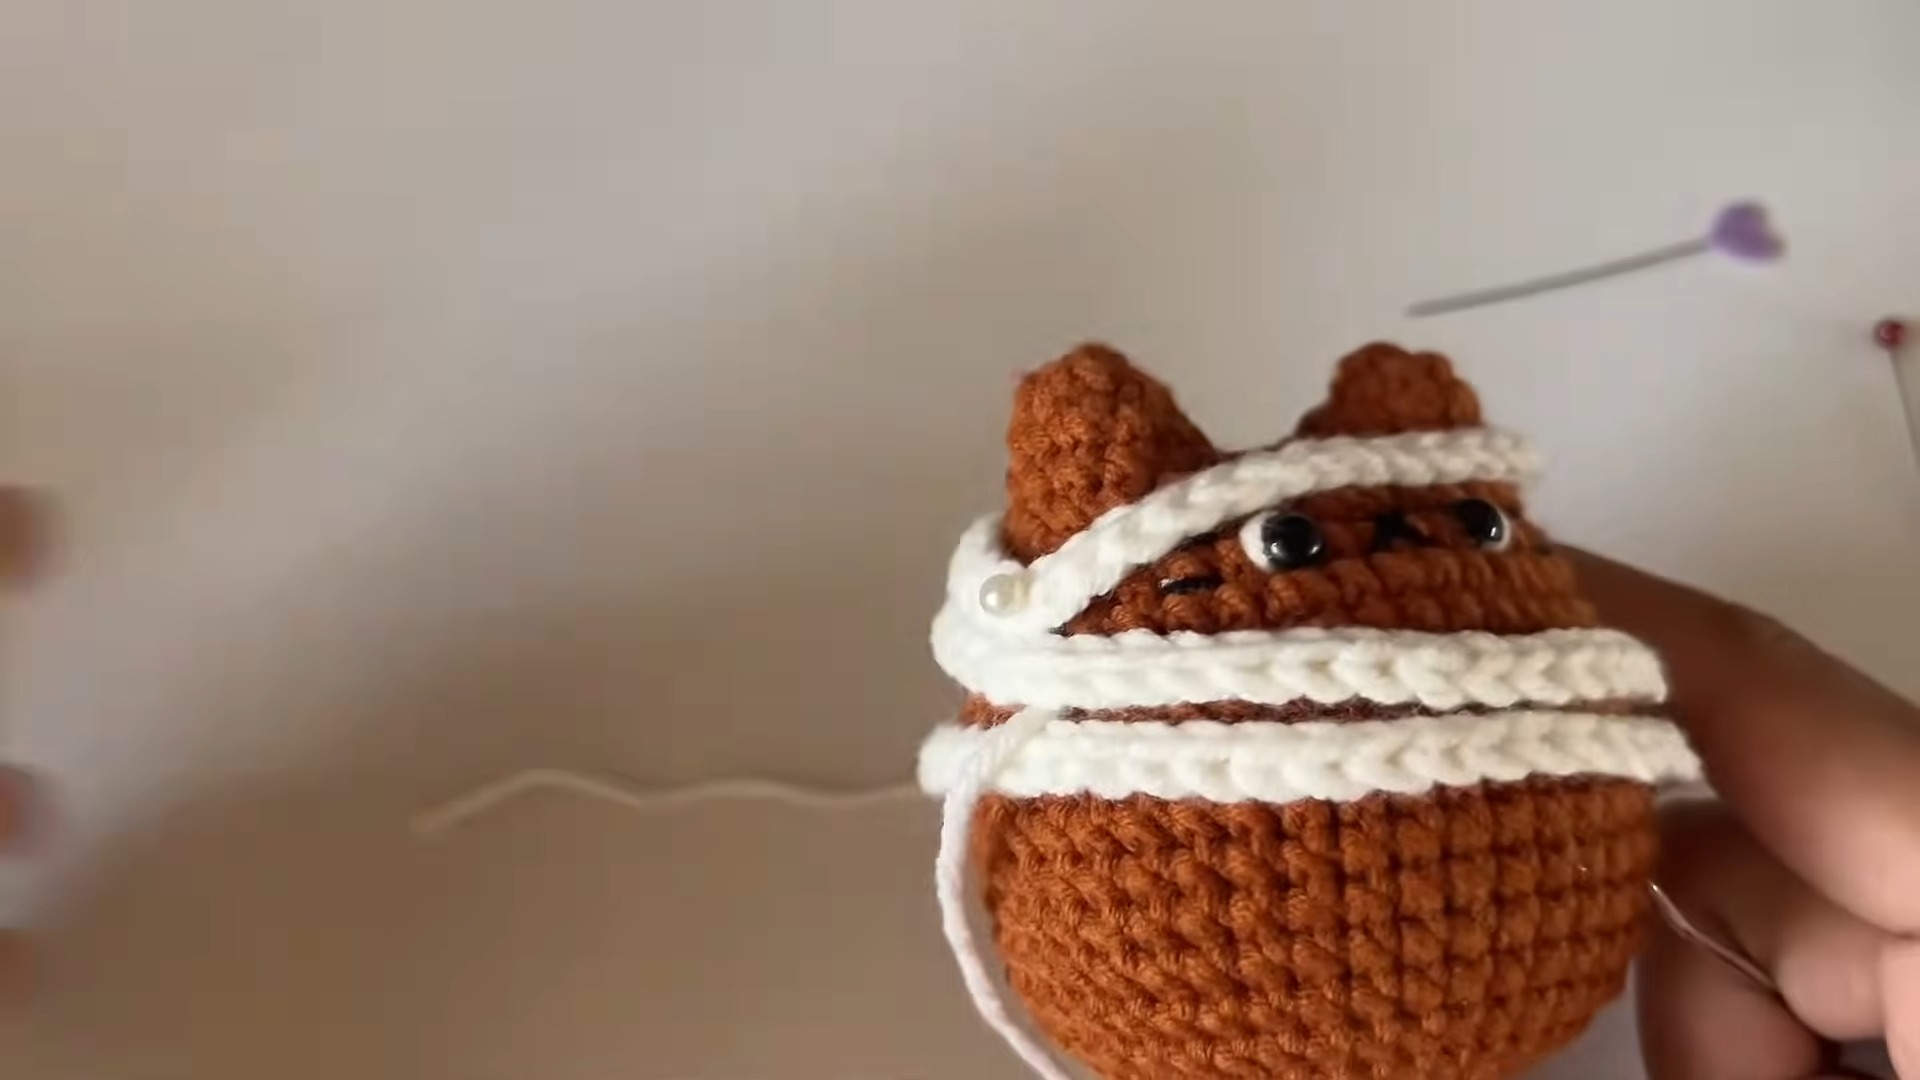
Facial features are added to give each cat its personality. For the skeleton cat, a white face patch is crocheted separately and then attached to contrast beautifully with the dark body. Whiskers and other small details are embroidered to mimic the spooky skeletal aesthetic. The mummy cat is “wrapped” with long, thin bandages made of slip-stitched chains. Meanwhile, the witch cat shines with its tiny pointed hat created by alternating rounds of single and double crochets, plus creative shaping for the brim.
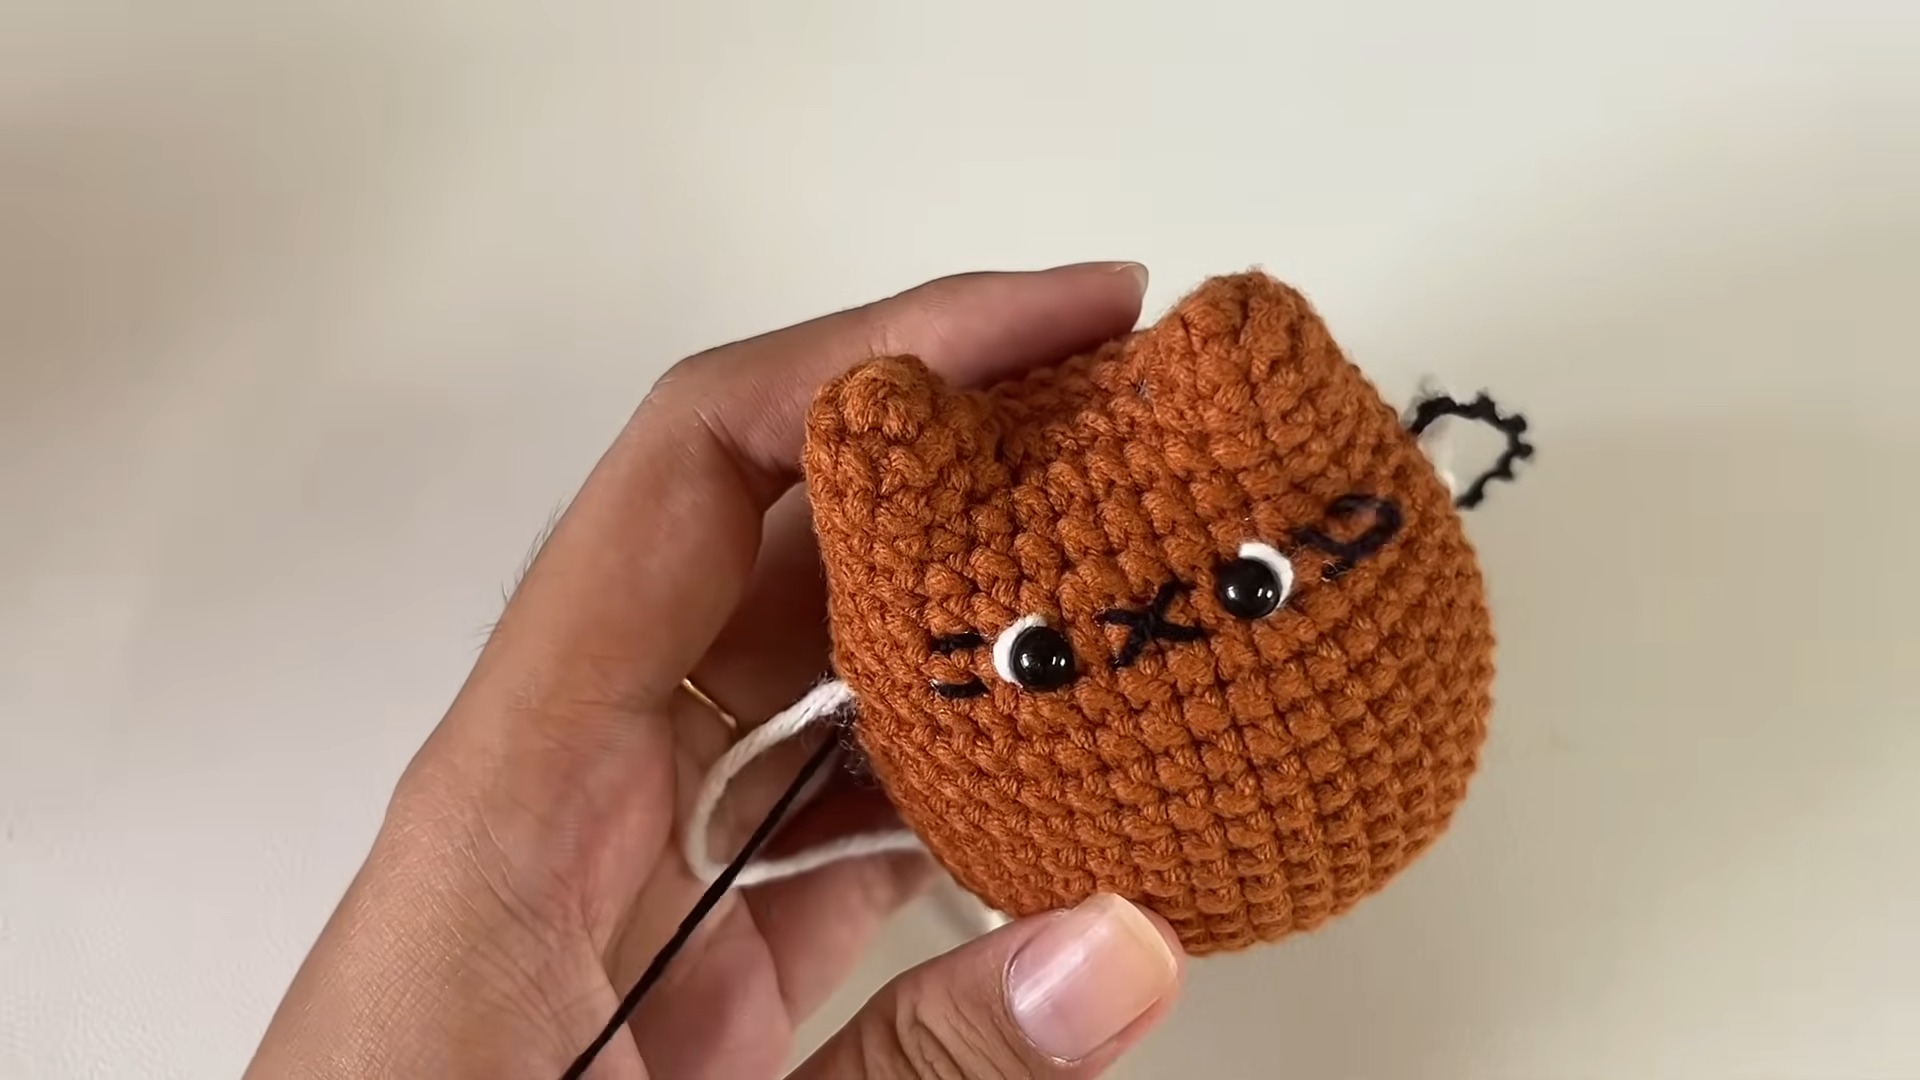
Each cat’s look is completed with safety eyes (or sewn eyes if desired), applied in just the right spot to enhance its charm. The tail is also a playful and quick addition, made using simple rounds with slight tapering achieved through strategic decreases.
Accessorizing is where these Halloween cats truly come to life. Using glue or sewing, you can secure small details that transform each cat into its unique character—like the skeleton’s X-mark eyes, the mummy’s wrapped bandages, or the witch’s hat with a sculpted lacey edge for extra flair.
Video Tutorial
Materials & Tools Needed
- Yarn: Black, white, or color of choice (soft medium-weight recommended).
- Hook: Crochet hook (size recommended in the video).
- Safety Eyes: 5 mm for the face.
- Stuffing: Polyester fiberfill.
- Tapestry Needle: For sewing and weaving ends.
- Stitch Markers: To guide beginning/end of rounds.
- Fabric Glue: For attaching accessories (optional).
- Scissors: For cutting yarn.
Finished Size & Customization Ideas
- Approximate size: The cats are about 6–8 inches tall depending on tension and hook size.
- Customization: You can use different yarn colors for Halloween themes:
- Skeleton Cat: Use black yarn with white embroidery for a spooky effect.
- Mummy Cat: Wrap the finished cat with crocheted bandages made of white yarn.
- Witch Cat: Attach a small crocheted witch hat and face patch for added charm.
- Use unique embroidery (whiskers, skeleton details, etc.) or embellishments for further customization.
Pattern Abbreviations & Terminology
- ch: Chain
- sc: Single crochet
- inc: Increase (two single crochets in the same stitch)
- dec: Decrease (single crochet worked over two stitches)
- sl st: Slip stitch
- st(s): Stitch(es)
- magic ring/loop: A circular foundation used to begin crochet in the round.
Step-by-Step Detailed Instructions
Below is a detailed breakdown of the components of the Halloween Cats. Each step follows the tutorial’s instructions.
Body
- Ears (Make 2)
- Round 1: Start with a magic ring. Work 5 sc into the ring. Pull the tail to close. Place a stitch marker in the first stitch for reference.
- Round 2: Work 2 sc into each stitch (inc in all sts). You will have 10 sc. Cut the yarn after the first ear, but leave the yarn on the second ear.
- Connecting the Ears
- Ch 4: Create a chain bridge.
- Attach the first ear with sc into the final stitch of the first ear. Work 10 sc across the stitches of the first ear.
- Work 4 sc across the upper loops of the chain.
- Continue with 10 sc across the second ear. Finally, work 4 sc on the lower loops of the chain. You should have a total of 28 sc.
- Rounds 4 & 5: Work 1 sc into each stitch (28 sc per round).
- Round 6: (inc round) Work 3 sc, inc. Repeat this sequence 7 times for a total of 30 sts.
- Round 7: Work 1 sc into each stitch (30 sc).
- Round 8: (inc round) Work 2 sc, inc, 2 sc. Repeat this sequence 7 times (42 sts).
- Rounds 9–20: Work 1 sc into each stitch (42 sts per round). Stuff the body tightly as you work.
- Round 21: (dec round) Work 1 sc, dec across the round. You should now have 14 sts. Begin stuffing tightly if not done earlier.
- Round 22: (dec round) Work dec across all stitches to close the gap. You will end with 7 sts. Finish and weave ends.
Face Details
- Eyes:
- Attach 5 mm safety eyes around Round 7, leaving 4 sts between them.
- Glue eyes with fabric glue or sew them securely. Wrap white yarn around the eyes for light accents.
- Nose/Whiskers:
- Embroider an “X” shape nose using 2 strands of black yarn between the eyes.
- Add whiskers by embroidering three lines outward from either side of the nose.
- Skeleton Cat:
- With white yarn, embroider the skeleton ribs on the front of the body.
Witch Hat
- Start Base:
- Round 1: Start with a magic ring. Work 6 sc into the ring.
- Round 2: Work 1 sc, inc around (9 sts).
- Round 3: Flip the piece to make sure the right side faces outward. Work 1 sc into each stitch (9 sts).
- Rounds 4–6: Continue increasing every other stitch (e.g., 2 sc, inc; then 3 sc, inc).
- Brim:
- Round 7: Work into back loops only with 1 sc in each stitch.
- Round 8: Switch to front loops and work dc increases. In the chain spaces, skip sts to maintain hat curves.
- Final Sl St: Chain one and finish. Weave in ends, leaving a tail for sewing onto the cat.
Tail
- Tail Construction:
- Round 1: Create a magic ring and work 6 sc into the ring.
- Round 2: Work inc in each stitch (12 sts).
- Rounds 3–7: Work 1 sc into each stitch (12 sc for each round).
- Round 8: Work 2 sc, dec, repeating this sequence to reduce to 9 sts.
- Rounds 9–16: Continue 1 sc in each stitch (7 sc per round). Stuff lightly for flexibility.
- Closing: Weave the stitches together to flatten and seal the tail. Attach the tail to Round 14 or 15 of the body securely.
Mummy Wrapping
- Using white yarn, create two pieces of wrapping:
- Long Bandage: Chain 120, then work sl st across all chains.
- Wrap tightly around the body, sewing or gluing it for a secure hold.
- Short Bandage: Chain 25, and work sl st across all chains. Wrap this around the cat’s left ear.
Finishing Techniques
- Weave in all yarn ends neatly.
- Secure accessories like hats or patches using glue or sewing. Place pins if needed while glue dries.
- For added customization, embroider designs or use fabric paint for details.
Troubleshooting and Suggestions
Troubleshooting:
- Magic Ring Woes: Struggle with the magic ring? Start with a chain loop as an alternative. Just remember to secure it tightly to avoid a gap in the center.
- Uneven Stitches While Increasing/Decreasing: Use a stitch marker to mark the first or last stitch in every round to maintain consistent counts while shaping the body and accessories.
- Face Embroidery: When embroidering whiskers or X details, use short, consistent stitches and keep an eye on the symmetry.
Suggestions for Customization:
- Play with Colors: Use pastel shades to create a “softer” version of the Halloween trio, or even experiment with glow-in-the-dark yarn to make spooky nighttime companions.
- Add Extra Accessories: A small broomstick for the witch cat, a pumpkin for the skeleton, or tiny beads for the mummy’s wrap can make these designs more festive.
- Turn Cats Into Keychains: Attach keyring loops or small clips to turn these mini friends into adorable keychains or bag charms.
- Vary the Size: Use thinner yarn and smaller hooks for micro versions or bulky yarn and larger hooks for cuddly, oversized decorations.