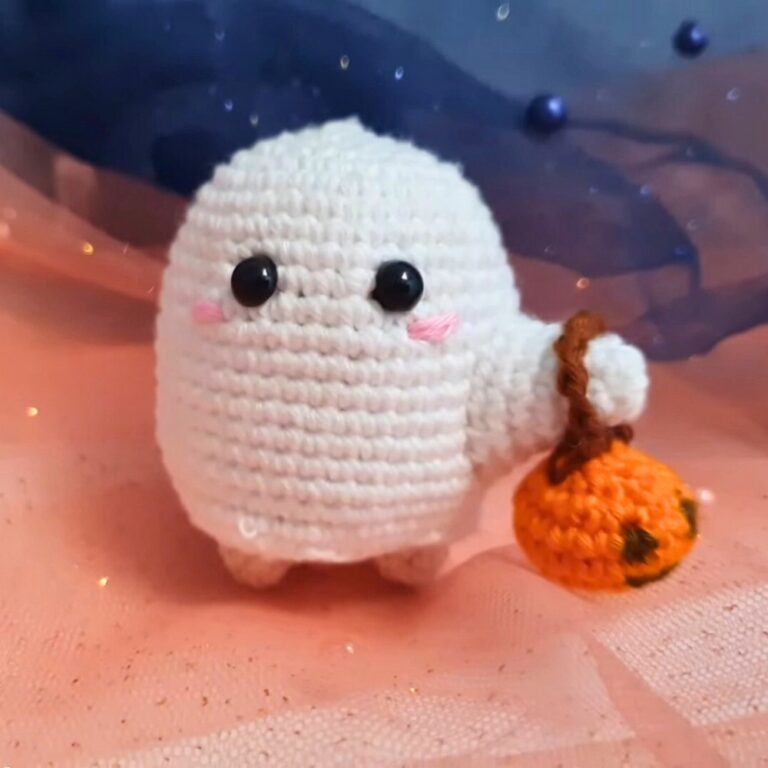
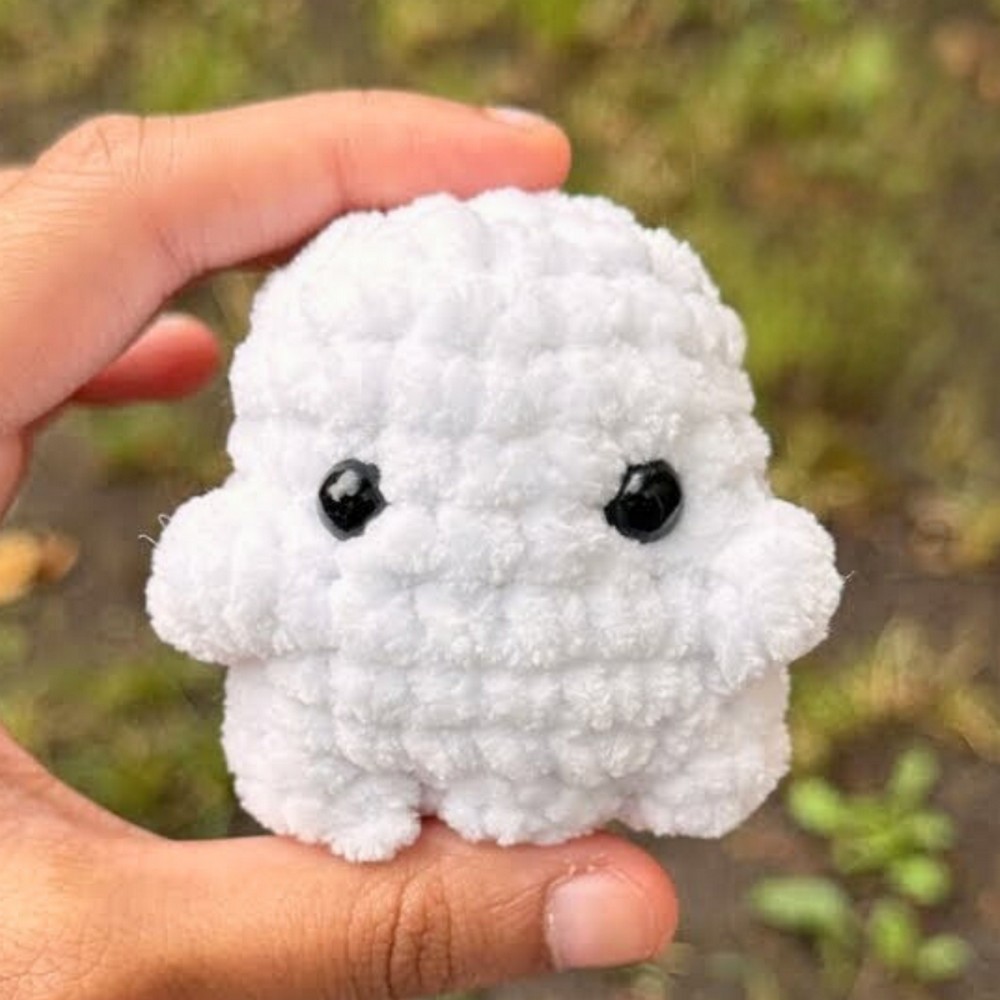
This adorable crochet ghost is the perfect mix of spooky and cute. It stands on its own, making it an excellent Halloween decoration, a playful toy, or a sweet handmade gift for someone special. Its simple, rounded shape and cheerful personality can brighten up any shelf, desk, or child’s imagination.
Easy Crochet Ghost Plushy Tutorial
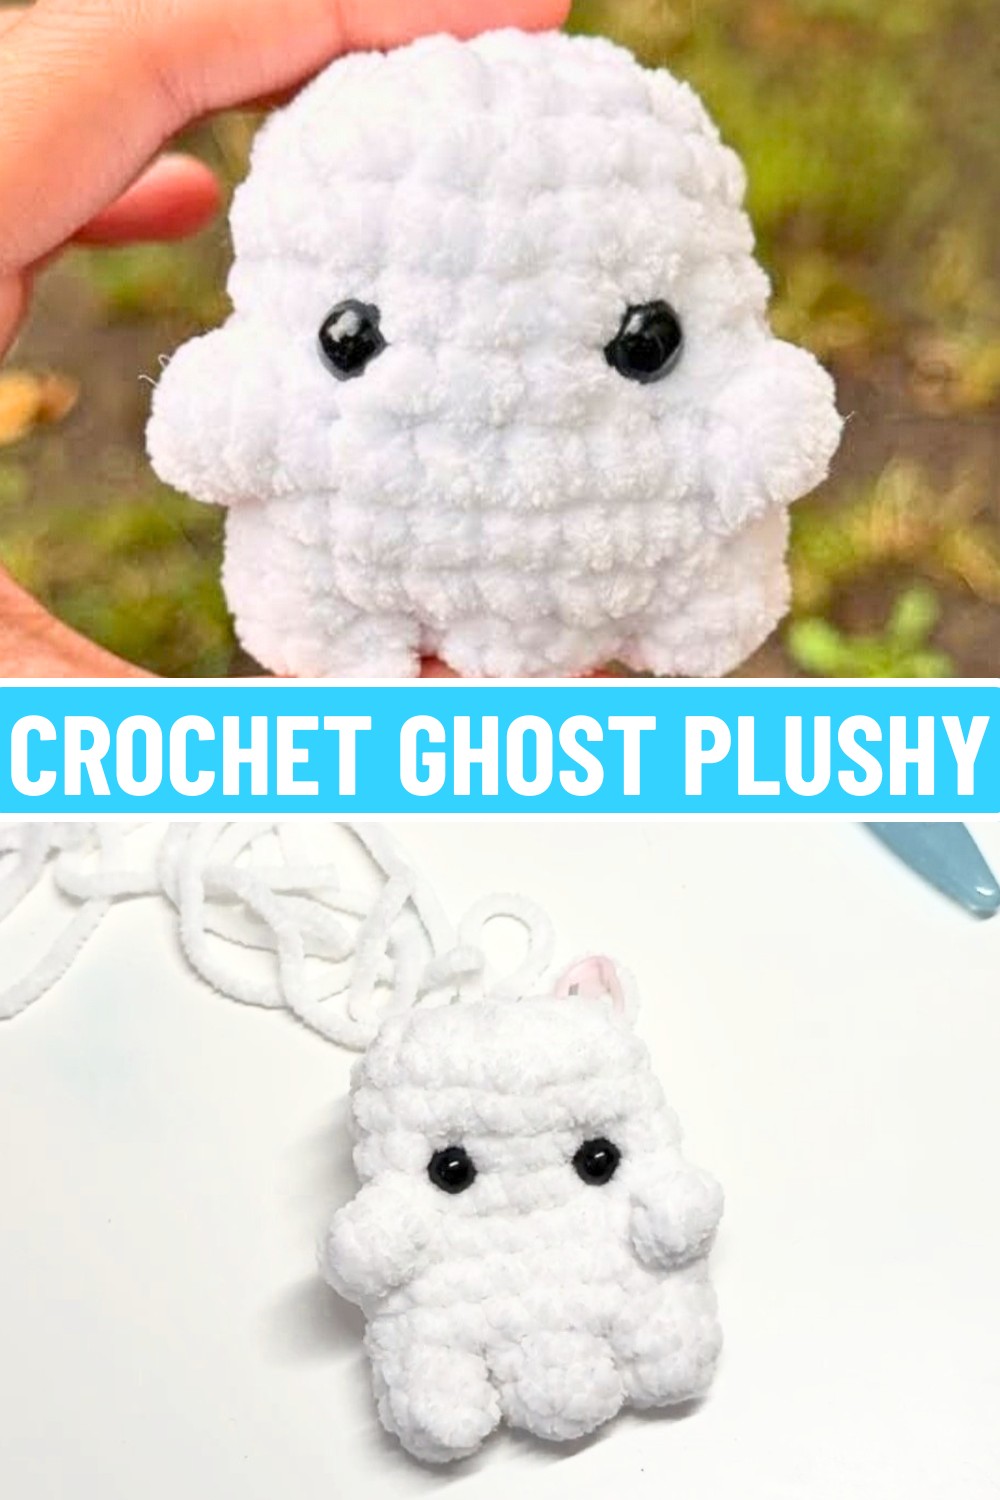
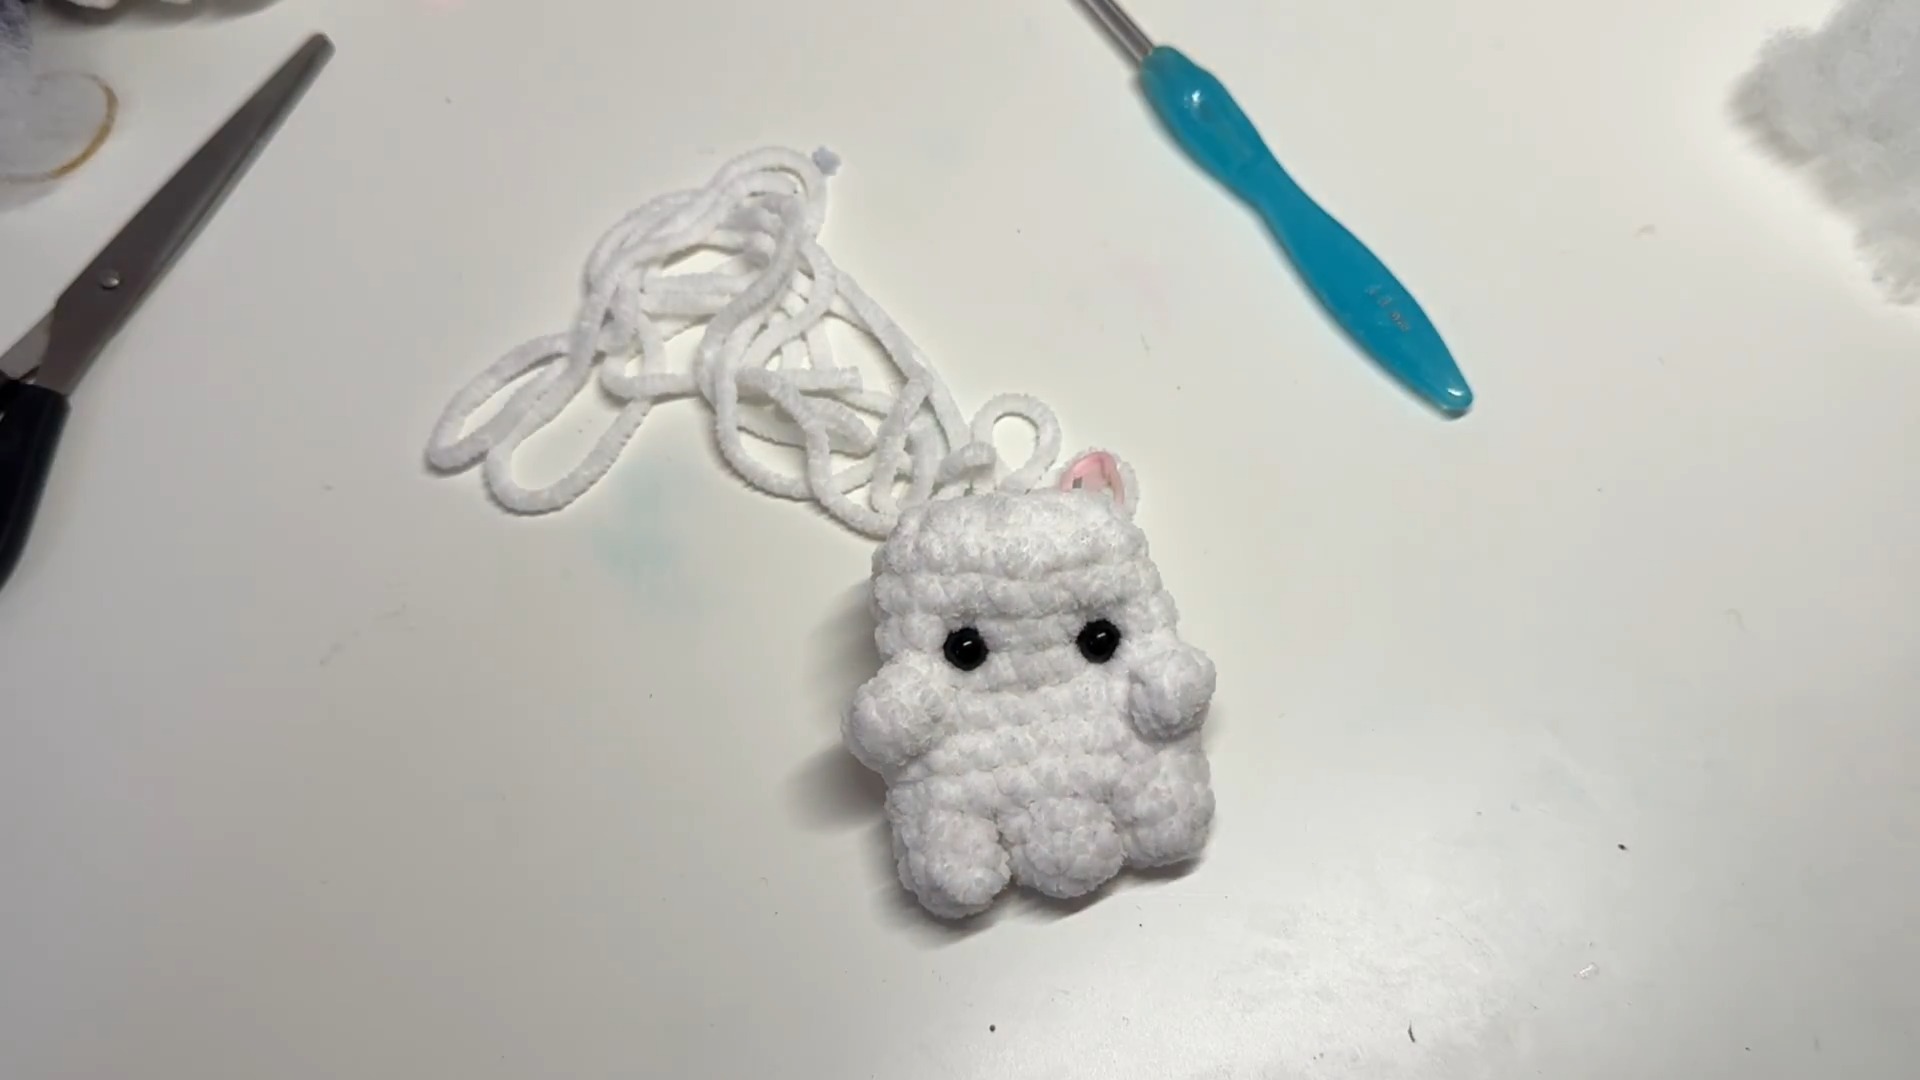
What makes this crochet ghost pattern unique is that it’s simple to create, even for beginners. Using just white yarn, some stuffing, and basic tools, you can follow along to build the ghost from its little legs to its bubbly arms and friendly face. The process includes joining small shapes together, making it fun and easy to assemble. As a bonus, the safety eyes give it an extra charming touch, and with almost no sewing involved, it’s quick to finish.
Credit Raeesaart
Materials & Tools Needed
To create the ghost plushy, you will need:
- White Yarn: Preferably medium or worsted weight.
- Stuffing: For filling the plushy.
- 4.5 mm Crochet Hook.
- 8 mm Safety Eyes.
- Scissors.
- Needle: For sewing in ends and shaping the ghost’s top.
- Stitch Marker: Helpful to mark your rounds and stitches.
Finished Size & Customization Ideas
- Finished Size: Approximately palm-sized, depending on your yarn, hook size, and tension. The ghost will have a rounded body and “legs” for a stable base.
- Customization Ideas:
- Use black or colored yarn for accents like bows or facial features.
- Add blush details by stitching or painting a small circle under each eye.
- Add Halloween-themed accessories, like a mini pumpkin or witch hat.
Pattern Abbreviations & Terminology
Here are the terms used in the pattern (US terminology):
- SC: Single Crochet.
- DC: Double Crochet.
- INC: Increase (2 SC in the same stitch).
- DEC: Invisible Decrease (Crochet into the front loops of two stitches).
- MR: Magic Ring.
- Bubble Stitch (BO): 5 DC worked in the same stitch, joined together.
- SLST: Slip Stitch.
- ST: Stitch.
- CH: Chain.
Step-by-Step Detailed Instructions
Bottom Section (The “Legs”)
- Create 3 small rounded bases (legs):
- Leg 1:
- Start with a magic ring.
- R1: Work 5 SC into the ring. Pull the ring tight.
- R2: SC around (5 ST). Place a stitch marker in the first ST.
- Fasten off, leaving tails for stuffing. Turn the piece right-side out.
- Repeat the steps above for Leg 2 and Leg 3, but do not fasten off at the end of Leg 3.
- Leg 1:
- Join Legs:
- With the working yarn from Leg 3, join it to Leg 1 using a SC.
- Work 2 more SC on Leg 1 (3 ST total).
- Move to Leg 2, join with a SC, then work 5 SC around Leg 2.
- Return to the middle section of Leg 1, work 3 SC there.
- Work 5 SC on Leg 3.
- Stitch count at the end: 16 SC (legs connected as a base).
- With the working yarn from Leg 3, join it to Leg 1 using a SC.

Body Section
- Create rounded body:
- R1: Work INC in the first stitch, followed by SC across. Total: 18 ST.
- R2: Work SC all the way around. Stitch count: 18.
- R3: Work SC for 17 ST, then make 1 Bubble Stitch (BO) in the final ST (represents one arm).
- R4:
- SC the first 6 ST and add another Bubble Stitch for the second arm.
- SC the remaining 11 ST. Total: 18 ST.
- R5–R8: Work SC all the way around (4 rounds). Stitch count remains steady at 18.
- Shape and decrease:
- R9: (SC, DEC) six times. Total: 12 ST.
- Insert safety eyes:
- Place them one row above the arms, spaced symmetrically apart.
- Stuff the body and legs evenly to maintain the shape.
- Final decrease & close:
- R10: Work 6 DEC (one DEC per ST). Total: 6 ST.
- Cut your working yarn, leaving a long tail. Use a needle to weave through each front loop and pull tight to close the piece completely. Tie a knot to secure.
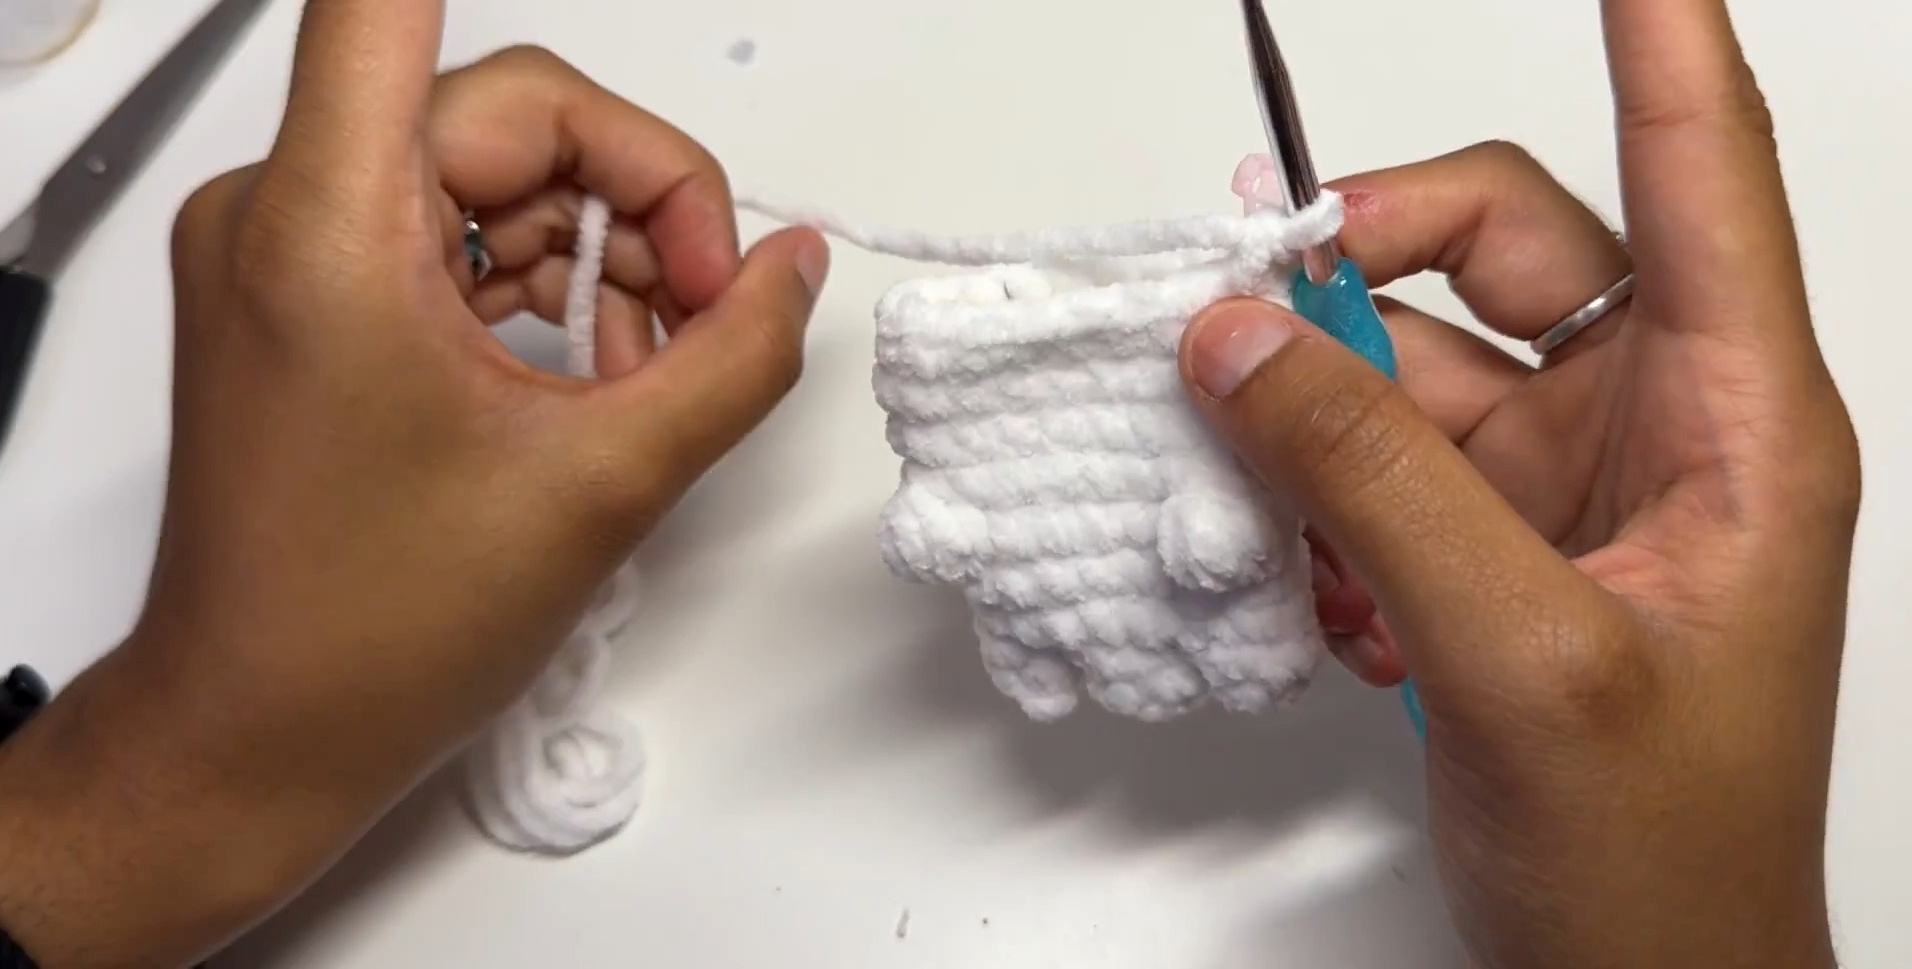
Finishing
- Use your needle to pull the thread out through a random stitch far from your knot, then cut off excess yarn flush with the surface.
- Adjust your stuffing and shape if needed.
- The ghost should stand upright with its rounded base and small arms!
Additional Notes
- Bubble Stitch: This creates cute arms for the ghost. Ensure the loops are tight and pull evenly for a clean stitch.
- Stuffing: Add stuffing incrementally to avoid overstuffing, especially for small parts like the legs.
- Customization: You can embroider a smile or attach accessories like bows or hats to personalize your ghost.