
A cozy, stylish crochet beanie worked bottom-up with a stretchy ribbed brim, bold spike stitch texture, and endless color possibilities – perfect for cold days and personal flair.

Learn how to create a cozy, colorful crochet beanie that’s stylish and useful. This simple pattern is perfect for chilly weather or as a thoughtful handmade gift. The crochet hat is comfortable, warm, and can easily be made for any child or adult size.
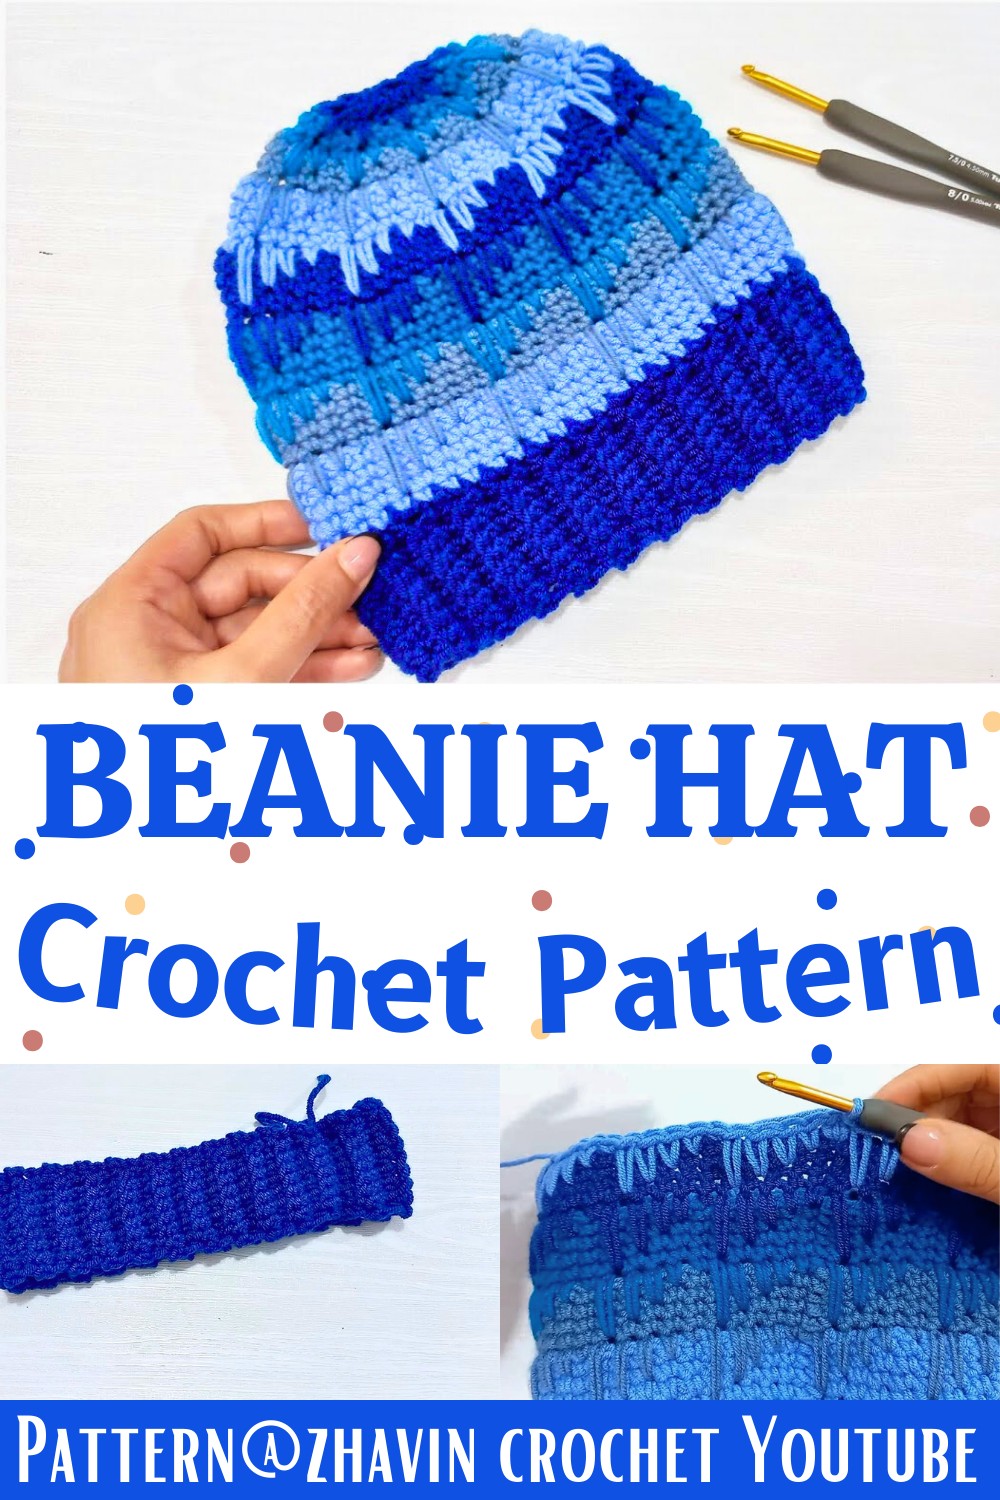
Beautiful & Easy Crochet Beanie Pattern
This crochet beanie pattern is great for everyday use. Wear the hat during chilly days, add flair to your outfits, or gift it to someone special. It’s versatile; you can play around with colors to match any style. The snug brim and structured body make it durable and perfect for keeping heads warm while looking stylish.
Credit zhavin crochet
Key Features:
- Bottom-up construction: Start with the brim and work upwards to form the body and crown.
- Two basic stitches: Single crochet and spike single crochet for texture and visual interest.
- Color variety: Use multiple colors of medium-weight yarn for a playful look.
- Brim shaping: Made with single crochet worked into the back loops for elasticity.
- Gradual crown decreases: Achieve a neat finish by reducing stitch counts in later rounds.
This crochet beanie starts with the foundation brim, offering a stretchy band that hugs the forehead. The brim is crocheted from repeated rows of single crochet, specifically worked into the back loops to create ribbing. The neat edge is achieved by crocheting the ends together using slip stitches, creating a seamless circular base for the hat’s body.

Once the brim is complete, the body of the hat begins by switching to a larger hook size and attaching a new yarn color. Single crochets are placed evenly into the rows of the brim, forming a smooth transition. The body is worked in continuous rounds, alternating between standard single crochets and spike single crochets. Spike stitches are strategically placed into lower rows of the fabric to add a dynamic, textured pattern. After repeating this sequence to build up height, the design transitions to shaping the crown.

The crown shaping begins with gradual decreases to reduce the number of stitches in each round. Every set of stitches is worked with care, incorporating spike single crochets that adjust to the diminishing rows. As the stitch count reduces from five to four, then three, and finally two, the hat takes on its signature snug silhouette. At the very top, all remaining stitches are closed neatly with a slip stitch and the yarn tail is used to cinch the hole closed for a polished finish.

This pattern includes multiple rounds of changes in spike heights and color swaps to add depth and playful variety. The repetitive nature makes it beginner-friendly while offering seasoned crocheters room for personalization.
Video Tutorial
Necessary Materials:
- Yarn: Four colors of medium-weight (worsted) yarn
- Hooks: 4.5 mm for the brim, 5 mm for the body
- Others: Scissors, tapestry needle for weaving in ends
Key Crochet Techniques:
- Slip Knot
- Chains (ch)
- Single Crochet (sc)
- Back Loop Single Crochet
- Spike Single Crochet
- Slip Stitch (sl st)
- Decreasing Single Crochet

Detailed Pattern:
- Brim:
- Start: With the 4.5 mm hook and your first yarn color, make a slip knot and then chain 9.
- Row 1: Skip the first chain, single crochet into each chain to the end. Chain 1 and turn.
- Row 2: Single crochet into the first stitch under both loops, then back loop only single crochet into the remaining stitches. Single crochet into the last stitch under both loops.
- Rows 3-50: Repeat Row 2. Ensure the total row count is a multiple of 5.
- Join the Ends: Slip stitch the ends of the band together to form a circle.
- Body of the Hat:
- Round 1: Switch to the 5 mm hook. Single crochet around the brim, making one single crochet at the top of each row.
- Rounds 2-5: Continue single crocheting in each stitch. Fasten off and change yarn color at the end of Round 5.
- Round 6 (Spike Stitches): Attach new yarn. Single crochet in the first stitch, then Spike single crochet into the stitches two rows below, three rows below, four rows below, and five rows below. Continue this pattern around.
- Rounds 7-10: Single crochet in each stitch. Change yarn color at the end of Round 10.
- Repeat the pattern: Alternate rounds of single crochet and Spike stitches until the hat reaches the desired height.
- Decreasing for the Crown:
- Decrease Round 1: Single crochet decrease over two stitches, then single crochet in the next three stitches. Repeat around.
- Decrease Round 2: Single crochet around without decreasing.
- Subsequent Decrease Rounds: Continue decreasing in the established pattern.
- When approximately 2 stitches remain, cut the yarn, leaving a long tail, weave in the tail, and tighten to close the top hole.
Troubleshooting and Suggestions:
- Spike stitches tension: Keep your loops loose when working spike single crochets to avoid pulling on the fabric, which can distort the texture.
- Color changes: Ensure clean transitions between colors by tightly securing and weaving in the tails.
- Stitch consistency: Pay special attention to the decreases near the crown. Count regularly to maintain symmetry and avoid missing stitches.
- Creative modifications: Experiment with fewer colors for a minimalist vibe, or switch between solid and variegated yarn for a unique look. Embellish with a pompom, or add appliqués for extra flair.
- Adaptability: Adjust as needed—this pattern can scale up or down for different sizes by increasing or decreasing the number of brim rows and crown rounds.


