Crochet Doraemon Coin Bag Tutorial – 8 cm Frame
Need to crochet this adorable Doraemon coin bag? Follow each round from magic ring to kiss-lock frame, then add tiny eyes and nose for its signature look.
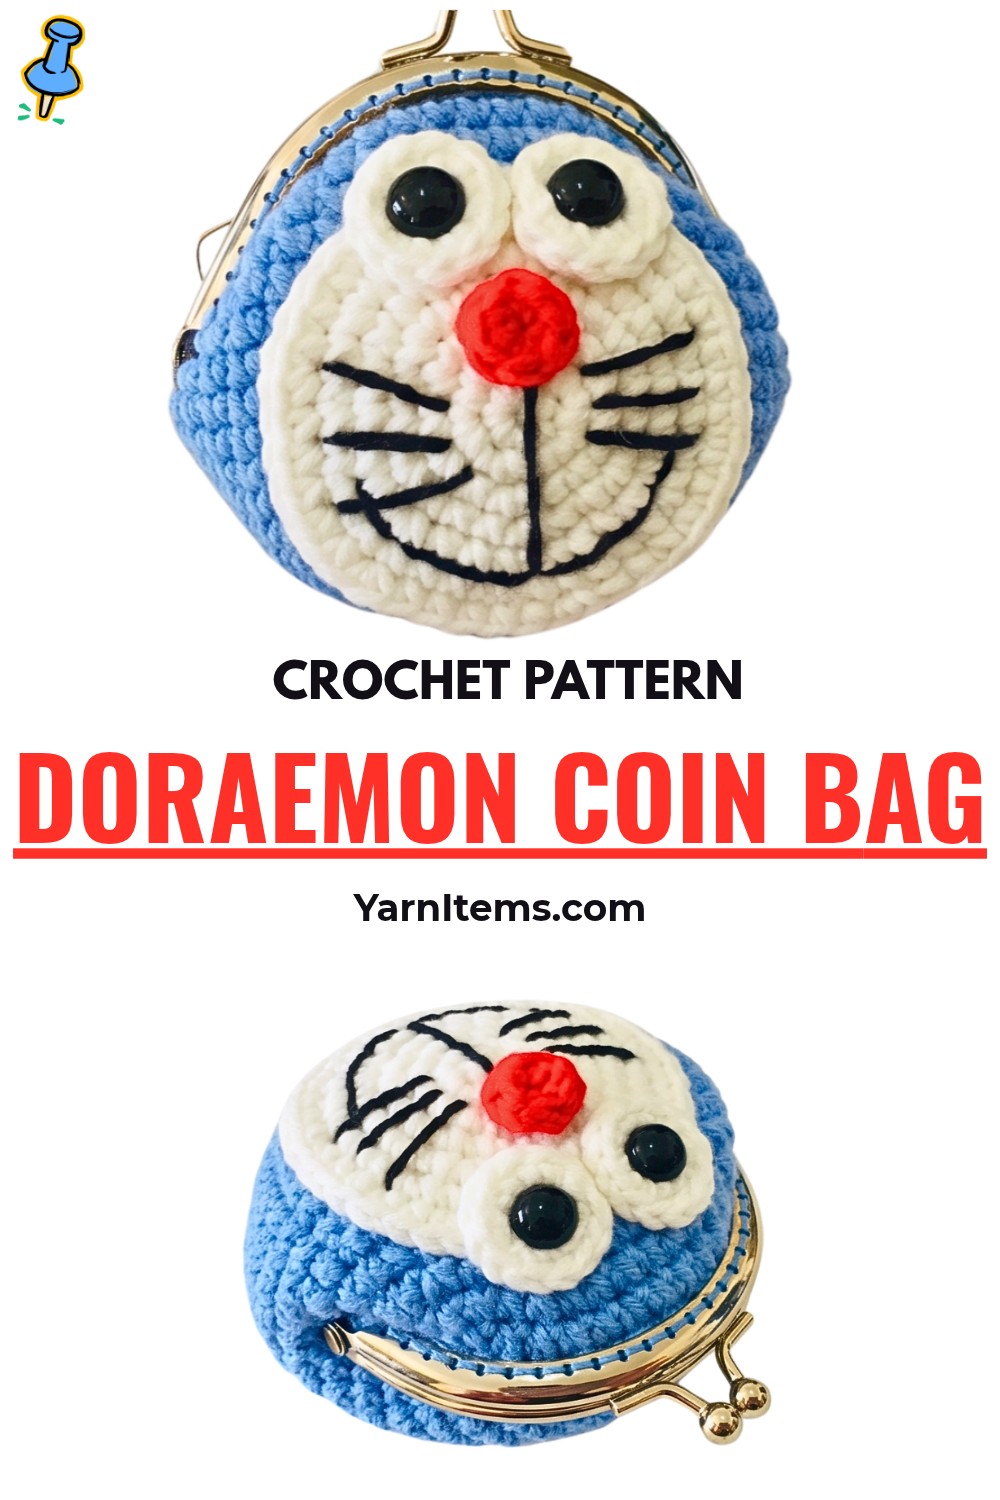
Round by round, blue milk cotton yarn takes shape as two matching panels for this playful Doraemon coin bag. Crochet details stay simple, while gradual increases create panels sized to fit an 8 cm kiss-lock coin purse frame.
Shape matters just as much as stitching here. After crocheting, polyester fiberfill helps both panels hold their rounded form before framing, while white eye patches and red nose bring Doraemon’s familiar face to life. Crochet construction and careful assembly work together for a neat finished pouch.
Credit Nala Crochet
Crochet Panels for Coin Bag
This design uses two identical body panels, one for front and one for back. Work them in blue milk cotton yarn with a 3.0 mm crochet hook.
You will also need:
- Blue milk cotton yarn
- Small quantities of white, red, and black yarn for facial features
- 3.0 mm crochet hook
- 8 cm kiss-lock coin purse frame
- Hot glue or fabric glue, such as UHU glue
- Polyester fiberfill
- Needle for sewing
- Scissors
Pattern Terms
The supplied pattern uses these abbreviations:
- Ch: Chain stitch
- Sl St: Slip stitch / connecting to close round
- X: Single crochet
- V: Increase – work 2 single crochets in same stitch

Work body panels in continuous rounds or join with slip stitch at end of each round, pulling tight to minimize seam.
Shape Each Body Panel
Round 1: Make magic ring, work 6 X into ring, pull tight to close, and join. (6 stitches)
Round 2: Ch 1, work V in every stitch around. Join. (12 stitches)
Round 3: Ch 1, work [1 X, 1 V] repeatedly around. Join. (18 stitches)
Round 4: Ch 1, begin with 1 X, then work [2 X, 1 V] repeatedly around until last stitch, ending with 1 X. Join. (24 stitches)
Round 5: Ch 1, work [3 X, 1 V] repeatedly around. Join. (30 stitches)
Round 6: Ch 1, begin with 2 X, 1 V, then work [4 X, 1 V] repeatedly around, ending final stitches with 2 X. Join. (36 stitches)
Round 7: Ch 1, work [5 X, 1 V] repeatedly around. Join. (42 stitches)
Round 8: Ch 1, begin with 3 X, 1 V, then work [6 X, 1 V] repeatedly around, ending with 3 X. Join. (48 stitches)

Continue Without Further Increases
For Rounds 9–14, Ch 1 and work 1 X in every stitch around. Join at end of each round.
These rounds establish pouch height rather than making the panel wider. Once Round 14 is complete, fasten off and leave long tail for sewing.
Repeat entire body pattern to create second identical panel.
Size option: If you want deeper pouch, add extra plain rounds following Round 8 before moving toward frame installation.

Add Doraemon’s Facial Features
Facial details are made separately before final framing.
Red Nose
Make magic ring.
Round 1: Work 6 X into ring, pull tight, and fasten off, leaving yarn tail for attachment. (6 stitches)
White Eyes
Make 2 identical white eye pieces.
Round 1: Make magic ring, work 6 X into ring, and join. (6 stitches)
Round 2: Ch 1, work V in every stitch around. (12 stitches)
Fasten off. Use smaller hook and invisible join technique to keep edges smooth.

Shape Panels Before Framing
Once both blue panels and facial pieces are complete, shaping comes before frame installation.
Block With Fiberfill
Stuff crocheted panels with polyester fiberfill.
Let them rest for one or two days so pouch develops clean, rounded form before framing.
This waiting stage is part of shaping process supplied in tutorial, so avoid rushing directly into frame attachment.
Build Doraemon’s Face
Position two white eye patches and red nose on front body panel.
Secure facial pieces using fabric glue or sewing.
Take care with placement before securing pieces permanently. Once attached, these details establish character expression on front panel.

Fit 8 cm Kiss-Lock Frame
The crocheted panels are designed to fit an 8 cm kiss-lock coin purse frame.
Apply Glue Inside Frame Channel
Apply fabric glue inside channel of metal frame.
Press upper edge of crocheted panels securely into frame channel.
For additional security, optionally stitch through pre-drilled holes in frame.
If extra durability is preferred, use both sewing and fabric glue when securing frame.
Allow frame attachment to become secure before putting coins or small items inside pouch.
Customize Your Doraemon Coin Bag
Several changes can personalize finished pouch without altering core character design.
- Deeper pouch: Add extra plain rounds, building on Round 8, before attaching metal frame.
- Stronger frame attachment: Combine sewing with fabric glue for additional durability.
- Color details: Use supplied white, red, and black yarn quantities for facial features while keeping blue as primary body color.
With two matching panels, rounded shaping, recognizable facial details, and secure kiss-lock framing, finished coin purse stays compact while retaining its structured form.

The completed crochet Doraemon coin bag is designed around an 8 cm frame and provides a neat, character-inspired way to carry coins or other small items.