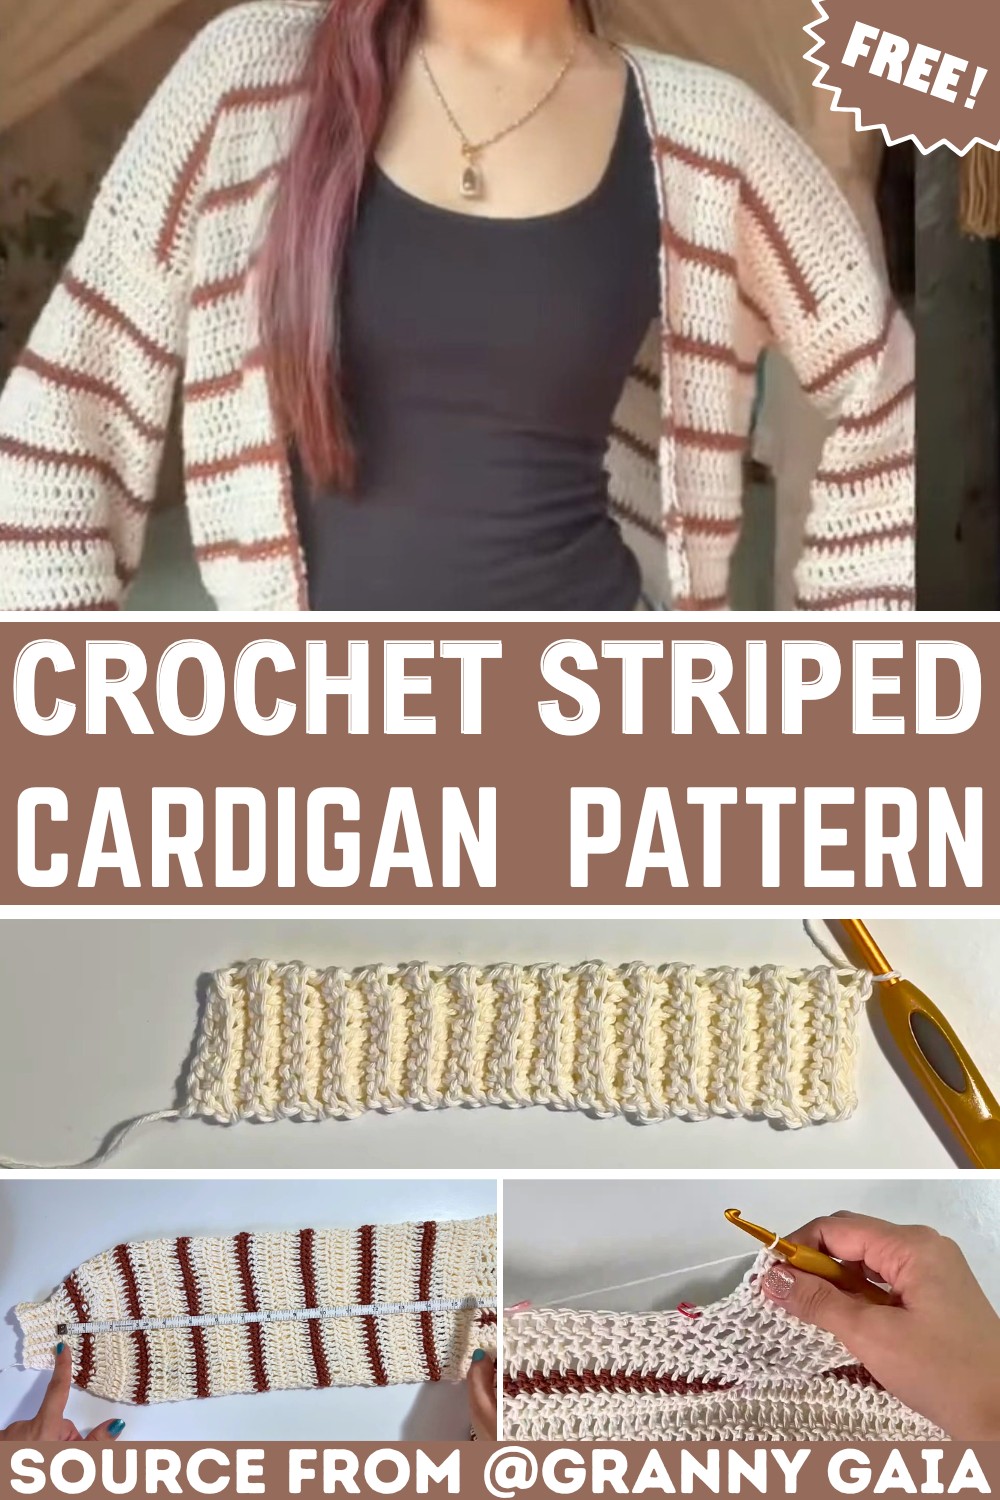
Lightweight Crochet Striped Cardigan Pattern Free
Make a lightweight striped cardigan that follows your own measurements, with simple ribbing and easy color changes for a comfortable fit you can adjust as you crochet.
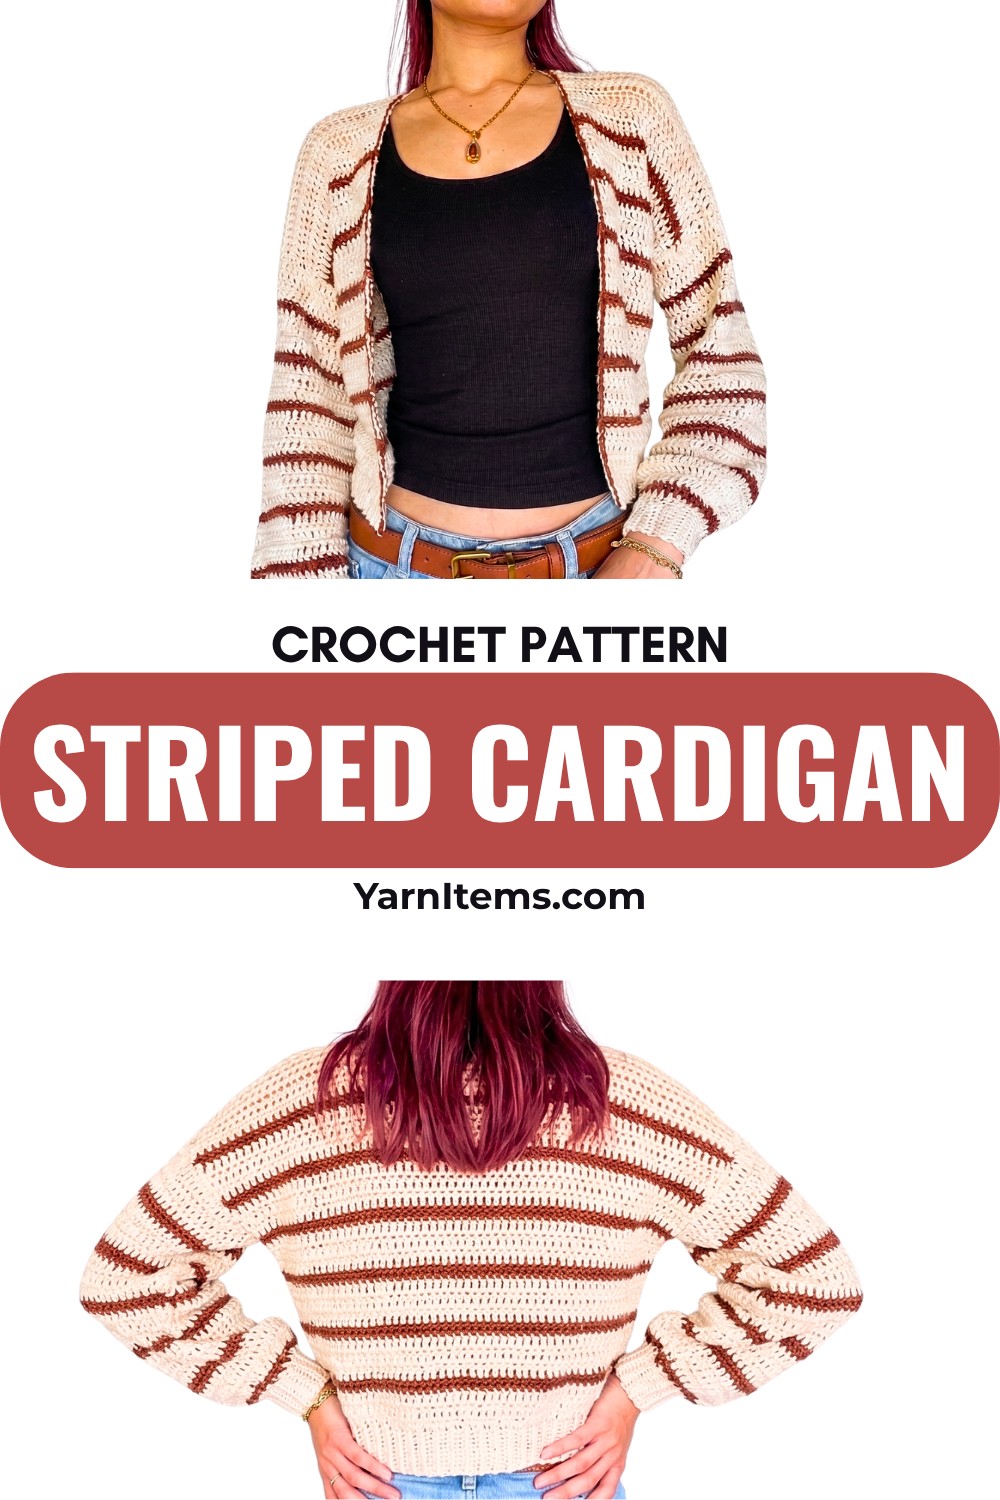
Crochet Striped Cardigan Pattern
A striped crochet cardigan becomes much easier to approach when you stop thinking about a fixed size and start with the measurements that actually matter. This crochet pattern uses your bust measurement to establish the front and back widths, while the length can be extended or shortened according to how you want the finished cardigan to sit.
The most important part is checking those measurements before moving too far ahead. A small difference in panel width can noticeably change the fit around the body, while sleeve and armhole measurements affect how comfortably the cardigan sits when worn. Taking a moment to compare your crochet with your measurements as you go can save you from making several rows that later need to be undone.
Credit Granny Gaia
Materials & Tools Needed
- Yarn: Sport weight #2 yarn in two colors. Soft cotton yarn can give the cardigan a light, breathable feel.
- 4.5 mm Crochet Hook: For the ribbing.
- 5.5 mm Crochet Hook: For the main cardigan and sleeves.
- Stitch Markers: For marking armholes and shoulder positions.
- Darning Needle: For securing yarn ends.
- Scissors
- Tape Measure: Essential for checking the cardigan against your measurements as you work.
Finished Size & Customization
This cardigan follows a made-to-measure approach, so the final size depends on your own measurements rather than a fixed size chart.
For the front panels, use your bust measurement as follows:
Bust measurement + 1 inch ease ÷ 4 = front panel width
For example:
- Bust: 33 inches
- Add 1 inch for ease: 34 inches
- 34 ÷ 4 = 8.5 inches
- Subtract approximately 1.5 inches for the neckline
- Front panel width: approximately 7 inches
You can make the cardigan cropped, medium-length, or longer simply by changing the number of body rows.
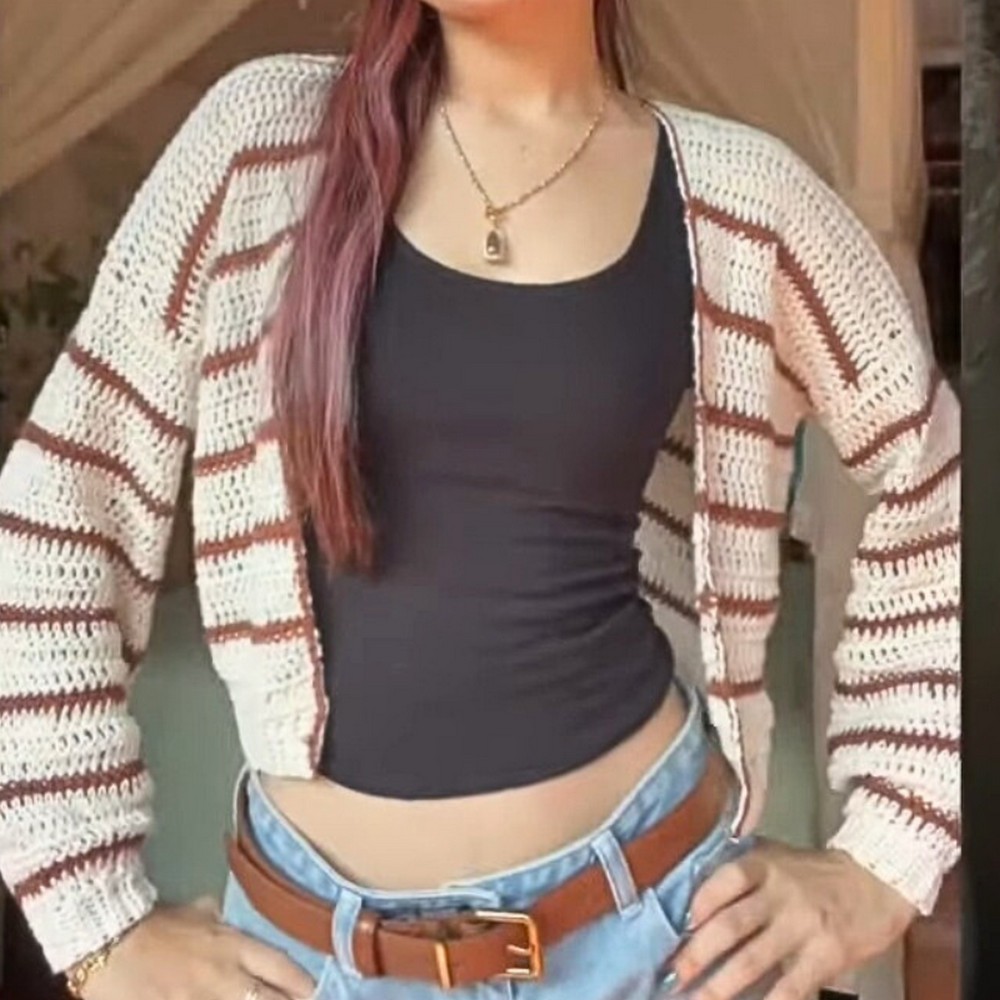
The ribbing can also be adjusted. The tutorial uses approximately 1.5 inches of ribbing, created with a chain of 7 plus 1 turning chain.
Pattern Abbreviations & Terminology
- Ch: Chain
- Sc: Single crochet
- Hdc: Half double crochet
- Dc: Double crochet
- Sl st: Slip stitch
- BLO: Back loop only
- Dctog: Double crochet two together
- Sctog: Single crochet two together
- St: Stitch
- Rep: Repeat
Crochet Striped Cardigan Instructions
Front Panels
Make the Ribbing
Using the 4.5 mm hook, make a slip knot and chain 7 + 1 for turning. Work 1 sc into the BLO of each chain. You should have 7 sc.
Chain 1 and turn.
For each following row, continue working sc through the back loop only. Keep making rows until the ribbing reaches the calculated width of your front panel.
For example, a ribbing section measuring approximately 7 inches may require around 30 rows, depending on your yarn and tension.
Mark the final ribbing row before beginning the main body.
Begin the Main Panel
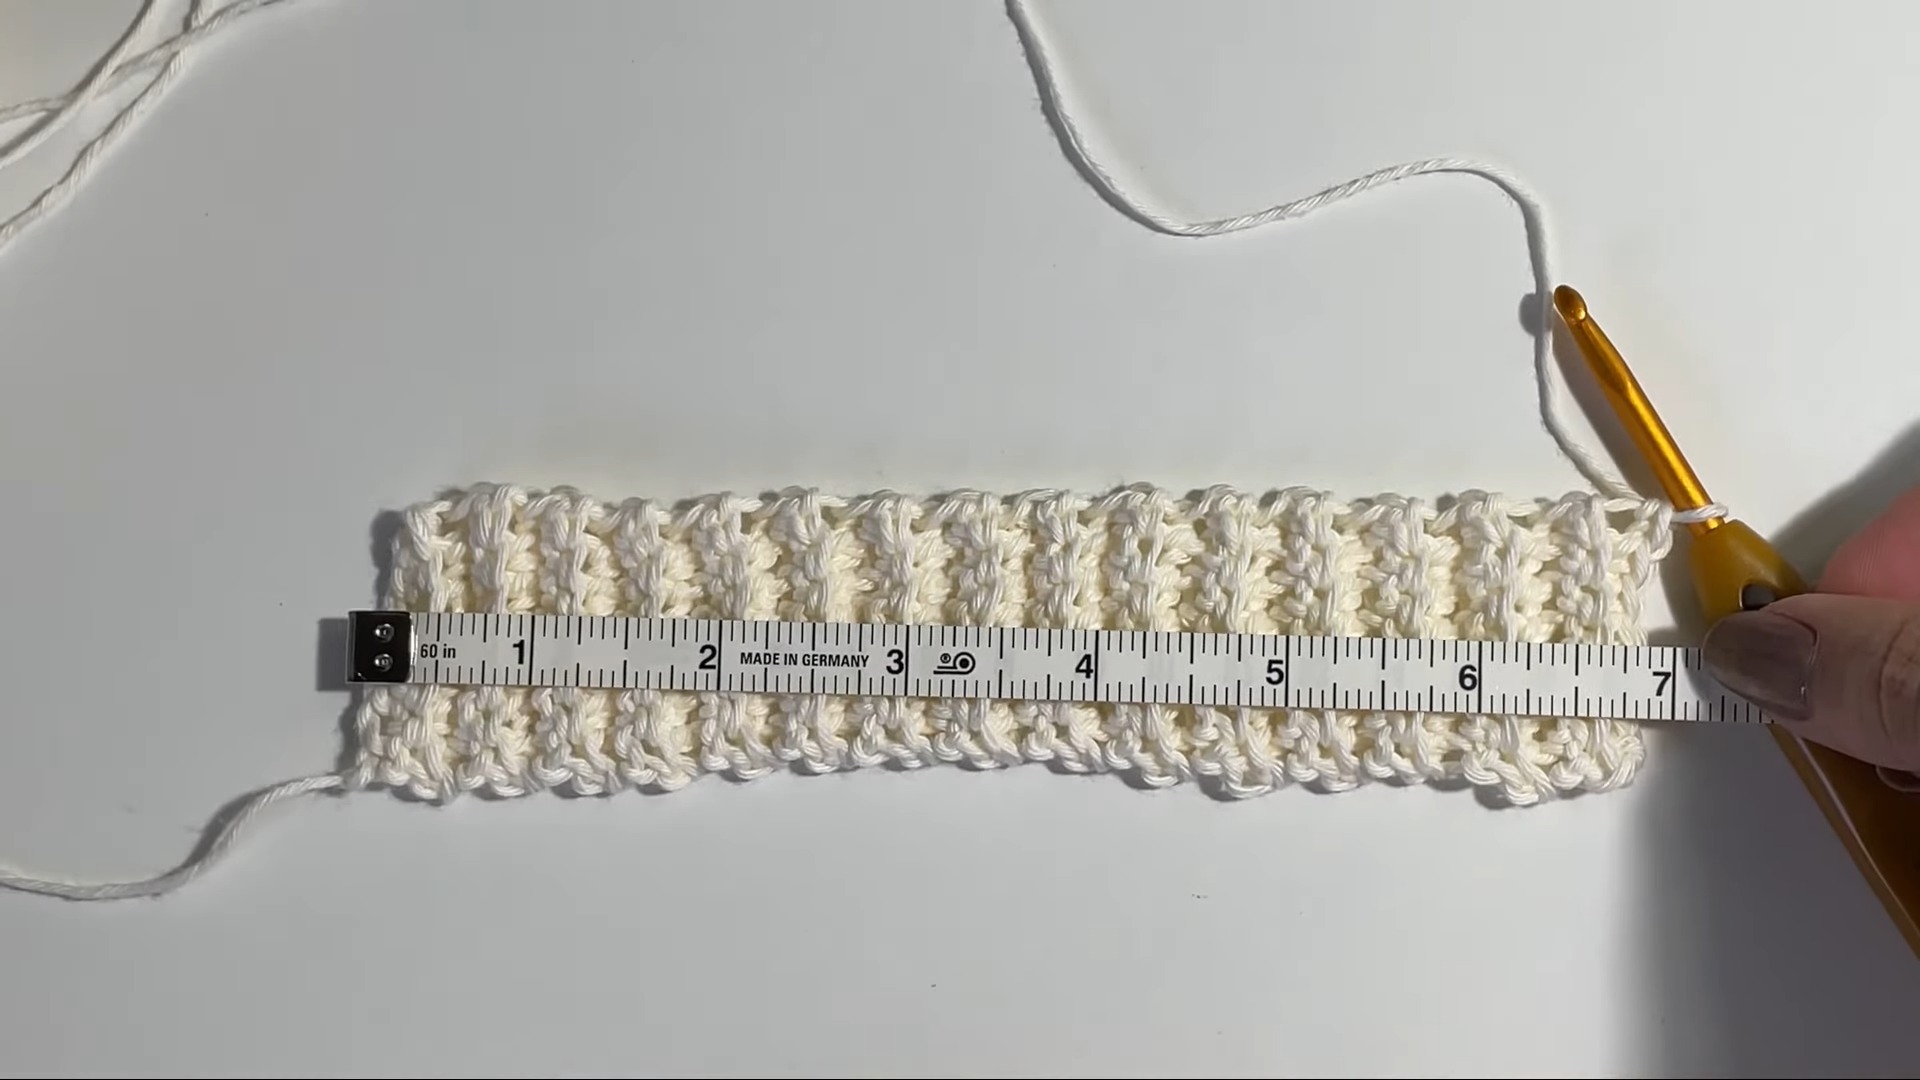
Switch to the 5.5 mm hook.
Work 1 sc into the edge of each ribbing row. If you made 30 ribbing rows, this gives you approximately 30 sc across the first body row.
Work the body using the following stripe sequence:
- Rows 2–4: Hdc across in the main color.
- Rows 5–6: Sc across in the second color.
- Repeat the 3-row Hdc / 2-row Sc sequence until you reach your desired cardigan length.
When you reach the shoulder area, add 3 additional rows of Hdc to provide the extra shoulder section.
Fasten off and weave in the ends as needed.
Make the second front panel using the same measurements and row sequence.
Back Panel
Create the Back Ribbing
Using the 4.5 mm hook, chain 7 + 1.
Work sc through the BLO of each chain, keeping 7 sc across every row.
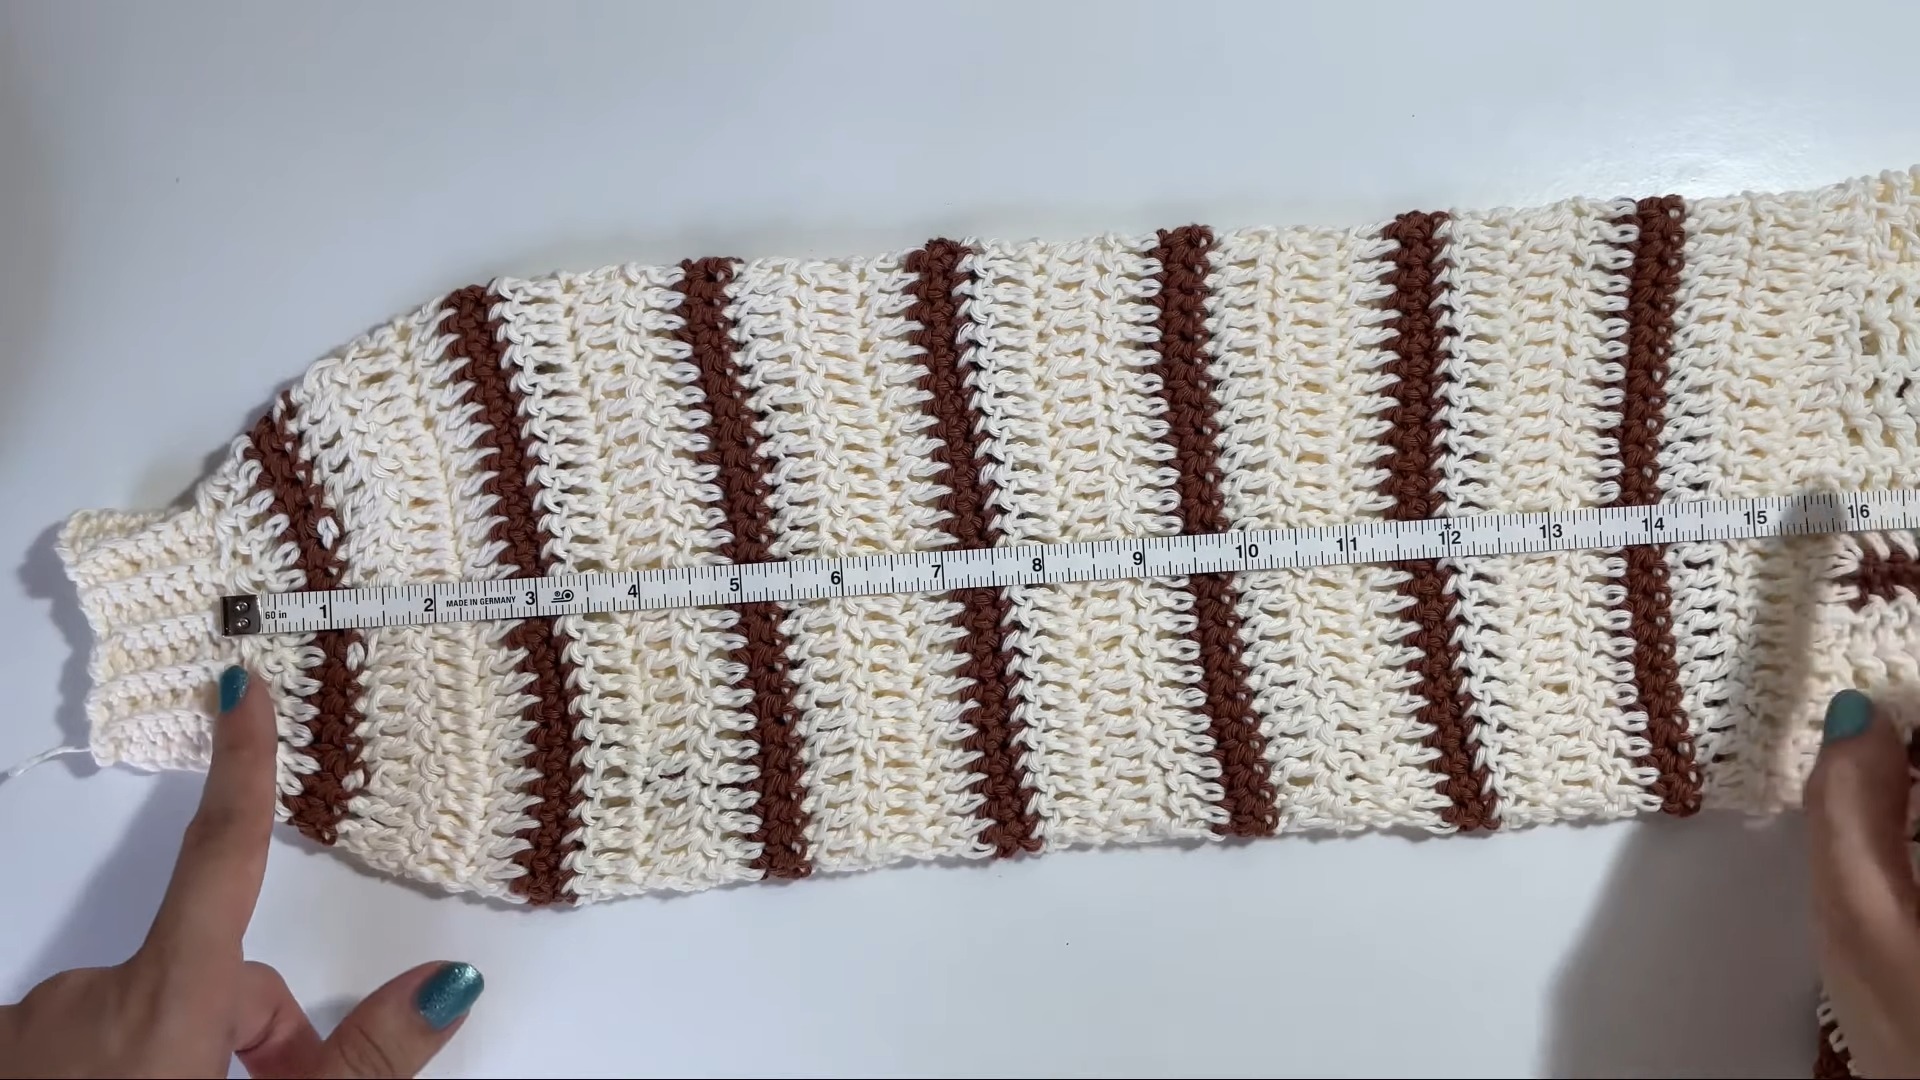
Continue until the ribbing reaches approximately half of the bust measurement.
For example, with a 34-inch bust, the back ribbing width would be approximately:
34 ÷ 2 = 17 inches
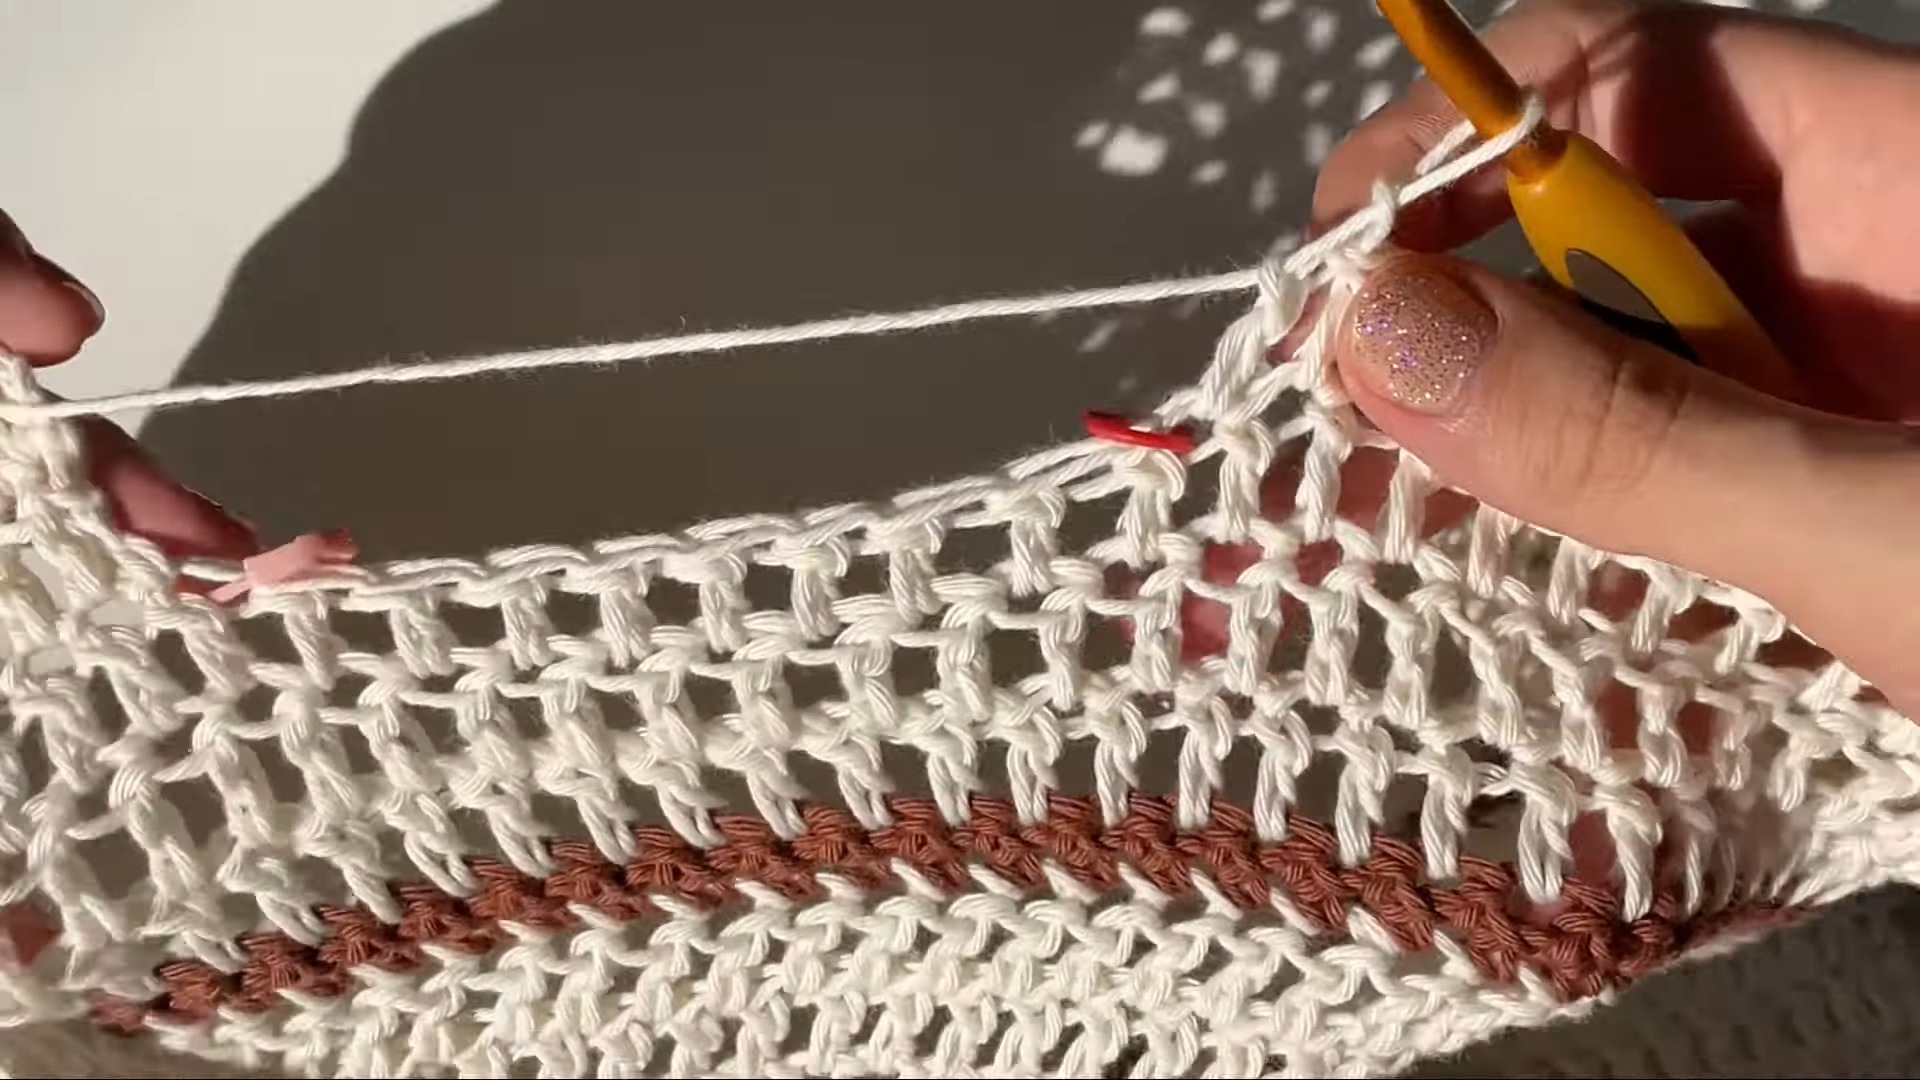
Work the Back Body
Change to the 5.5 mm hook.
Work 1 sc into the edge of each ribbing row.
Continue with the same stripe sequence used for the front:
- 3 rows of Hdc in the main color
- 2 rows of Sc in the second color
- Repeat
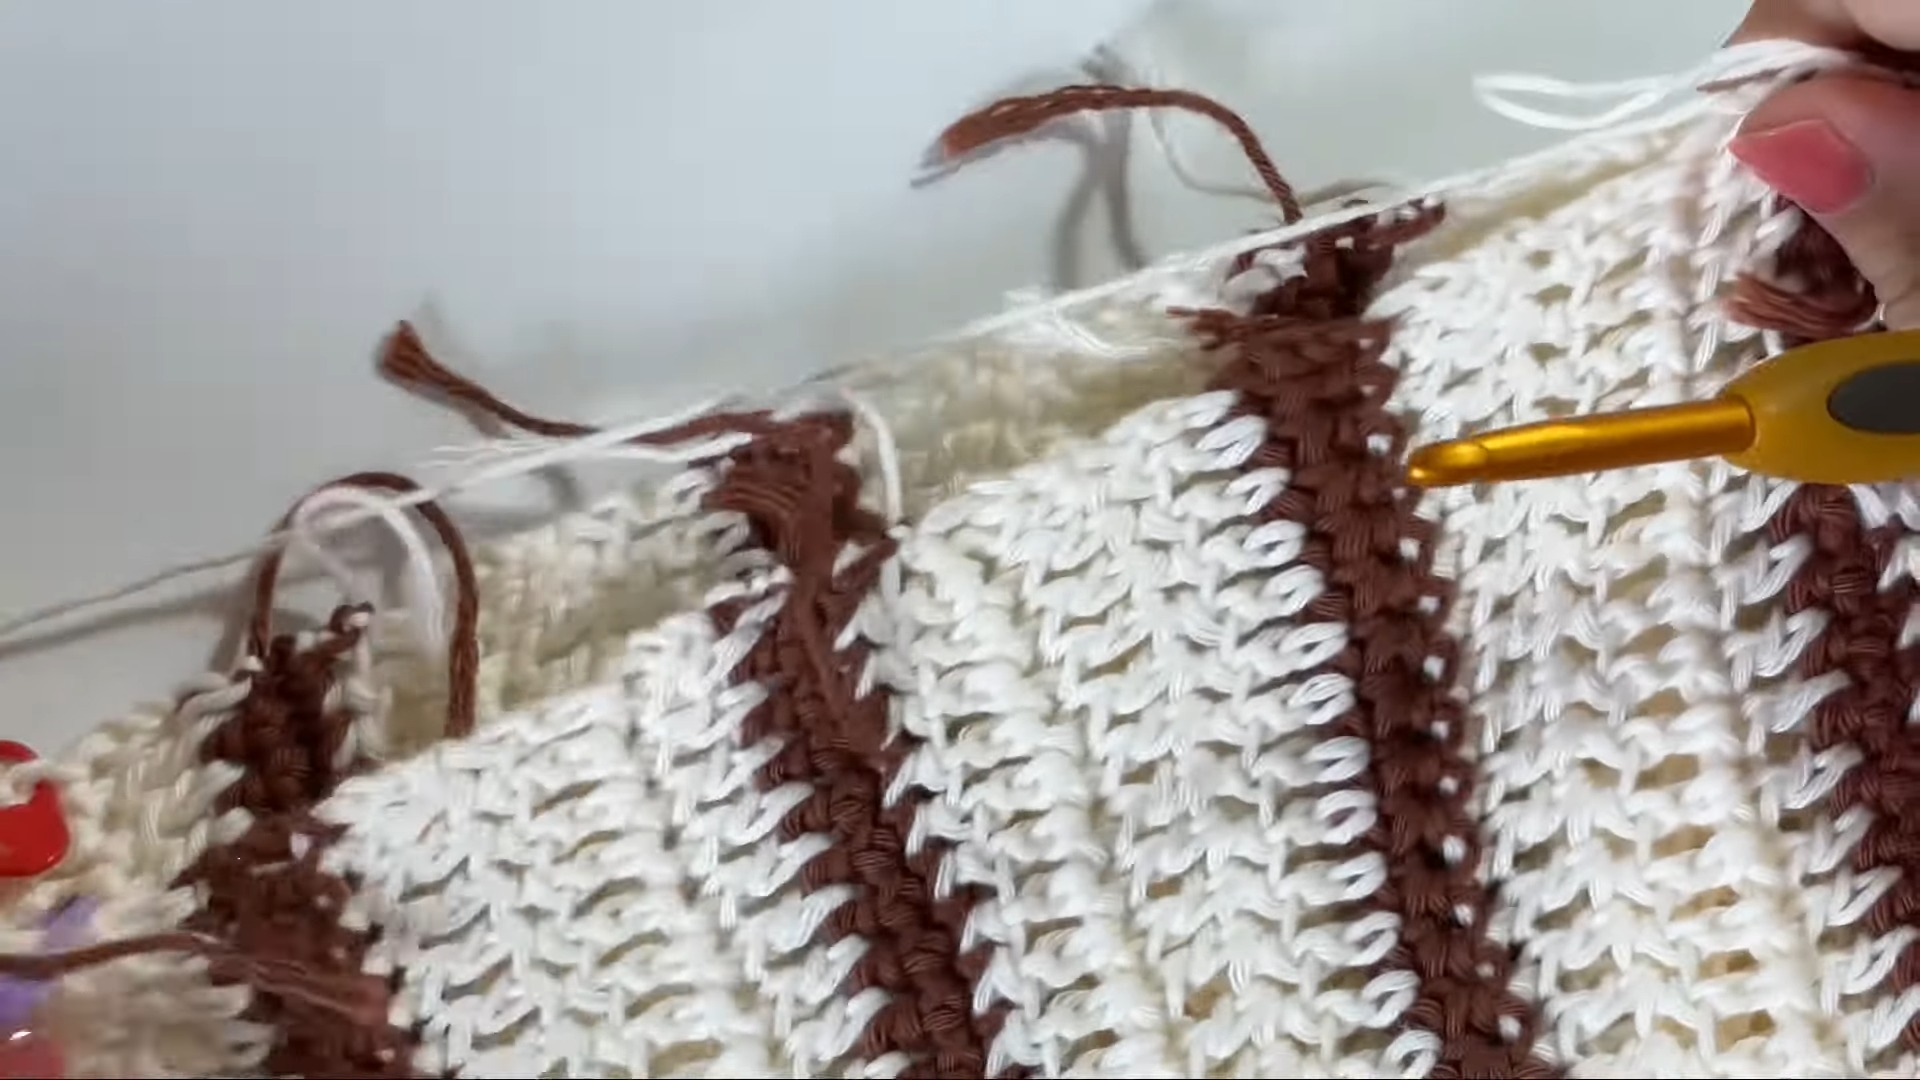
Stop the back panel when its height matches the front panels before their additional shoulder rows.
Divide the top section into two shoulder areas and mark the positions needed to line them up with the front panels.
Work the additional 3 Hdc rows on the marked shoulder sections.
Check the Fit Before Continuing
At this stage, lay the front and back panels together and compare them with your measurements before moving on to the sleeves.
Check the body width, overall length, neckline opening, and armhole space. If the cardigan feels narrower or shorter than intended, this is the easiest point to correct it.
For the armholes, the tutorial uses approximately 7 inches of open space. Rather than relying only on the number of rows, compare this opening with how you want the cardigan to sit when worn.
Join the Shoulders
Place the front panels against the back panel and align the shoulder sections.
Use a sl st join to connect the shoulder areas, keeping the marked armhole space open.
Once the shoulders are joined, the cardigan can be checked again before the sleeves are completed.
Sleeves
Attach the yarn around the armhole edge using the 5.5 mm hook.
For the first sleeve round, work:
- 2 Dc around each double-crochet row
- 1 Dc around each single-crochet row
Join with a Sl st.
Continue the sleeve using the same stripe rhythm:
- 3 rounds of Dc in the main color
- 2 rounds of Sc in the second color
Begin each round with Ch 2, turn, and continue around.
Sleeve Decreases
As the sleeve approaches the wrist, gradually reduce its width:
- Round 32: Dc2tog every 6th stitch
- Round 33: Dc2tog every 5th stitch
- Round 34: Sc2tog every 4th stitch
- Final round: Work 1 Sc in each stitch with no further decreases
The gradual reduction creates a narrower wrist area without making the sleeve suddenly tight.
Add the Sleeve Cuff
Switch back to the 4.5 mm hook.
Chain 7 + 1 and work sc in the BLO to create the cuff ribbing.
Join the ribbing to the sleeve edge with slip stitches as you work. Use additional slip-stitch decreases where needed to bring the cuff comfortably around the wrist.
Repeat the sleeve instructions for the second side.
Close the Side Seams
Align the front and back panels.
Starting from the bottom ribbing, use slip stitches to join the side edges upward.
Stop at the armhole opening and check that both sides have the same length.
Finish the Neckline
Work a slip-stitch border around the neckline to give the edge a cleaner finish and help prevent it from curling.
Weave in the remaining yarn ends with a darning needle.
Final Fit Check
Before considering the cardigan finished, try it on and check the body length, sleeve length, wrist fit, and armhole comfort.
If you want a longer cardigan, additional body rows can be added before finishing the lower edge. Likewise, sleeve length can be adjusted by continuing or stopping the sleeve rounds at the point that feels right for you.
The result is a lightweight striped cardigan that can be kept simple in two colors or changed into a completely different look with your own stripe combinations.