Vibrant & Stylish Crochet Shorts Pattern
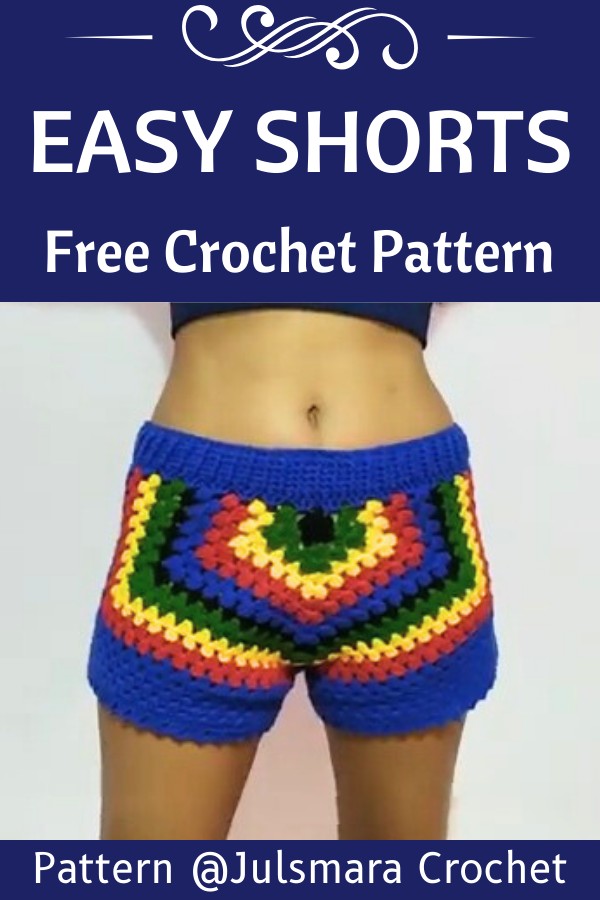
These colorful and comfy crochet shorts are a playful wardrobe staple, perfect for lounging at home or enjoying sunny outdoor adventures.

Step into style with vibrant crochet shorts that effortlessly blend charm and comfort. Perfect for summer days or lounging around, these shorts are designed to be as functional as they are fashionable. The alternating colors and intricate stitch techniques create a bold yet timeless aesthetic that suits a wide range of personal styles.
Crochet Shorts Pattern
This pattern features a beautifully constructed two-panel design tailored for a snug yet flexible fit, with stretchable sections to flatter and move with your body. The unique incorporation of colorful rows and delicate edging details elevates the overall look, making these shorts a fun and playful addition to your handmade wardrobe. Whether you aim for a casual outfit or a statement piece, these crochet shorts bring creativity to life in the most stylish way.
Credit Julsmara Crochet
Key Features and Construction:
- Made with Two Panels: Each panel consists of rows of vibrant, textured stitches joined together to form the front and back of the shorts.
- Simple Stitch Repeats: Features rows of double crochet stitches combined with chain spaces, making it beginner-friendly.
- Customizable Sizing: Adjust the number of rows to fit your hip measurements, forming a personalized, stretchy fit.
- Detailed Edging and Waistband: Includes a picot edge around the leg openings and a ribbed waistband for added style and structure.
- Multi-Color Designs: Perfect for playing with color combinations, creating an eye-catching striped effect.
Overview of the Construction Process
To create these trendy crochet shorts, you’ll work on two identical rectangular panels. Starting with a magic ring, the pattern uses a combination of double crochet stitches and chain spaces to build colorful rows. Each color is switched out in neat intervals, giving the piece its bold, stripe-like effect. Don’t worry—Julie, the designer, guides you through the steps to seamlessly introduce the new yarn colors.
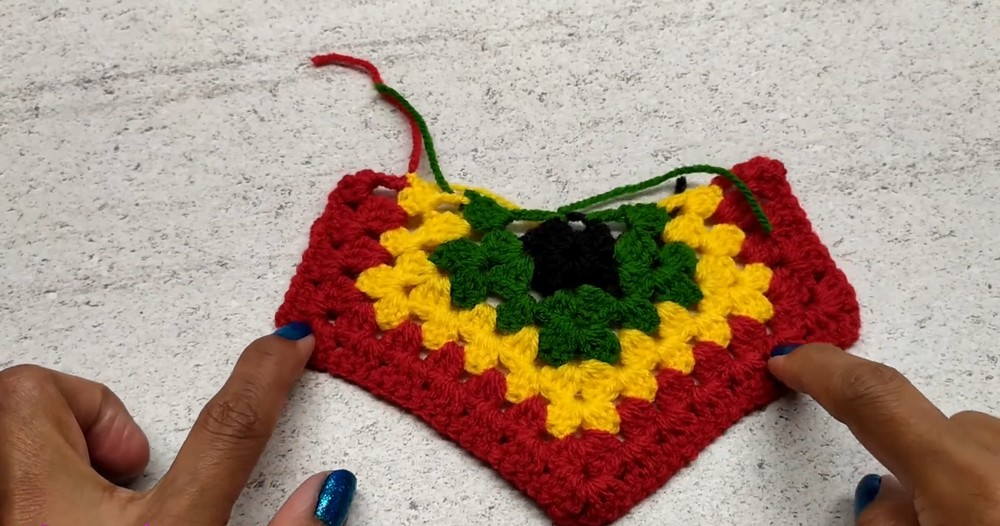
Once the panels are complete, they are sewn together along the sides and crotch to form the basic shape of the shorts. This simplicity makes the design ideally suited for crochet enthusiasts seeking a straightforward garment-making pattern. The fabric’s stretch—achieved through the combination of stitches and yarn tension—ensures the shorts contour to your body comfortably.
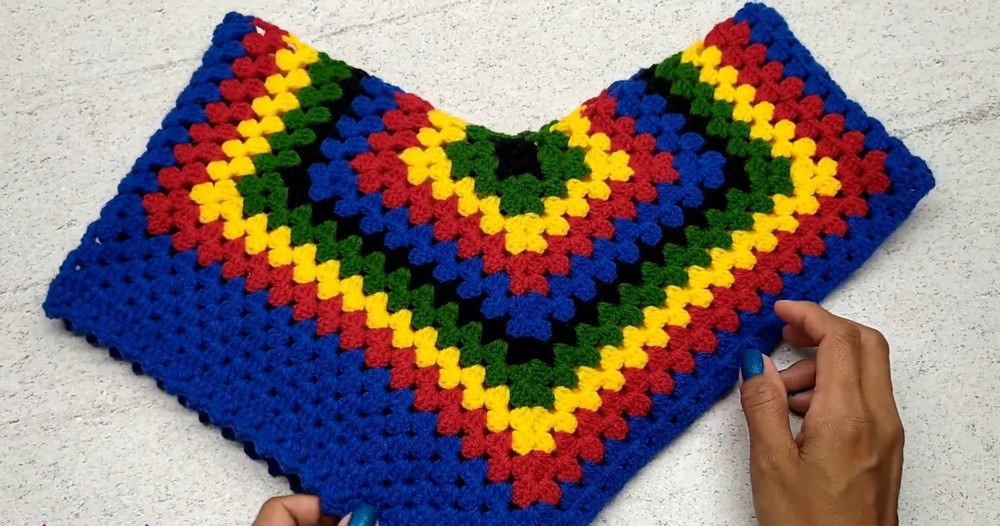
Next, you’ll add a contrasting border to the leg openings using a delightful picot stitch. This elegant touch not only provides a polished finish but also adds a bit of playfulness to the design. If picots aren’t your favorite, you can opt for a simple round of single crochet for a more streamlined look.
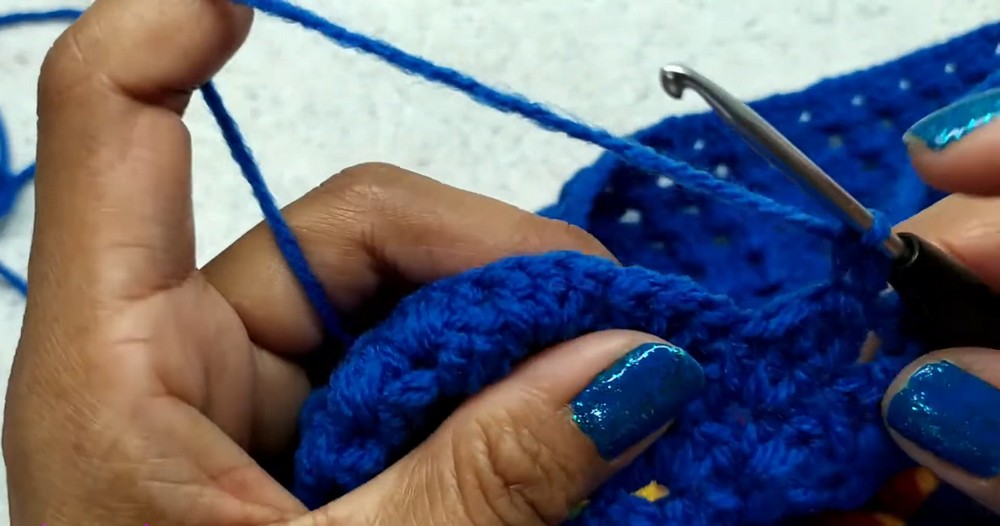
The final element is the waistband. It’s worked in rounds of front-post and back-post double crochet stitches, creating an elastic ribbing effect that hugs the waist snugly. You can extend this section for a high-waisted style or keep it shorter for a low-rise silhouette—whichever suits your personal taste.
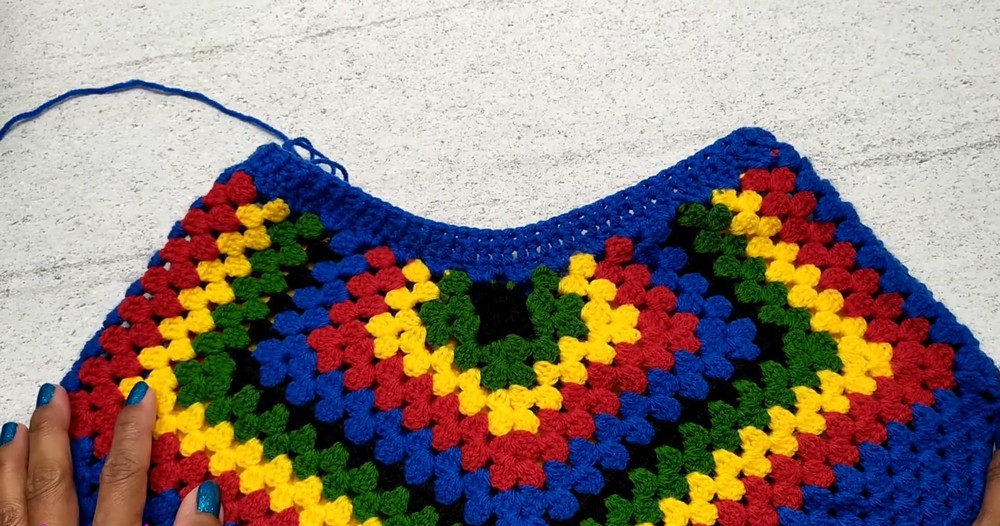
When all the pieces come together, the result is a pair of chic crochet shorts that are both bold and functional. They’re lightweight, breathable, and perfect for customizing with your favorite yarn colors.

Video Tutorial
Materials and Preparation
Here’s everything you’ll need to create these crochet shorts:
- Yarn: Multiple colors for vibrant color blocking (Black, Green, Yellow, Red, Blue, etc.). The yarn should match your desired weight, preferably #4 medium yarn.
- Crochet Hook: Size appropriate for your yarn (recommended: 5.0 mm crochet hook).
- Tape Measure: For accurate sizing based on your measurements.
- Scissors: To cut yarn between color changes.
- Darning Needle: For sewing panels and weaving in ends.
- Stitch Markers: (Optional) To keep track of panel edges or corners.
Abbreviations and Notes
Abbreviations:
- CH: Chain
- DC: Double Crochet
- SC: Single Crochet
- SL ST: Slip Stitch
- FPDC: Front Post Double Crochet
- BPDC: Back Post Double Crochet
Pattern Notes:
- Crochet terminology used here is in American English.
- Gauge is not explicitly provided, but ensure your panels are sized according to your measurements.
- Each panel represents half the garment (front and back), with measurements based on your waist and hips.
- Example: Waist is 12 inches (half of 24 inches for this sample), and total hip measurement stretched is 35 inches.
- Keep track of color changes as indicated, rotating through rows with green, yellow, red, blue, and black.
Step-by-Step Pattern
Step 1: Create the Panels
Both the front and back panels of the shorts are made identically.
Row 1: Magic Ring + First Round
- Begin with black yarn and create a magic ring.
- CH 3 (considered your first DC).
- Inside the magic ring, make: 2 DC, CH 2, 3 DC, CH 2, 3 DC, CH 2, 3 DC, CH 2, 3 DC.
- You will have 4 sets of 3 DC separated by CH 2.
- Close the ring tightly.
- SL ST into the third CH of the initial CH 3 to close.
- CH 1 and cut the yarn.
Row 2: Add Second Color (Green Yarn)
- Join green yarn in any CH 2 space from the previous row using a SL ST.
- CH 4.
- Skip the previous 3 DC and work into the next CH 2 space:
- 3 DC, CH 2, 3 DC (creating a corner).
- CH 1, move to the next CH 2 space, and repeat:
- 3 DC, CH 2, 3 DC.
- Continue this pattern across all corners, alternating CH 2 for corners and CH 1 for flat edges.
- SL ST to the third CH of the previous CH 4 to close the round.
- Repeat with successive rows using alternating yarn colors (Yellow, Red, etc.), growing each round as detailed.
Step 2: Assemble the Shorts
Assembly
- Lay your two panels side by side.
- Use a needle or SL ST to sew the left and right sides of the panels together for vertical seams.
- Fold the shorts in half so that the top and bottom face you.
- Sew the crotch area together to connect front and back panels.
Step 3: Work the Legs
Leg Panels
- Attach yarn at the crotch.
- CH 3.
- Work 3 DC into the chain spaces around the leg opening.
- Continue working evenly around the leg to close the round with a SL ST.
- Repeat for additional rows as needed (e.g., 4 rows for desired length).
Edging with Picot Stitch
- Begin at the last row of the leg opening.
- CH 1 to start.
- Create clusters of double crochet with picot stitches:
- Yarn over, insert hook into the first stitch and pull through, work cluster (details in your notes), then CH 3, insert hook into the first chain and pull through to create picot.
- Continue around the leg opening, adding picots at intervals until complete.

Step 4: Create the Waistband
Row 1: Foundation Waistband
- Attach yarn at the side seam of the waistband.
- CH 3.
- Work 3 DC into each chain space of the waistband.
Rows 2–5: Front Post/Back Post Ribbing
- CH 3, turn your work.
- Alternate between FPDC and BPDC for each stitch of the row.
- Repeat this process for 3-5 rows (depending on desired waistband height).
Optional Edging:
Use SC or Picot stitches to finish the waistband edge for a polished look.
Final Touches
- Weave in all loose ends using your darning needle.
- Adjust fit by stretching or blocking the shorts if needed.
Troubleshooting and Suggestions
Tips for Common Issues:
- Color Changes: To ensure a tidy finish when switching colors, fasten off each yarn neatly and weave in ends as you go. Avoid carrying the previous color along the edges to prevent bulking.
- Gauge Consistency: Check your stitch tension periodically to avoid uneven or loose panels—this is especially important since the shorts rely on stretch for comfort.
- Seam Alignment: When sewing the panels together, use stitch markers to align corners and edges precisely, preventing any twisting or misalignment.
Creative Modifications:
- Play with Colors: Experiment with gradient yarns, alternating stripes, or even a monochrome palette for a trendier or subtler vibe.
- Custom Leg Edging: Instead of a picot stitch, opt for a scalloped edge or a shell stitch for a different flair.
- Add Pockets: Create small patch pockets and sew them onto the front or back panels for extra functionality.
- Adapt into Pants or a Skirt: Extend the leg length to create boho-inspired crochet pants, or widen the panels and sew them differently to make a mini crochet skirt.