Cute Crochet Bunny Keychain Pattern Free
One tiny bunny can turn an ordinary keyring into a charming little companion. This crochet bunny keychain brings a soft, playful touch to keys, backpacks, and bags while keeping its design small and easy to carry. Its sweet appearance also makes it a lovely handmade gift for someone who enjoys cute and thoughtful accessories.
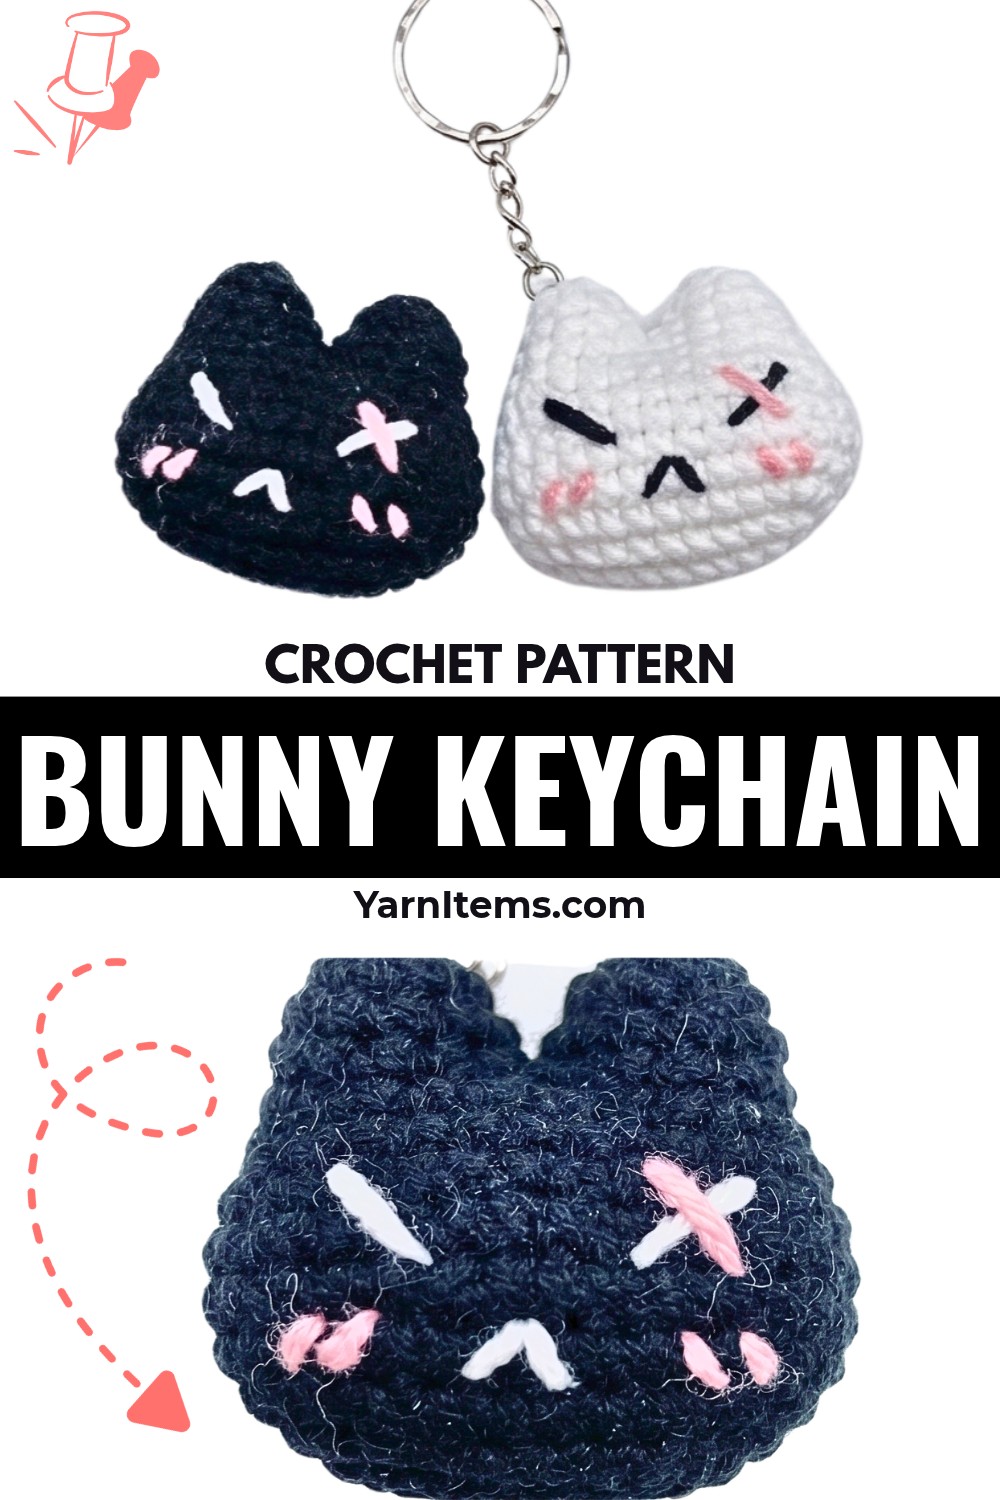
Small details can make everyday belongings feel much more personal. This crochet bunny can add a cheerful accent to a child’s backpack, decorate a favorite bag, or become a special piece in a handmade collection. Its compact shape and practical keychain crochet bunny design make it both adorable and useful, giving you plenty of ways to enjoy or share this delightful crochet item.
Credit Xuxu Crochet
Materials & Tools Needed
- Yarn:
- 50g Milk Cotton Yarn in:
- White (main body)
- Black (facial embroidery)
- Pink (cheeks/details)
- 50g Milk Cotton Yarn in:
- Crochet Hook: 2.5 mm
- Stuffing: Polyester Fiberfill (bông gòn)
- Notions:
- Stitch marker
- Yarn needle
- Scissors
- Keychain attachment ring
Finished Size & Customization Ideas
- Finished Size: Approximately 6–7 cm tall (compact pocket size).
- Customization:
- Couple Keychains: Make a pair using contrasting colors (e.g., beige, pastel blue, gray).
- Facial Variations: Add scars for a playful or cool personality look, or stick to classic cute pink cheeks and a simple nose.
- Accessories: Attach mini bows, small crochet hearts, or bells to the keychain ring.
Pattern Notes
- Important: Pattern is worked in continuous spiral rounds (do not join at the end of rounds unless instructed).
- Keep Track: Use a stitch marker in the first stitch of every round.
- Technique: Utilize invisible decreases (dec) for smoother finishes and to prevent stuffing from showing through.

Pattern Abbreviations & Terminology
-
ch: chain
-
sc: single crochet
-
inc: increase (2 single crochets in the same stitch)
-
dec: invisible decrease (single crochet 2 stitches together using front loops)
-
st(s): stitch(es)
-
Rnd: Round
Tips Before You Start
- Maintain consistent tension throughout to ensure firm stitches.
- Stuff the head thoroughly before closing the ears to ensure that fiberfill reaches into their base.
- Count stitches at the end of each round to ensure symmetry.
Step-by-Step Instructions
Main Head & Body
Using White Yarn:
- Foundation Chain & Rnd 1:
- Ch 8.
- Starting in the 2nd ch from the hook:
- 6 sc along the chain.
- 3 sc into the last chain stitch.
- Turn to work along the opposite side:
- 5 sc along the opposite side.
- 1 inc (2 sc) in the final stitch.
- Total: 16 sts

- Rnd 2:
- 1 inc, 5 sc, 3 inc, 5 sc, 2 inc.
- Total: 22 sts
- Rnd 3:
- (1 sc, 1 inc), 5 sc, (1 sc, 1 inc) × 3, 5 sc, (1 sc, 1 inc) × 2.
- Total: 28 sts
- Rnd 4:
- (1 sc, 1 inc, 1 sc), 5 sc, (1 sc, 1 inc, 1 sc) × 3, 5 sc, (1 sc, 1 inc, 1 sc) × 2.
- Total: 34 sts
- Rnds 5–7:
- Sc in each st around (34 sc per round).
- Total: 34 sts per round
- Rnd 8:
- 1 sc, 1 dec, 9 sc, 1 dec, 4 sc, 1 dec, 9 sc, 1 dec, 3 sc.
- Total: 30 sts
- Rnd 9:
- 1 dec, 9 sc, 3 dec, 9 sc, 2 dec.
- Total: 24 sts
- Rnd 10:
- Sc in each st around (24 sc).
- **Total: 24 sts **

Ear Formation & Division
- The top opening (24 sts) is divided into 12 stitches for each ear.
First Ear
- Rnd 11:
- Work 6 sc along the front side, skip 12 sts for Ear 2, and work 6 sc along the back.
- Total: 12 sts
- Rnd 12:
- Sc in each st around (12 sc).
- Total: 12 sts
- Rnd 13:
- (1 sc, 1 dec) × 4.
- Total: 8 sts
- Fasten off, leaving a yarn tail. Thread through the front loops of the 8 sts and pull tight to close. Stuff the ear firmly.

Second Ear
- Rnd 11:
- Reattach yarn at the 6th stitch of the remaining 12 open stitches.
- Ch 1, 1 sc in same st, then work 5 sc along the front and 6 sc along the back.
- Total: 12 sts
- Rnd 12:
- Sc in each st around (12 sc).
- Total: 12 sts
- Rnd 13:
- (1 sc, 1 dec) × 4.
- Total: 8 sts
- Fasten off and stuff the ear firmly. Weave through the remaining 8 sts to cinch the ear closed. Sew the gap between ears securely.

Final Assembly
- Embroider Details:
- Eyes (black yarn): Vertical embroidery between Rnds 7–8, spaced 6 stitches apart.
- Mouth/Scar Line (black yarn): Around Rnd 5.
- Cheeks (pink yarn): Below the eyes on Rnd 5.
- Add Keychain Ring:
- Attach the jump ring/keychain clasp securely to the top center between the ears.

Conclusion
Your adorable Bunny Keychain is now complete! This quick and compact project makes for thoughtful gifts or a fun way to showcase your crochet skills.