
Create a spooky, delicate Spider Web Granny Square, perfect for Halloween decorations or adding a gothic touch to your crochet patterns.

A spider web granny square is a unique crochet pattern that combines a spooky vibe with a touch of elegance. This crochet Granny Square design stands out with its intricate, web-like appearance, making it perfect for Halloween-themed decorations or adding a playful twist to your everyday items. If you use it for blankets, bags, table decor, or even as part of a costume, this charming Granny Square invites creativity in how you use it.
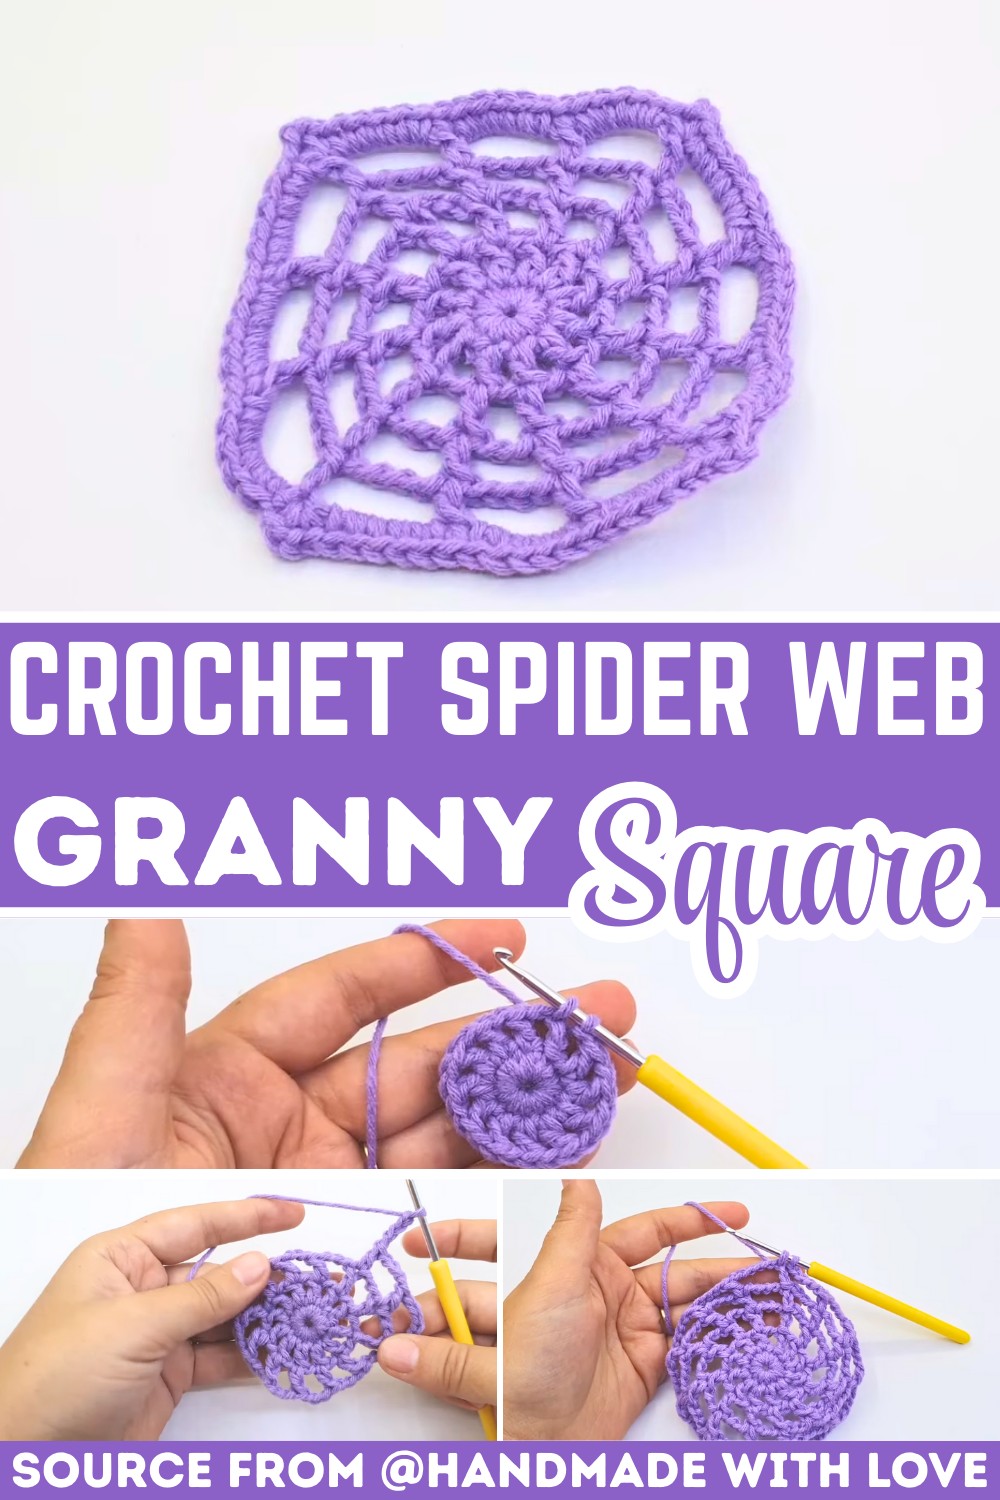
Crochet the Stunning Spider Web Granny Square
Crocheting this Spider Web Granny Square is surprisingly enjoyable. It starts with a simple base and builds into a mesmerizing spider-web shape. While it might look complex, it’s approachable for beginners once they follow the right steps. Every crocheter can find joy in stitching together such a distinctive square and imagining all the fun ways to use it.
Credit Handmade with love
Key Features and Pattern Highlights:
- Worked in the round to create an intricate lace-like spider web design.
- Features chain spaces and basic stitches like double crochet for an airy, geometric web effect.
- Includes granny square shaping, creating clean edges and a square frame around the circular web.
- A highly versatile piece, excellent for blankets, bunting, and festive embellishments.
- Perfect for experimenting with seasonal colors or adding a fun, spooky flair to your crochet repertoire.
Pattern Overview:
This enchanting granny square begins with a foundational ring, worked in circular rounds to create the delicate threads of the spider web. You’ll start by chaining a loop, then use a combination of chain spaces and double crochets to expand outward from the center. The negative space created by the chain stitches is what gives this pattern its web-like appearance.

As the web grows, careful shaping transforms the circular design into a square, allowing it to be joined seamlessly with other granny squares or used as a standalone design. The corners take shape through strategic placement of double crochet clusters and chains, ensuring a symmetrical, neat finish.

One of the standout features of this square is its ethereal structure. The openwork webbing makes it light and airy, reminiscent of a fragile spider web. Whether you’re using classic black for a spooky Halloween look or experimenting with ombré shades for a more artistic interpretation, the design is captivating in its simplicity.

Finishing touches may include blocking your square for crisp edges and a perfectly flat finish. The result is a versatile piece that can function as a coaster, an appliqué, or a modular unit for a larger pattern such as a blanket or table runner.

Video Tutorial
Step-by-Step Pattern:
Materials
Here’s what you’ll need to get started:
- Yarn: Choose a medium-weight (Size 4) yarn in your preferred color. Use black or gray for a classic spider web look, or pick something bright for a fun twist!
- Hook: A 4.5mm or 5mm crochet hook works well with medium-weight yarn, but you can adjust depending on your desired gauge.
- Scissors: To neatly cut your yarn at the end.
- Tapestry Needle: For weaving in the ends.
- Stitch Marker (optional): To keep track of rounds, especially if you’re new to crocheting in the round.

Pattern Instructions
Foundation Steps
- Start with a Magic Circle:
- Make a slip knot, then work a magic circle by chaining 4 (counts as the first double crochet and ch-1 space).
- Round 1:
- Into the magic circle, work (1 dc, ch 1) seven times. You will have 8 double crochet stitches separated by chain spaces.
- Close the round with a slip stitch into the top of the starting chain-3. Pull the tail of the magic circle to tighten the center.
Building the Web
- Round 2:
- Slip stitch into the first ch-space, chain 5 (counts as a dc + ch-2).
- In each ch-space from the previous round, work 1 dc, ch 2.
- Close the round with a slip stitch into the third chain of the starting ch-5.
- Round 3:
- Slip stitch into the first ch-space, chain 6 (counts as a dc + ch-3).
- In each ch-space from the previous round, work 1 dc, ch 3.
- Close the round with a slip stitch into the third chain of the starting ch-6.
- Round 4 (Optional Decorative Webbing):
- Continue in the same pattern as previous rounds, increasing the chains between double crochet stitches by 1 each round (e.g., ch-4, then ch-5, etc.).
- For a smaller square, stop at this step. For a larger web, repeat more rounds in this fashion.
Squaring the Web
- Round 5 (Forming Corners):
- To convert the circular web into a square, determine where the four corners will sit. In these key stitches, work (2 dc, ch 2, 2 dc) into the same ch-space to form the corners.
- Between corners, continue the established pattern of dc, ch [appropriate number based on prior rounds].
- Round 6:
- Work a border around the square using single crochet stitches. In each corner ch-space, work 3 sc to maintain the square shape.
Finishing Touches
- Cut the yarn, leaving a 6-inch tail. Fasten off and weave in all ends using the tapestry needle.
Troubleshooting and Suggestions:
- Chain Tension: Maintaining consistent tension on your chains is crucial for the web’s symmetry. If the chains feel too loose or tight, the web may look uneven or collapse.
- Clean Edges: If your square isn’t lying flat after finishing, try blocking it to prevent curling and ensure straight edges.
- Creative Modifications: Experiment with mixing yarn textures like metallic, glitter, or speckled yarn to add a magical touch. You can also vary the yarn weight for larger or smaller squares.
- Versatility: Use it as a stand-alone coaster, stitch multiple squares together for a haunting afghan, or string several squares along a chain to create spooky bunting.
- Color Play: While black and orange scream Halloween, consider whites or silvers for a frost-covered web effect or rainbows for a fun, whimsical twist.


