
How to Crochet a Mitered Flower Granny Square for Decor
A beautiful floral twist transforms an ordinary granny square into something truly eye-catching. The crochet mitered flower granny square combines neat shaping with layered petals that create a soft and elegant finish.
Its balanced design makes every piece look warm, colorful, and full of handmade charm. The pattern blends classic crochet techniques with a fresh floral style that stands out beautifully.
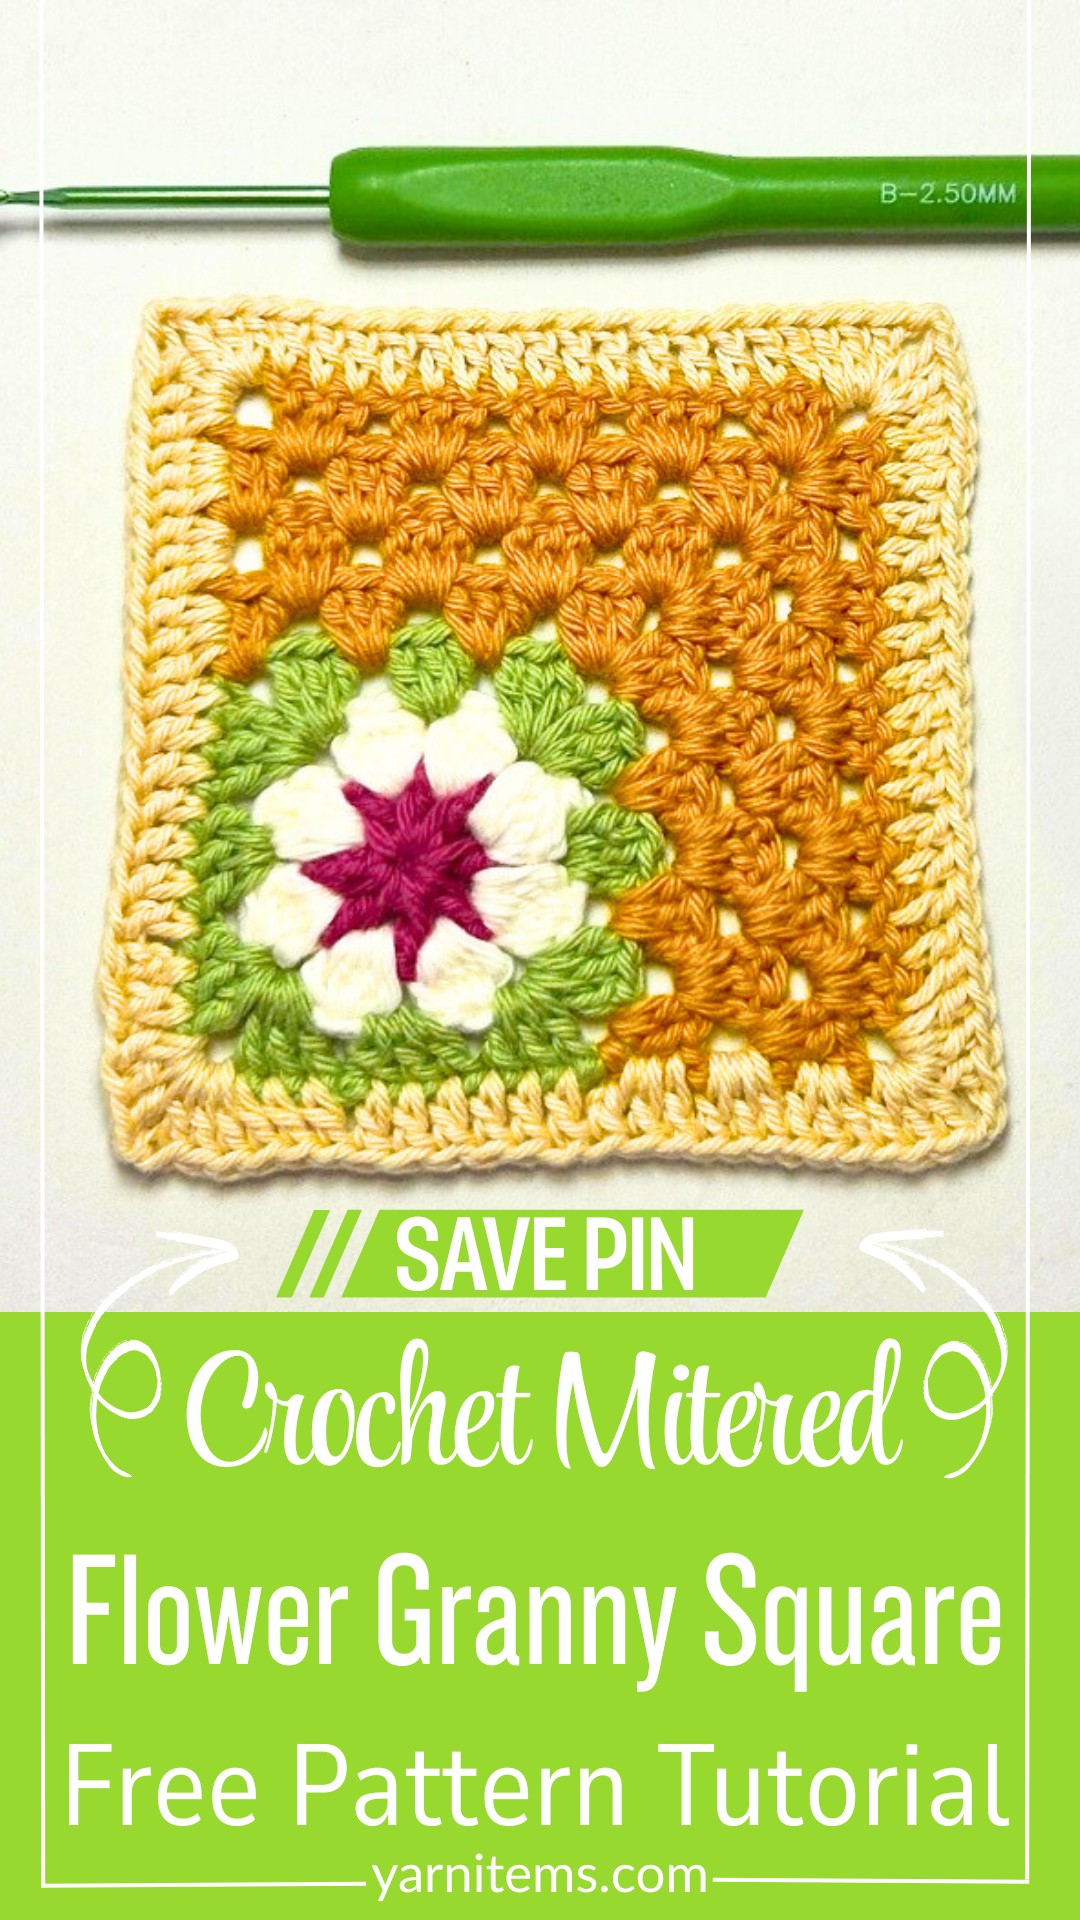
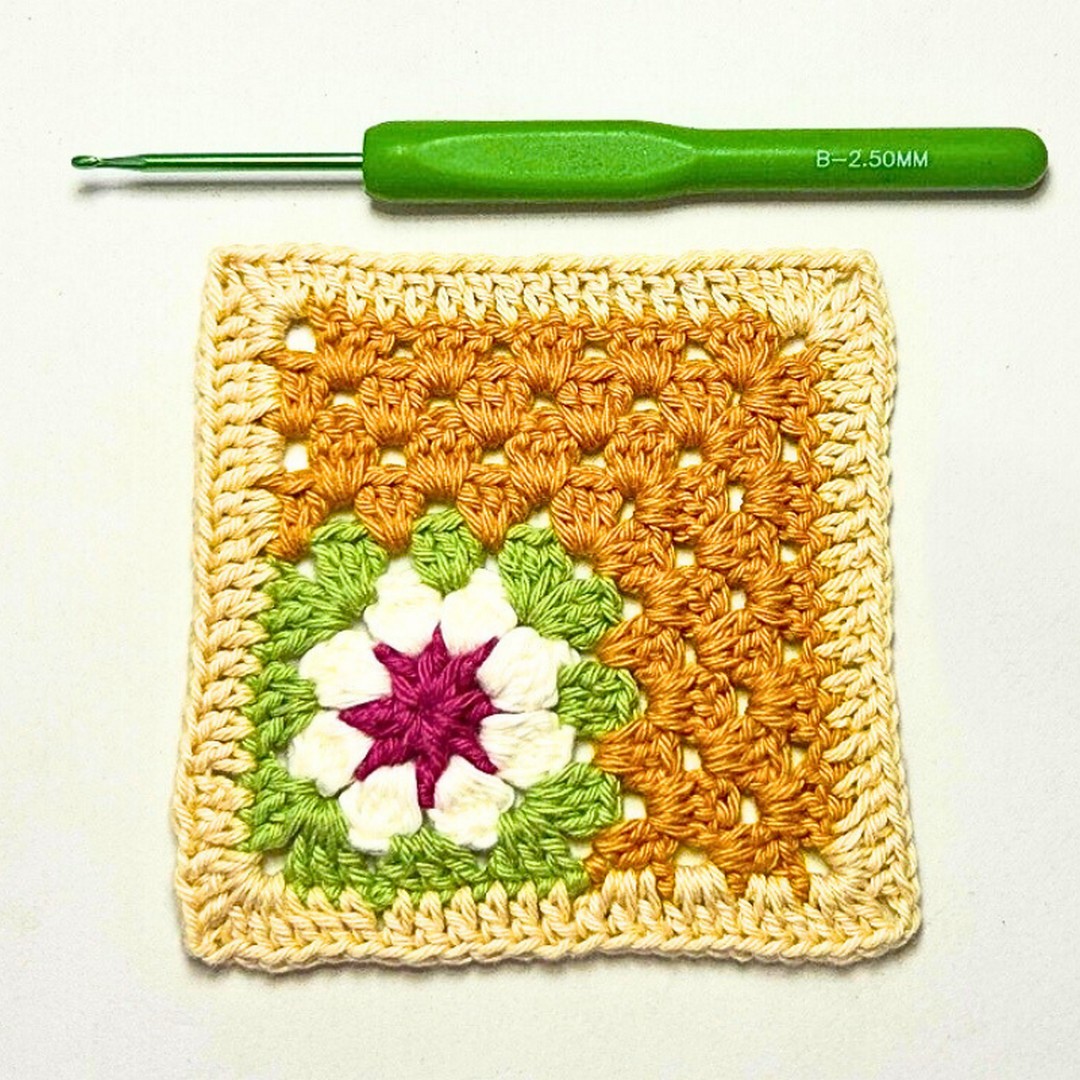
Soft textures and blooming details make this square suitable for many creative ideas. It works wonderfully for blankets, cushion covers, bags, and other decorative items while allowing endless color combinations.
The clear stitch placement keeps it approachable for beginners and enjoyable for experienced crocheters alike. Every finished piece brings a cozy floral touch that feels both timeless and unique.
Credit Hook & Loop Crochet Tutorials
Materials & Tools Needed
- Yarn: 100% organic soft cotton yarn (4 colors recommended)
- Crochet Hook: 2 mm
- Other Tools: Tapestry needle, scissors
Finished Size & Customization Ideas
- Finished Size: The final size depends on your tension and yarn weight but will generally be around 4-6 inches using the materials provided.
- Customization Ideas:
- Use different colors for each round to create a vibrant floral design.
- Adjust the hook size for a smaller or larger square.
- Combine multiple squares to create blankets, throws, bags, cushion covers, or even garments like cardigans.
Pattern Notes
- Starting Point:
- This granny square begins with a floral design at the center.
- Expansion:
- The design gradually expands into a mitered square, creating clean geometric lines.
- Finishing Touches:
- To achieve a polished finish:
- Weave in all loose ends securely.
- Trim excess yarn.
- To achieve a polished finish:
- Creative Flourish:
- Change colors between rounds to enhance the design.
- Follow the tutorial for tips and ideas on color combinations.
Pattern Abbreviations & Terminology
The pattern is written in U.S. terminology.
- ch: Chain
- dc: Double Crochet
- sl st: Slip Stitch
- st: Stitch
- puff stitch: Yarn over, insert hook, pull up a loop (repeat to create 5 loops on the hook), then pull through all loops.
- fake dc: A substitute for a standard double crochet that gives a similar appearance.
Tips Before You Start
- Practice Puff Stitches
If puff stitches are new to you, take time to practice them on a scrap piece of yarn. This will help you master the technique and ensure a smoother start to your main project. - Use a Stitch Marker
Place a stitch marker at the beginning of each round to track your progress and avoid losing track of where the round starts or ends. - Maintain Consistent Tension
Pay attention to your yarn tension throughout the project to ensure your square remains even and symmetrical. - Choose the Right Yarn and Hook
Select yarn and hook sizes recommended for your pattern. A mismatch can affect the texture and size of your project. - Read the Pattern Carefully
Before you begin, read through the entire pattern so you know what to expect and can prepare for any tricky parts ahead of time. - Relax While Crocheting
Take breaks and avoid holding your hook or yarn too tightly—this will improve your tension and keep your hands comfortable!
Step-by-Step Detailed Crochet Instructions
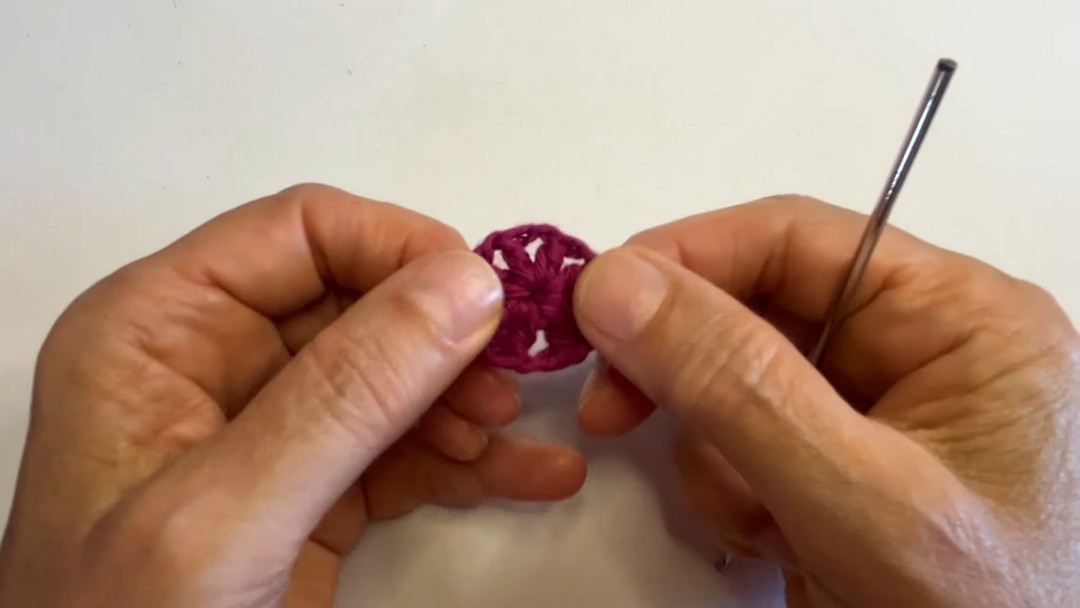
Round 1 (Base Center Ring, Color 1)
- Create a slip knot and chain 4.
- Join with a sl st to form a ring.
- Into the ring:
- Work 1 fake dc, followed by ch 1.
- Make 7 dc, ensuring you add ch 1 between each stitch. This creates a total of 8 dc with spaces in between.
- Join with a sl st to the top of the fake dc.
- Fasten off: Cut the yarn, pull through the loop, and weave in the tails. Secure and hide tails.
Round 2 (Puff Stitches, Color 2)
- Join the second color with a slip knot.
- Start in any ch-1 space from Round 1:
- Create the Puff Stitch (PS):
- Yarn over, insert hook, pull up a loop, repeat for 5 loops on the hook.
- Yarn over and pull through all loops.
- Chain 2.
- Create the Puff Stitch (PS):
- Repeat: 1 puff stitch + ch 2 in every ch-1 space around.
- Join with a sl st to the top of the first puff stitch.
- Fasten off: Cut yarn, pull tight, and weave in the tails.
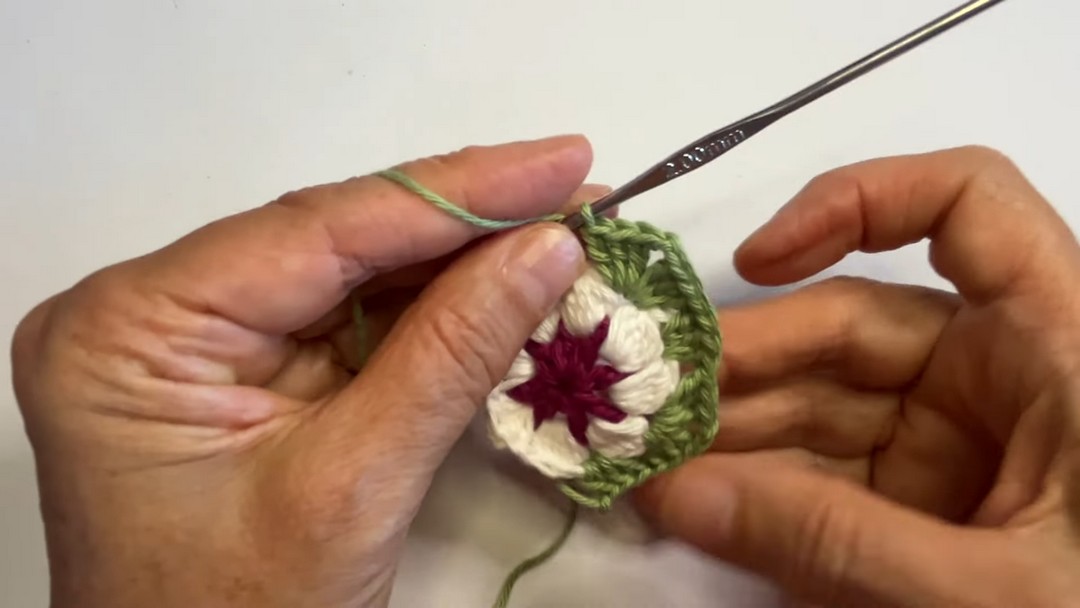
Round 3 (Flowers to Granny Formation, Color 3)
- Join the third color with a slip knot.
- Work 1 standing dc in any ch-2 space.
- Create the Corner Sequence:
- Work 3 dc + ch 2 + 3 dc in the same ch-2 space.
- Work 3 dc in the next ch-2 space.
- Repeat the pattern for all corners:
- Corner sequence (3 dc + ch 2 + 3 dc) in corner spaces.
- 3 dc in the spaces between.
- Join with a sl st to the top of the first dc and fasten off.
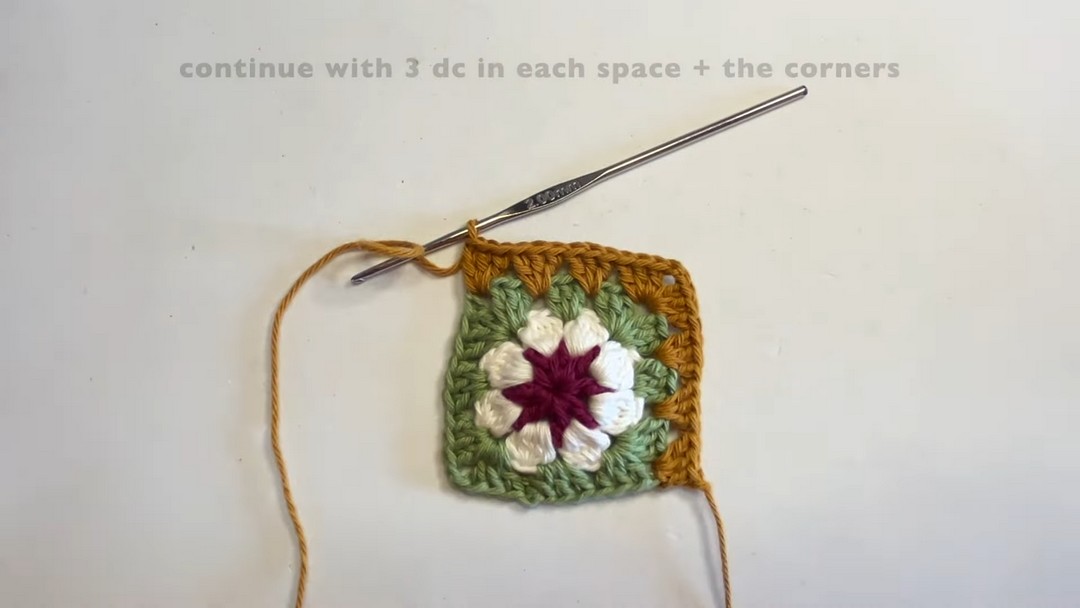
Round 4 (Expanding Square, Color 4)
- Join the fourth color using a slip knot.
- Work 3 dc in the corner space.
- For each edge:
- Work 3 dc in the next 2 spaces.
- Create the Corner Sequence: 3 dc + ch 2 + 3 dc.
- Repeat the pattern around, ensuring to maintain the corner sequences.
- Join with a sl st, fasten off, and weave in the ends.
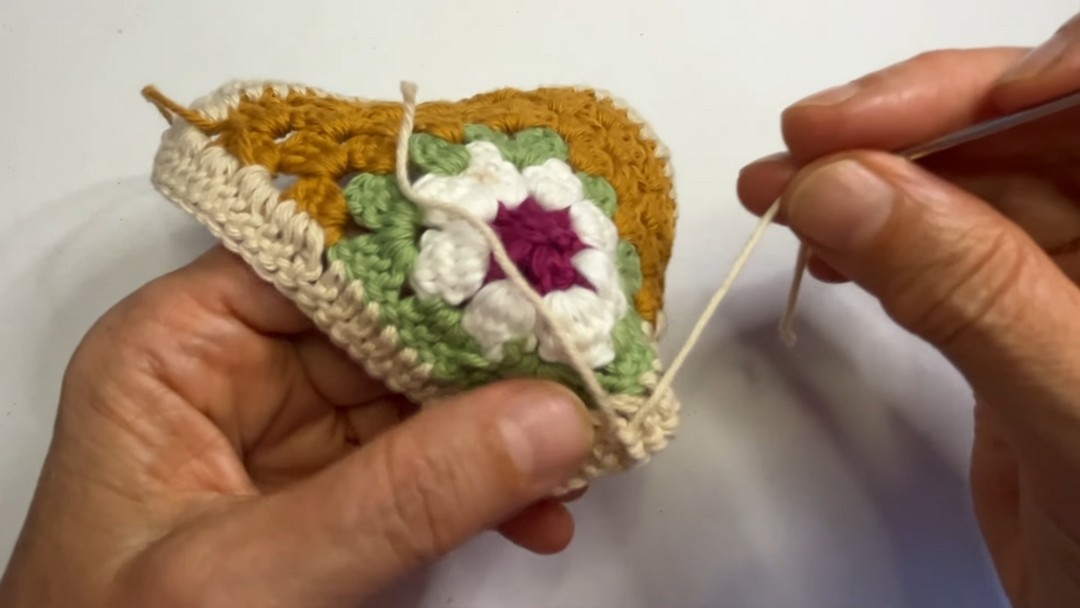
Round 5-7 (Square Expansion, Color 1)
- Rejoin Color 1 to begin the square expansion to desired size.
- For each round:
- Ch 3 (counts as the first dc), turn work.
- Work 3 dc in each space along the edge.
- Create the Corner Sequence: 3 dc + ch 2 + 3 dc in each corner space.
- Finish with 1 dc in the last stitch on each side.
- Turn after each round to maintain symmetry.
- Repeat until you complete Round 7.
Round 8 (Border, Color 2)
- Rejoin Color 2 to add a finishing border.
- For the border:
- Work 3 dc in corner spaces.
- Work 1 dc in each stitch in the rows.
- Add 3 dc in dc gaps along edges for consistent coverage.
- Pull up a loop and cut the yarn.
- Use a seamless join technique for a professional finish.
Final Assembly
- Block your square to shape it perfectly (optional but recommended).
- Combine multiple squares using slip stitching, the join-as-you-go method, or seaming techniques depending on your project.
Conclusion
The Mitered Flower Granny Square is a versatile design that combines floral motifs with a traditional mitered square. With its colorful changes and textured puff stitches, it’s perfect for blankets, throws, bags, and more. Practice, color experimentation, and consistent tension will ensure your squares turn out beautifully every time!


One Comment