
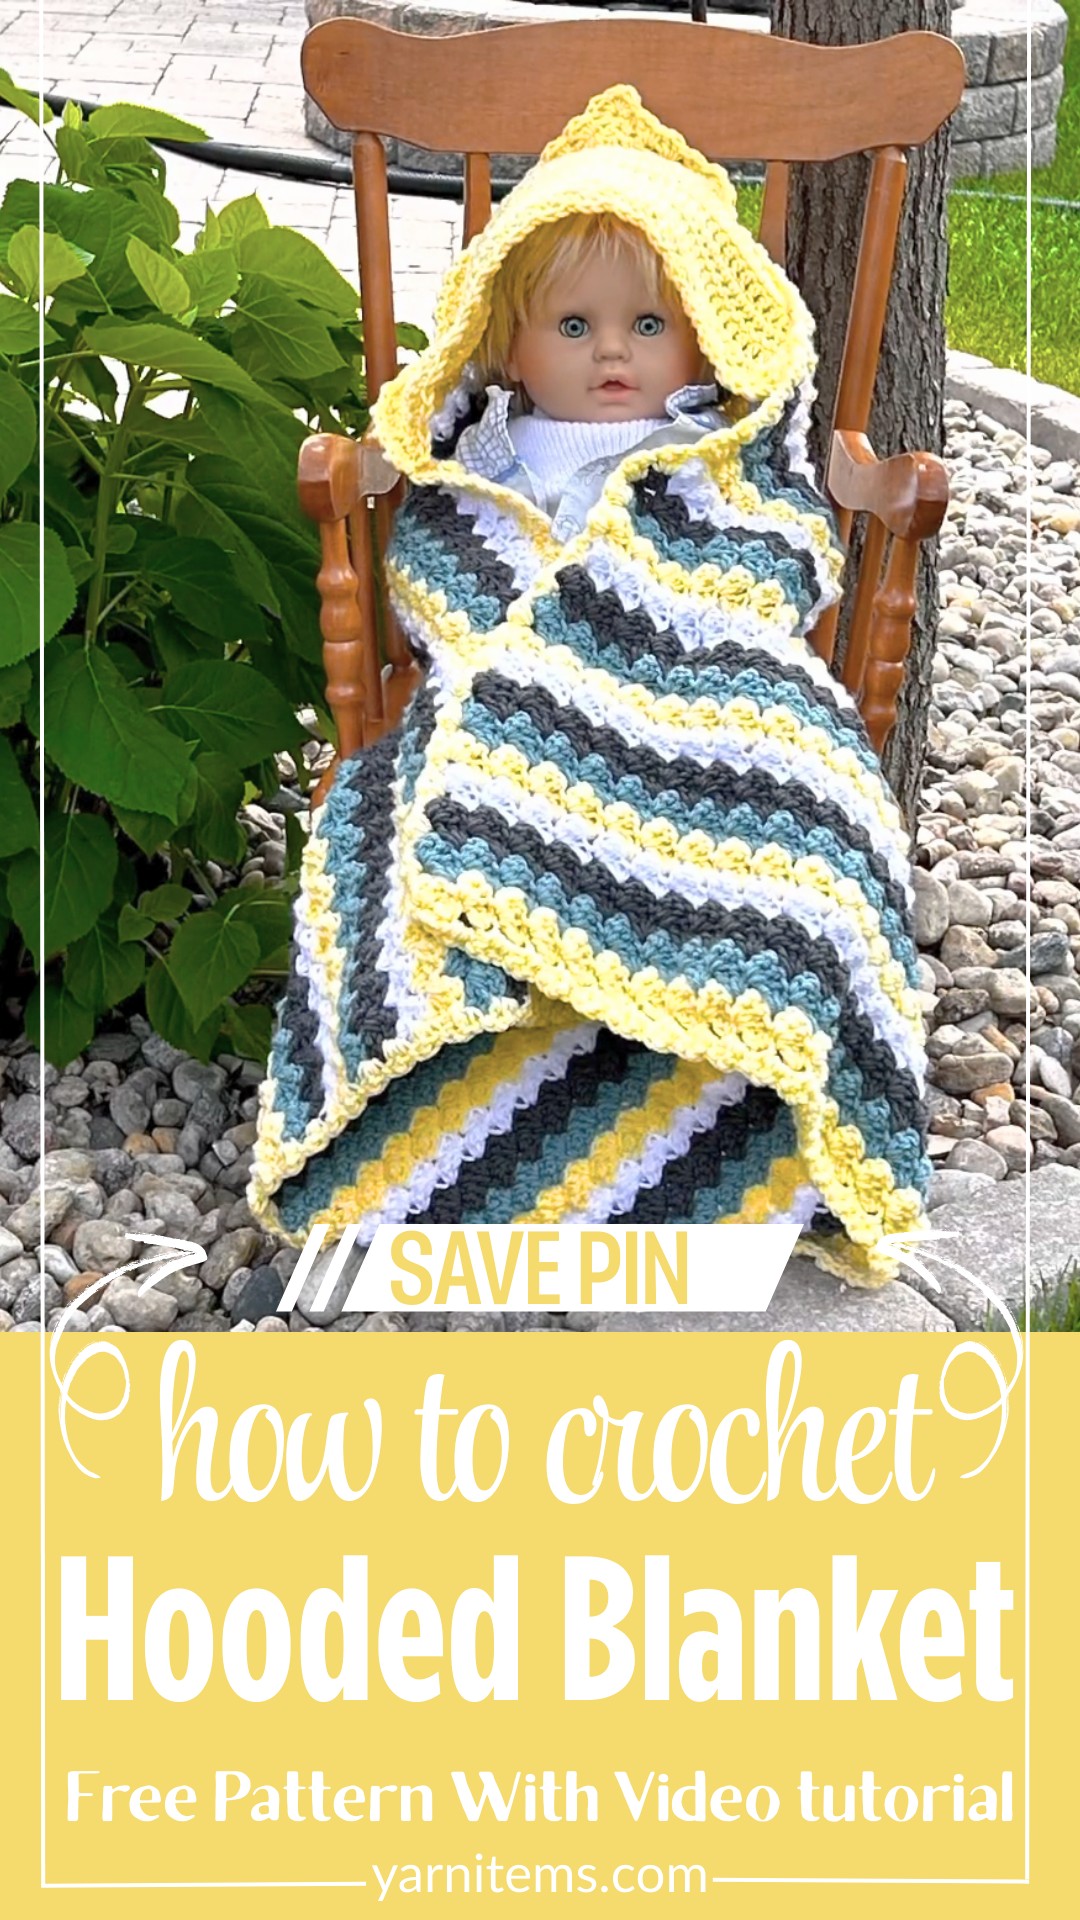
A soft and cozy 28-inch crochet square baby blanket featuring a stylish, functional hood—perfect for keeping little ones warm, snug, and wrapped in handmade love.

A crochet hooded blanket is a delightful creation that combines the coziness of a blanket with the practicality of a hood. This piece is not just for babies; it’s a versatile design that grows with your little one. From cuddle sessions for infants to cozy nights on the couch for toddlers or even older kids, this crochet blanket is a lifelong companion filled with love and comfort.
Simple Crochet Hooded Blanket
The Blanket design is simple yet beautiful, featuring soft textures and an easy-to-follow repeating pattern. With gentle scalloped edges all around, the blanket feels extra special. It’s lightweight, easy to carry, and perfect for snuggling during chilly evenings, naps, or family gatherings. Plus, the hood adds a playful twist; kids can wrap themselves up like a cape.
Credit Koala Knits and Knacks
Key Features & Construction Summary:
- Size: Approximately 28” x 28” square blanket.
- Main stitches: A simple one-row repeat featuring single crochets and double crochets to create a textured scalloped design.
- Materials: Lightweight 4-ply yarn in multiple colors and a size J (5.75mm) metal crochet hook.
- Colorwork: Use up to four yarn colors or keep it solid—creative freedom reigns!
- Edging: Scalloped trim is added to all edges for a polished finish.
- Hood: Made separately in rows, shaped into a triangle, then sewn onto one corner of the blanket.
- Fast assembly: Simple stitches and modular components make this a quick and enjoyable pattern.
The hooded baby afghan is a versatile creation that starts as a simple square blanket, worked with a charming scalloped pattern featuring clusters of single crochet and double crochet stitches. Using solid or multi-colored yarn allows you to customize the look to suit any nursery or child’s favorite colors. Starting with a foundation chain 28 inches long, you’ll build a repeating one-row texture that’s easy to memorize as you progress. The lightweight yarn and J-hook make it a breathable yet snug accessory.

Once the square blanket is complete, the hood is constructed separately by working rows to form a triangle—this shaping is achieved using incremental increases at both ends of the rows to create the classic hooded design. The hood attaches seamlessly to the corner of the blanket, forming a cozy place for little ones to tuck their heads. The right-side orientation ensures the stitches align beautifully with the blanket’s scalloped borders.

To bring the blanket together, a scalloped edge is added to all four sides of the square. This edge mirrors the texture of the blanket body and hood, ensuring a cohesive, uniform look. The combined elements—the soft texture, vibrant colors, and neat edges—create a finished product that’s both functional and visually appealing.

While the yarn recommendations suggest lighter tones like yellow with complementary shades, the beauty of this pattern is its adaptability. Feel free to change colors every few rows or commit to a solid tone. The scalloped stitch transitions seamlessly between color blocks, making this pattern a great canvas for exploring colorplay.

Video Tutorial
Step-by-Step Pattern
Materials
Here’s what you need to gather before you get started:
Yarn:
- Main Color (Light Yellow): Crochet Smart Yarn, 198g/7oz ball
- Additional Colors:
- Arctic Green (small amount)
- Charcoal Gray (small amount)
- White: Bernat Premium Yarn (small amount, or roughly the same thickness as a 4-weight yarn)
- Alternatively, feel free to select your own color palette to customize the blanket.
Hook:
- J Hook (5.75mm): Metal hook (as recommended in the tutorial).
Additional Tools:
- Scissors
- Stitch markers (helpful for tracking rows or marking chain spaces)
- Measuring tape
- Yarn needle (for weaving in ends)

Pattern Instructions
Step 1: Create the Foundation Row
- Chain 93 (or multiples of 3) until the chain measures 28 inches.
- Keep the tension loose, as this prevents tight edges in the finished blanket.
- Measure the chain flat for accuracy. Add or adjust your stitch count as needed (for Shelly, 96 chains reached 28 inches).
Step 2: Work the First Row of Stitch Clusters
- Skip the first two chains from your hook.
- In the third chain, create 2 double crochets (dc).
- Place a stitch marker in your first dc (to track cluster placement).
- Pattern Repeat:
- Skip the next two chains.
- In the third chain: Work 1 single crochet (sc) followed by 2 double crochets (dc) into the same space.
- Continue the repeat across the row, skipping two chains between each cluster.
At the end of the row, stop with a single crochet in the final chain.
Step 3: Build the Blanket Body
- Turn your work after completing the foundation row.
- Row 2: Chain 2.
- In the very first single crochet of the row, work 2 double crochets. Mark the first stitch with a stitch marker.
- Skip the next two stitches and work a sc & 2 dc cluster into the next sc from the last row.
- Repeat this pattern until the end, stopping with a single crochet in the top chain.
Step 4: Continue Stitch Pattern
- Chain 2 at the start of each row, turn your work, and continue repeating the sc + 2 dc clusters.
- Alternate your yarn colors every 2 rows (or as per your chosen pattern).
Work the same pattern across all 68 rows or until the length matches your desired 28 inches height.
Step 5: Create the Hood
- Start the Hood Foundation Row:
- Chain 4, and work 2 double crochets in the 4th chain from the hook (forming a triangle shape).
- Row Repeat:
- Chain 3, turn your work, and follow this repetition:
- Row 4 (Expansion Row): Work 2 dc in the first stitch, continue across with 1 dc in each stitch, and end with 3 dc in the last stitch.
- Row 5 (Filler Row): Work 1 dc in the first stitch, 1 dc in each stitch across, and 2 dc in the last stitch.
Continue repeating Rows 4 and 5 until you have 48 double crochets on the final row of your hood.
- Chain 3, turn your work, and follow this repetition:
Step 6: Attach the Hood
- Mark the center top edge of the blanket with stitch markers.
- Position the hood (right side facing upward) and align the center edge of the hood with the marked center edge of the blanket. Pin into place if needed.
- Seam the hood to the blanket using:
- Slip stitches or whip stitches with yarn and a needle.
- Fasten off and weave in ends.
Step 7: Add Edging Around the Blanket
- Using your preferred color, start with a chain 3 in any corner of the blanket.
- Skip 2 rows, then work the stitch cluster (sc & 2 dc) evenly spaced to create the scalloped edge.
- Continue this pattern around all four sides.
- In each corner space, work a single crochet followed by 2 double crochets.
Fasten off, hide your ends, and admire your completed pattern!
Troubleshooting & Suggestions:
Common Issues:
- Foundation Row Length: Ensure your chain measures precisely 28 inches to maintain the blanket’s proportions. Avoid stretching the chain while measuring—it should lie flat and relaxed.
- Inconsistent Tension: If your rows seem uneven, remember to pull up loops evenly when working double crochets to keep stitch height consistent.
- Difficulty Locating Stitch Joins: Use stitch markers for tricky areas like the tops of chains or color-change transitions.
- Color Changes: When swapping colors, pull tightly to secure the new yarn and weave in ends as you go to save time later.
Creative Modifications & Suggestions:
- Color Variations: Swap out pastels for bold tones or rainbow gradients. Alternate every row or every few rows for a striped effect.
- Add Texture: Consider incorporating puff or popcorn stitches along the edges for an extra layer of visual interest.
- Multifunctionality: Adjust the size to create lap blankets for adults or give it as a camping or TV-time shawl for kids.
- Embellishments: Add appliqué stars, hearts, or other baby-themed shapes for a personalized touch.
- Alternative Uses: Omit the hood entirely for a simpler square baby blanket or use these components to create a wearable shawl for older children.


